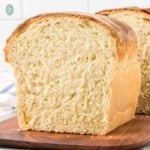
Sourdough Sandwich Bread
Make the best soft crust sourdough sandwich bread with our easy no-knead recipe. You'll love our step-by-step instructions and pro-tips for success!
Servings: 16 slices
Calories: 215kcal
Equipment
- loaf pan 9x5 inches or 1 pound loaf pan. See recipe notes for a 12' x 4.5" pan or smaller loaf pans
- warming mat optional but recommended if your home is below 75ºF.
Ingredients
- ⅓ cup sourdough starter (65 grams) fed 8-12 hours prior (or up to 24 hours works) *see notes below
- 1⅓ cups warm water, filtered (300 grams) 95º to 100º F or baby bottle warm
- ¼ cup granulated sugar (56 grams) or 2 rounded tablespoons of honey
- 4 cups bread flour (500 grams) or all-purpose flour
- 1½ tablespoons extra-virgin olive oil (20 grams) or your preferred cooking oil
- 2 teaspoons fine salt (9 grams)
Instructions
- Add the starter to a large bowl. Mix in warm water and sugar, stirring until dissolved. Add flour, oil, and salt. Stir with a dough whisk or wooden spoon until a thick, shaggy dough forms.
- Flour your hands or wet your hands, and finish mixing dough by hand until most of the flour has been absorbed. Don't worry if there is flour on the sides or bottom of the bowl. Cover with a clean, damp kitchen towel and let the dough rest for 30 to 45 minutes.
- Coax the dough from the bowl, then stretch and fold the dough by stretching 4 inches then pushing it down the middle and turning 1/4 until you make a circle (see video below for how to do this).Return the dough to the bowl, cover with a damp towel (or plastic wrap if you live in a dry area) and let rise at room temperature or a warm area 4-12 hours (see chart in notes) to ferment.
- In the morning, lightly flour your counter top. Remove the dough from the bowl, gently stretching it into a rectangle, then use your fingers to dimple the dough.Roll up dough into a log shape. Tighten the dough log by gently pulling it towards you along the countertop for 5-8 inches. Cover and let the dough rest 10 minutes. Spray loaf pan with cooking spray and set aside. To bake smaller loaves, see Recipe Notes below for directions.
- Place dough in your loaf pan, seam side down. Cover and let rise for 1-2 hours, until the dough is about double in size. To see if your dough is ready to bake, press the corner edge of the dough in about 1/2 inch. If the indentation remains, it's ready to bake.
- Heat oven to 375ºF. If desired, brush the top of the loaf with an egg wash.
- Bake in the center of the oven for 40 minutes. See Recipe Notes below for smaller loaves. The top of the loaf should be golden brown in color. To ensure your bread is done baking, insert an instant-read thermometer in the side of loaf towards the center. It should read between 195°F and 200°F. Remove from oven.Let the pan rest for 10 minutes before tipping the loaf out onto a wire rack to cool.
- Wait at least 1 hour before cutting (to prevent the loaf from deflating).
Video
Notes
FOR GRAMS MEASUREMENTS: Click on METRIC tab above ingredients.
Ingredient Notes & Substitutions
- Starter: this recipe uses a starter that was fed 8 to 24 hours before mixing your dough (8 to 12 hours works best). It does not need to be at its peak when you mix the dough. A 100% hydration sourdough starter works best. Use a mature starter that’s at least 10 days old and doubles in size within 4 to 6 hours after feeding.
- Flour: Bread flour gives the tallest, airiest loaf. You can use the same amount of all-purpose flour, but your loaf might be slightly smaller.
- Whole wheat: For the best texture and softness, replace only half of the flour with whole wheat flour. Want a whole wheat loaf? Try our whole wheat sourdough sandwich bread.
- Sugar: Use 2 rounded tablespoons of honey in place of the granulated sugar.
Instruction Notes
- I recommend using a clear glass mixing bowl for fermentation (rising). This allows you to see the activity on the dough's top and bottom. Often, the bottom of the dough will show a lot of activity, reassuring you that it's properly fermented.
- Do not refrigerate the dough! Our recipe does not use a refrigerated rise. If it gets too cold, the dough will not ferment (rise) properly.
- How will I know if my bread is done baking? The top should be golden brown and sound hollow when tapped. For best results, insert an instant-read thermometer in the side of the loaf toward the center. It should read between 195 and 200ºF.
Bulk Fermentation Rising guidelines:
Rising times will vary according to your room temperature and humidity:- 80ºF about 4-5 hours
- 75ºF about 6-7 hours
- 70ºF about 8-9 hours
TFN Pro Tips:
- Keeping dough warm in colder months: Place the bowl in the oven with the light on and the door slightly open to create a slightly warmer climate without actually turning the oven on. Some ovens get very warm with the light on, so check your oven’s temperature first. You can also use a heated mat (like those used for germinating seeds), or use the “proof” setting of your oven (I set mine to 85ºF) and set a timer. Check it at 4 and 6 hours. A sunny room that stays warm works too.
- Prevent blowouts: Don’t skip tightening the dough log. Gently pull it toward you along the countertop for 5 to 8 inches. This builds surface tension and helps prevent blowouts on the sides of the loaf.
- Slicing: Wait at least 1 hour before cutting so the loaf doesn’t deflate. Use a serrated bread knife for even slices.
Storage and Freezing
- Let the bread cool completely. Store it in a plastic bag at room temperature. I use a plastic bread bag with a twist tie, and it stays fresh for about 5 days.
- This sandwich bread is also great to freeze. Place it in an airtight bag and store in the freezer for up to 3 months. Thaw the loaf at room temperature, then slice and enjoy.
- Check out our in-depth guide on how to store fresh sourdough bread for more storage tips.
Nutrition
Serving: 2slices | Calories: 215kcal | Carbohydrates: 40g | Protein: 6g | Fat: 3g | Saturated Fat: 1g | Sodium: 181mg | Potassium: 52mg | Fiber: 1g | Sugar: 2g | Calcium: 8mg | Iron: 1mg
