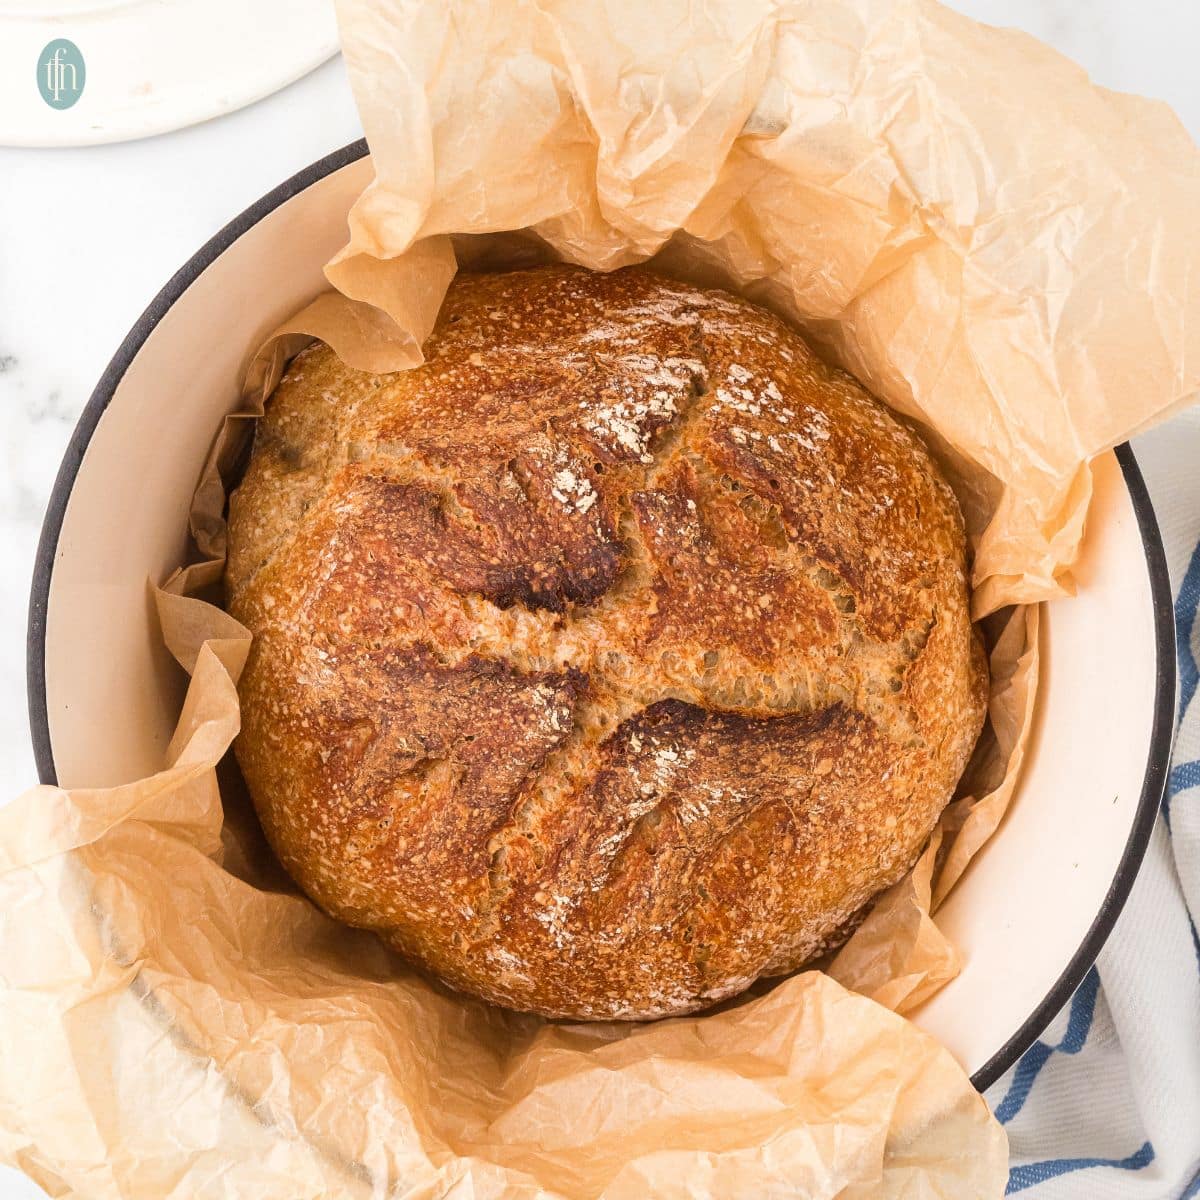
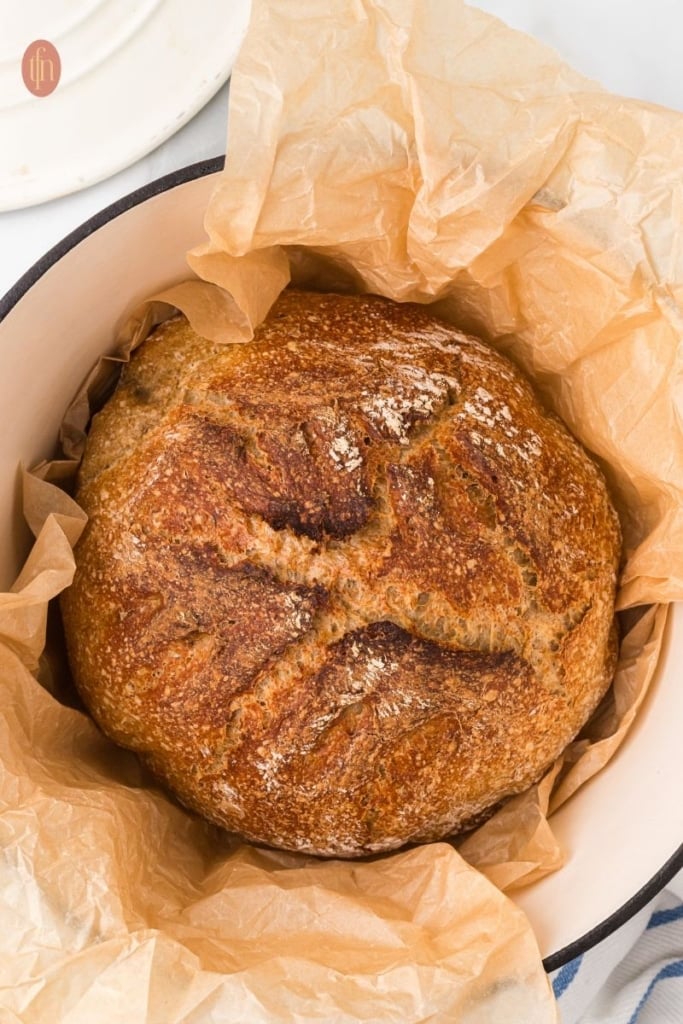
I’m not going to lie, it took me a long time to get this recipe perfect for you! I wanted to turn a recipe that is typically considered difficult, into one that was easy to understand and perfect for beginners. Easy Sourdough Rye Bread is made with only four ingredients and has a delicious earthy, nutty and slightly sweet flavor. Below you’ll find step-by-step instructions with pictures to make this recipe as simple as possible-whether you are a beginner or have been creating sourdough bread for years. I promise, this is easier than it looks!
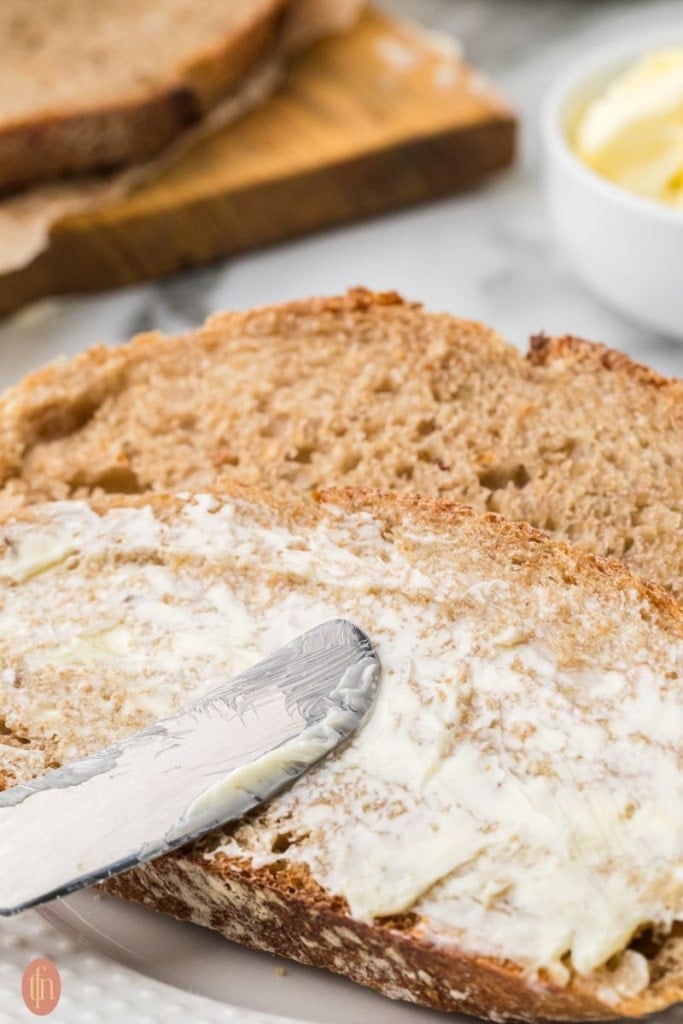
By now you might be asking, but why rye bread? Rye provides a deeper, nuttier flavor that you just can’t get from traditional wheat. Combine this with molasses, salt and bread flour and the flavor profile is expanded to- earthy, tangy and slightly sweet bread. Rye bread is higher in fiber with a lower glycemic index than white bread, it also tends to be more nutrient dense. It stays fresh tasting for 5-7 days and because it is a denser bread it holds up great for deli-loaded sandwiches.
This recipe was adapted from our popular dutch oven sourdough bread recipe.

Content Covered Here
Why We Love Sourdough Rye Bread
- Familiar ingredients-no hard to find items, all items that are available at your local grocery store, we also provide practical substitutions to make things even easier!
- Beginner- friendly technique- no complicated folding, dragging, or slapping needed- simply stretch, tuck and turn.
- Use the equipment you already own- this recipe works as a boule or in a loaf pan. See FAQ for simple instructions for making our sourdough rye bread in a loaf pan. If you love making homemade sandwich bread, try our sourdough sandwich bread recipe
Ingredients and Substitutions
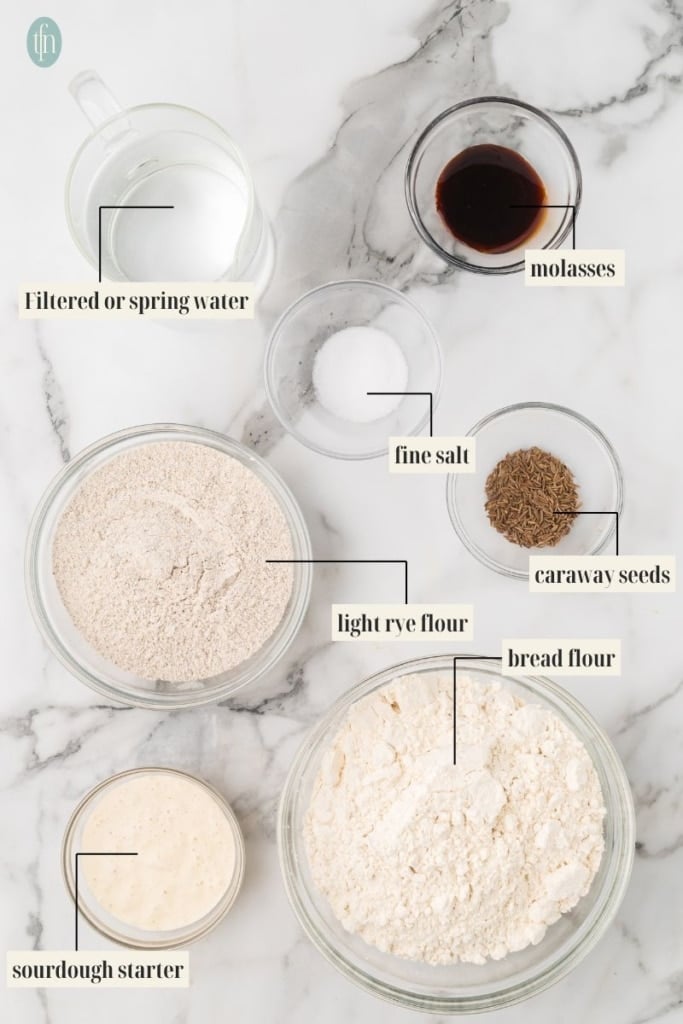
- Active sourdough starter – fed 12-24 hours prior. When we say “active,” we mean a mature starter that will double in size within 4-6 hours of feeding. It doesn’t mean you need to use it at the peak activity after a feeding. This recipe uses an unfed starter or one that was fed 12-24 hours prior.
- Filtered or spring water – about 100°F or “baby bottle” warm
- Rye flour – light, medium, or dark rye. See below for more information on different types of rye.
- Bread flour– I prefer using unbleached King Arthur bread flour. In some of our other sourdough recipes we substitute with all -purpose flour, but for rye specifically- bread flour is needed for gluten structure and a better-rising loaf that is more beginner-friendly
- Molasses – can substitute in equal amounts with honey, but the molasses adds a depth of flavor to the rye.
- Caraway seeds – optional, but provides a traditional flavor.
Equipment
Needed:
- Dutch oven – 4 to 5 quart, with lid, or a heavy pot with tight-fitting lid, rated to 450°F
- parchment paper
Helpful, but not necessary:
- banneton proofing bowl
- dough whisk
- warming mat (I recommend this if your room is cooler than 70°F)
What Kind of Rye Flour Should I Use?
There are three different types of rye and each one differs in taste and texture. Light rye flour is considered to be the most beginner friendly. It has a more milder taste and texture. Dark rye provides a more intense flavor and feels more like a traditional, European style bread. Medium rye is the best of both words- a mild flavor and texture but still enough of that nutty taste to make the rye stand out. We recommend to start out using light rye and work your way darker, if desired.
How to Make Homemade Rye Bread
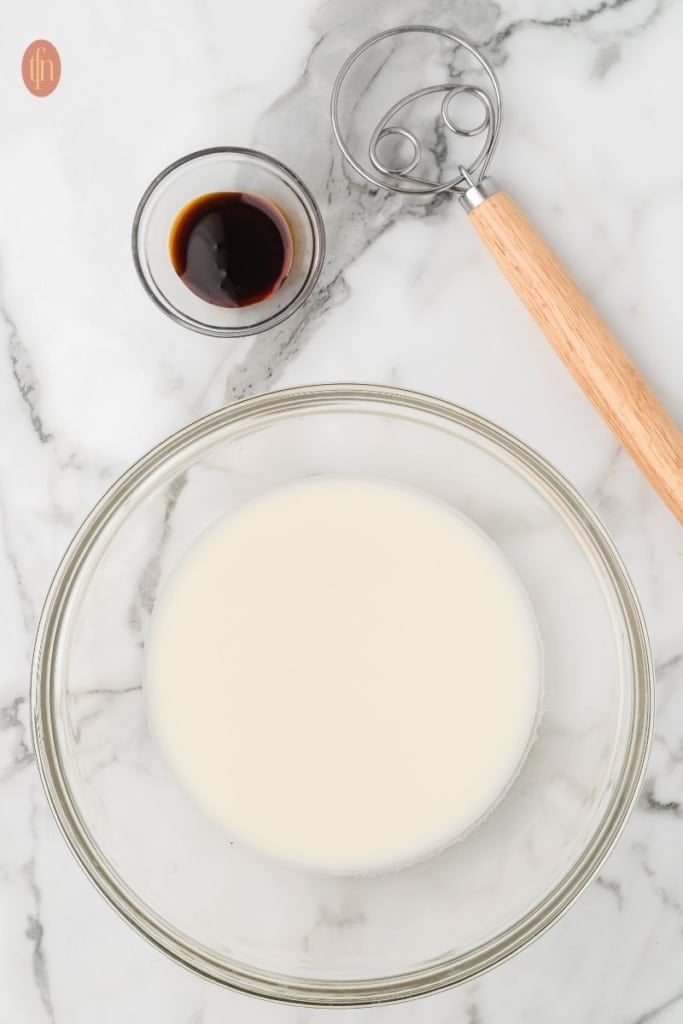
- In a large bowl, add the sourdough starter and warm water. Use a dough whisk or wooden spoon to stir until the starter is mostly dissolved. Add the molasses and stir until combined.
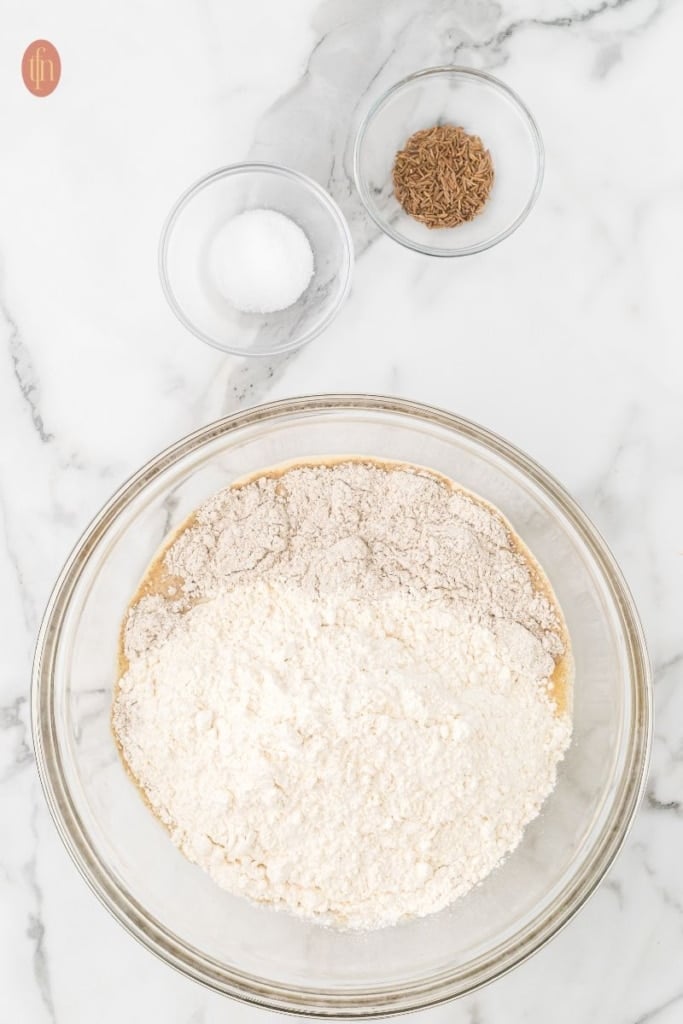
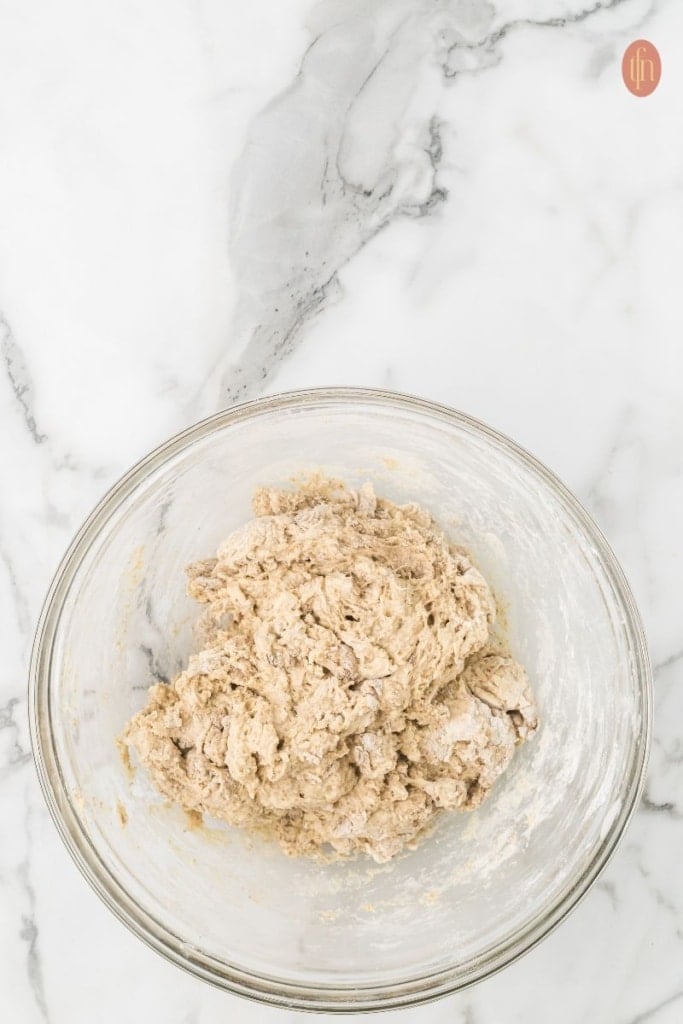
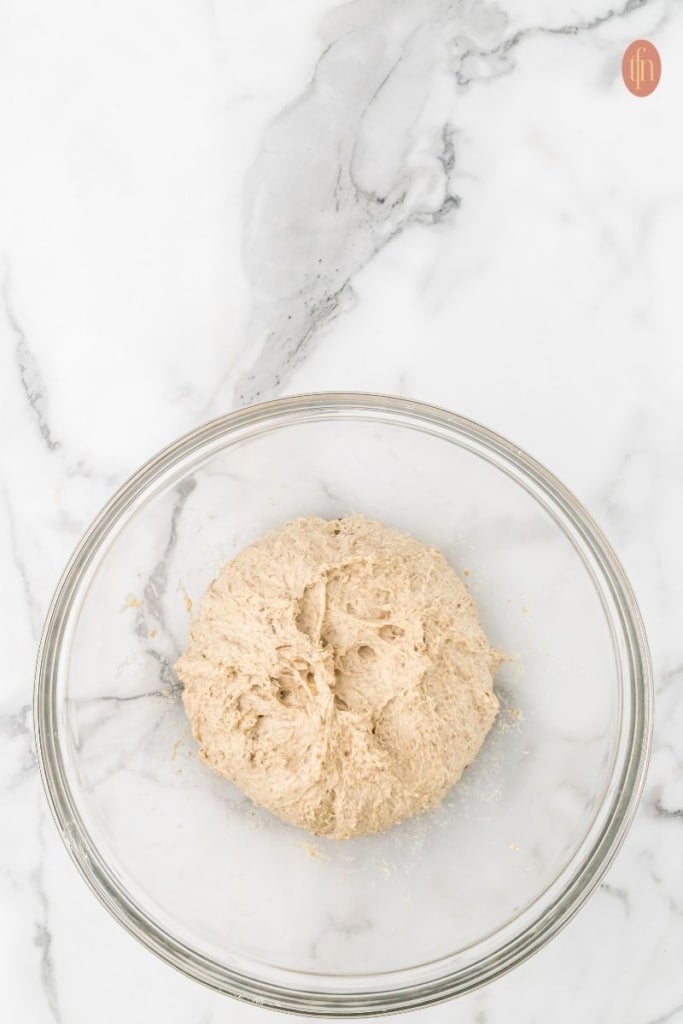
- Slowly stir in rye and bread flour, salt, and caraway seeds (if using) until a shaggy looking dough forms. Finish mixing the dough by hand (be sure to wet your hands to prevent sticking) in the bowl until all the flour has been absorbed. The dough will feel stickier than sourdough made with wheat flour, this is normal for rye bread!
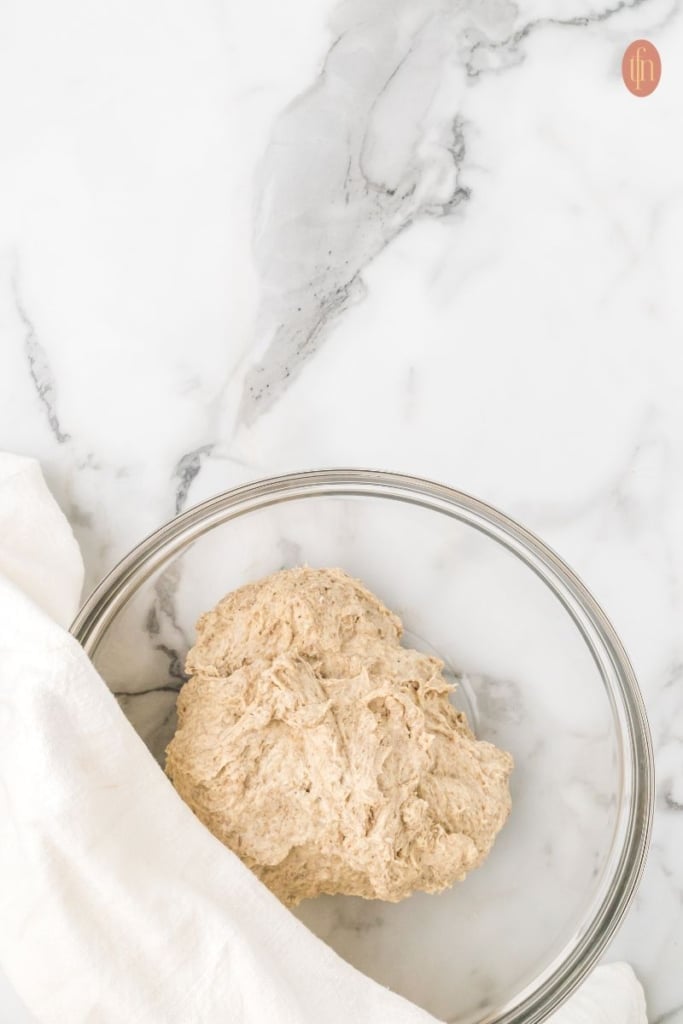
- Cover the bowl with a clean, damp kitchen towel and let the dough rest for 30-45 minutes, this is called autolyse.
- Stretch and fold: grab the edge of the dough, lift it straight up about 4 inches, and tuck it into the center. Turn the dough 1/4 turn and repeat until you’ve come full circle and the dough has tightened. Optional: Repeat this stretch and fold once every 30 minutes for the next 90 minutes (3 total sets). This helps create a lighter, airier loaf.
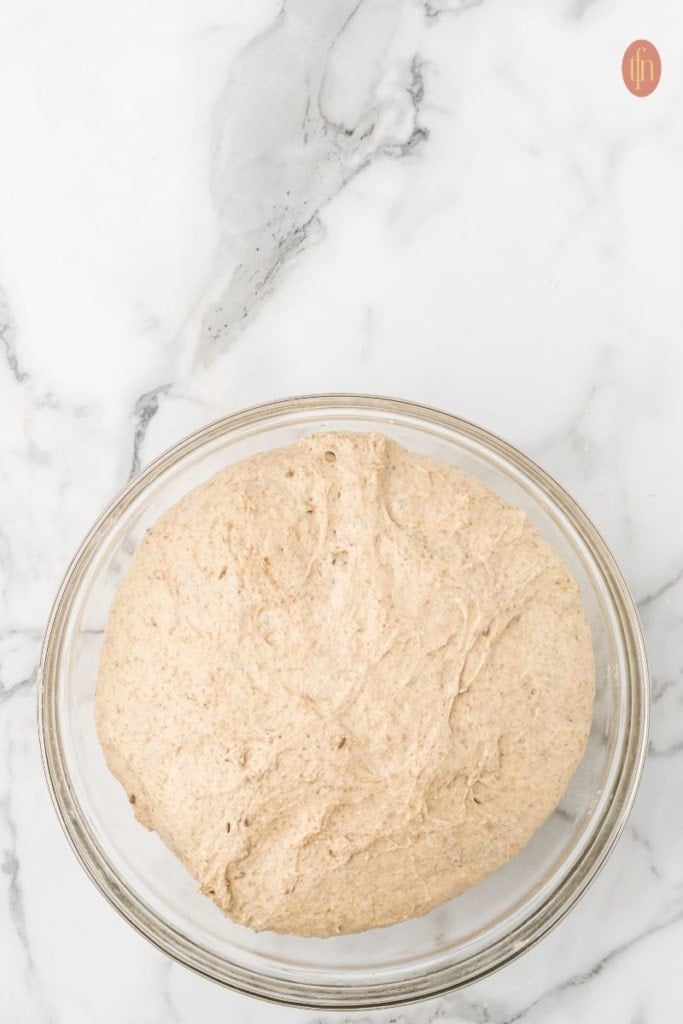
- Cover the bowl with a damp towel (or plastic wrap if you live in a dry area). Let bulk rise at room temperature for 6-10 hours until the dough has doubled in size (see photos above).
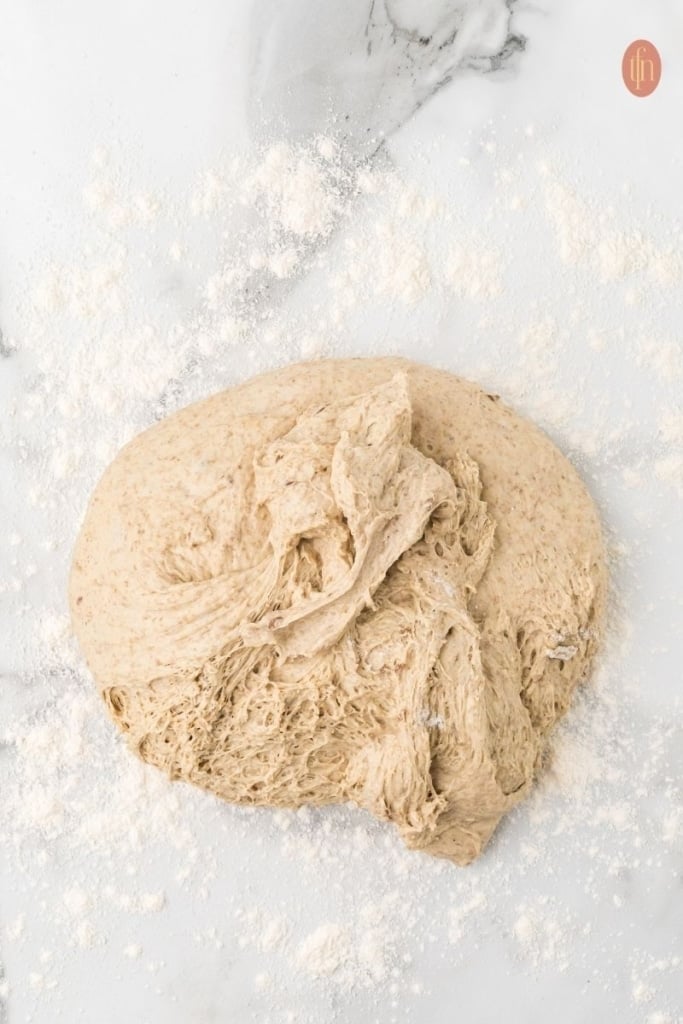
- Pull the dough from the bowl and shape it by gently stretching and folding it again to build tension. Cup your hands around the dough and slide it toward you along your work surface to tighten it into a round shape. Cover and let rest for 10-15 minutes.
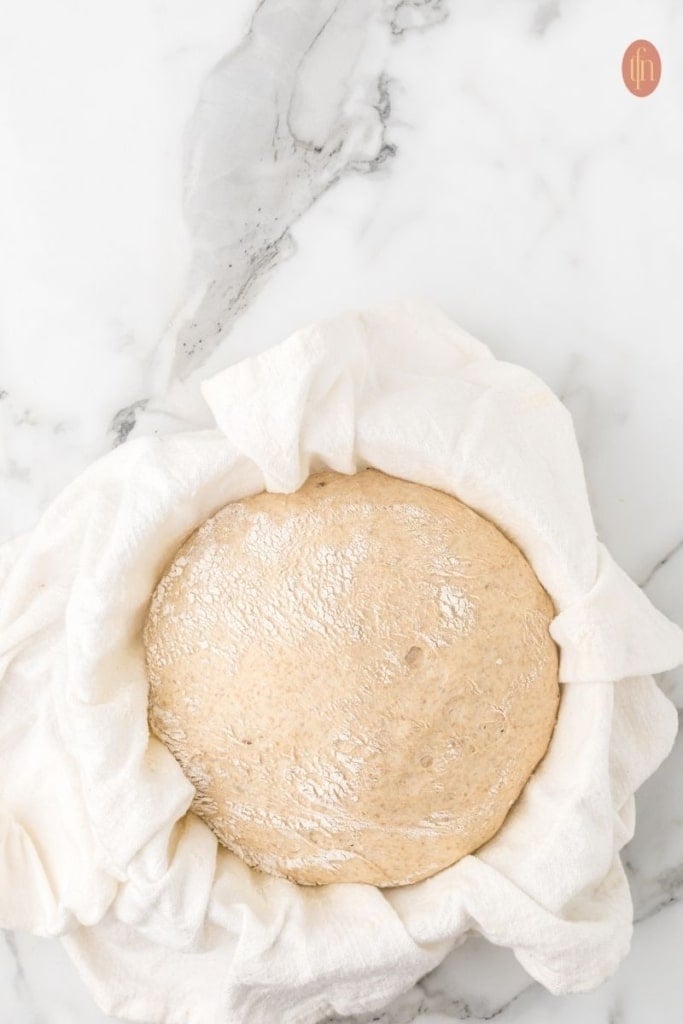
- Line a medium-sized bowl with a towel (or use a banneton bowl with a linen cover) and dust heavily with flour. Let dough rise for 45-60 minutes in a warm location until slightly puffy. Preheat your oven to 450°F towards the end of this rise time.
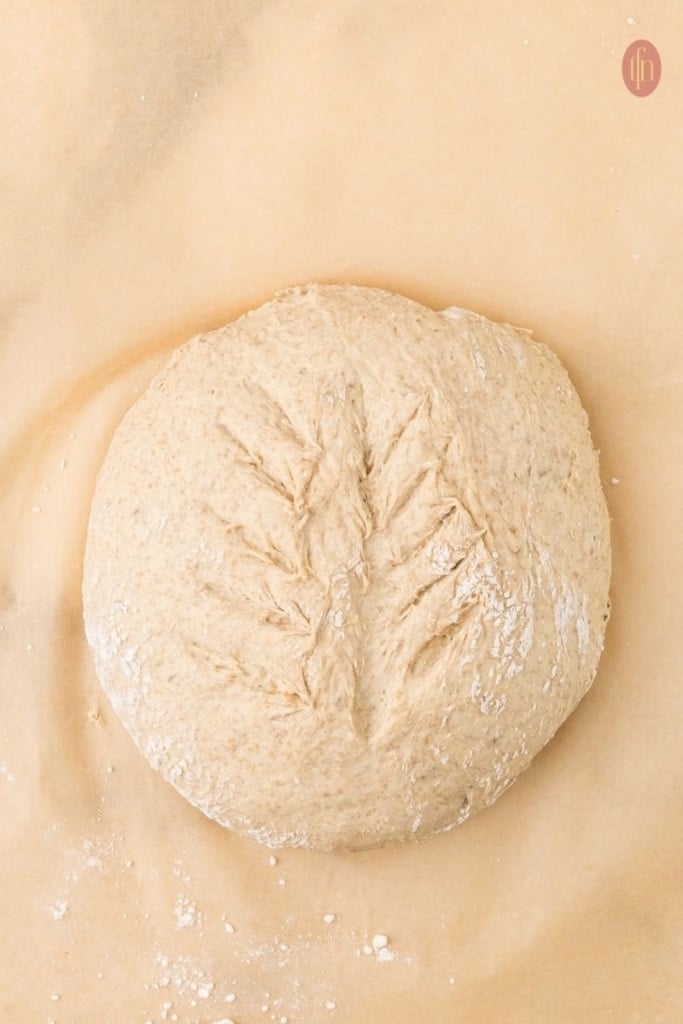
- Cover the dough bowl with a long piece of parchment paper and turn it over onto the countertop. Slash the top of the loaf with a knife. Gently lower the parchment paper with dough into a heavy pot with a tight-fitting lid. Cover with the lid, place in the center of the oven, and bake for 25 minutes.
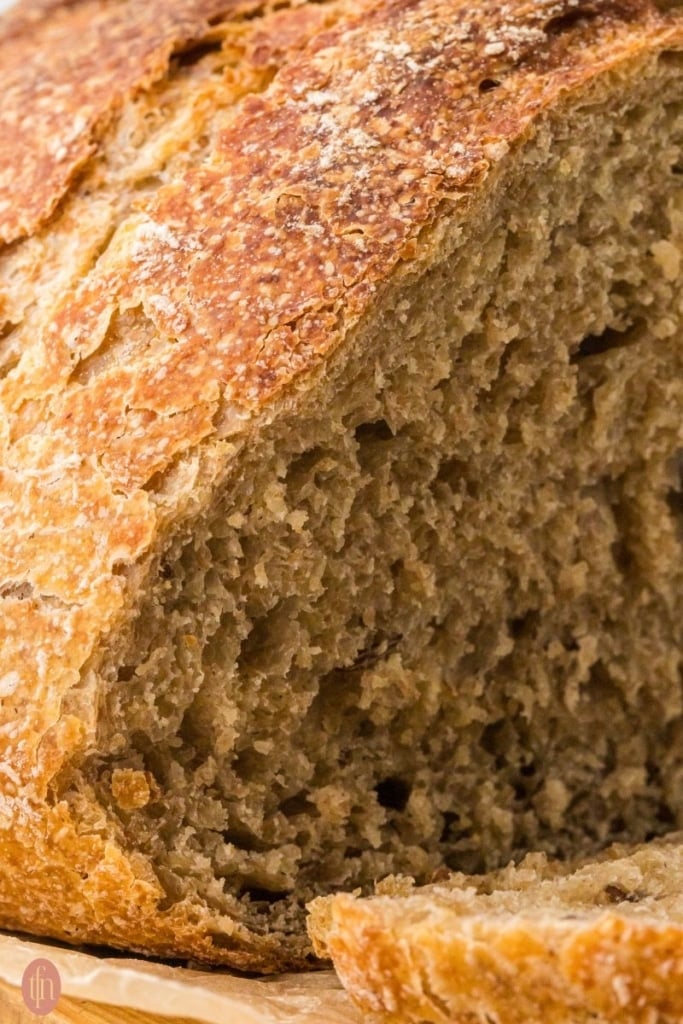
- Remove the lid and bake for 20 more minutes.Using oven mitts, carefully remove the bread from the pot and place it directly on the oven rack. Bake for up to 10 minutes more to crisp the exterior (if needed). The internal temperature of the bread should reach 195°F to 205°F. Let the bread cool on a wire rack for at least 1 hour before slicing, preferably 24 hours.
🎯 TFN Pro Tip
Is your dough feeling really sticky? Rye flour has less gluten than wheat flour, so the dough will feel stickier. This is normal! Don’t add extra flour. Instead, wet your hand when working with the dough in its initial stages. You can also use a damp bench scraper and bowl scraper.
Sourdough Bread Rye Recipe FAQs
No, although rye flour is different than wheat flour, they both contain gluten.
Ideally, rye bread needs a full 24 hours to completely cool- slice too soon and it can have a gummy texture on the inside. This can also happen if the bread wasn’t fully baked- ensure internal bread temperature is 195°F to 205°F before removing from the oven.
Yes, after final shaping of the dough (stretch more oval than round), place in a greased 9×5 loaf pan seam side down and cover with a damp towel. Let the dough rise for 45-60 minutes, until the dough is risen about an inch above the loaf pan. Preheat oven to 375°F towards the end of the rise time. Bake for 45-55 minutes, until the top is deep golden brown and the internal temperature reaches 195°F to 205°F.
Common Troubleshooting Tips
- Rye dough will ferment best around 70-72°F, your bulk ferment will take longer if your house is cooler than this temperature. 80°F – about 4-6 hours, 75°F – about 5-7 hours, 70°F – about 6-8 hours and for temperatures under 70°F, it can take 8-10+ hours
- This recipe uses an unfed sourdough starter, which means one that was fed 12-24 hours before starting the recipe. I recommend waiting a minimum of 8 hours after feeding before starting this recipe. A 100% hydration sourdough starter works best with this recipe. See our guide on How to Fix Common Sourdough Issues for more information.
- Rye dough is stickier than wheat based doughs, use wet hands, and a bench and bowl scraper to make it easier to work with.
- Let it cool completely, it might be hard but rye bread is best when given 24 hours to completely set.
- Watch your dough during the end of bulk fermentation- you do not want to over-proof your dough, you will end up with a dense, flat loaf. If you need more help determining when your dough is ready see more information here: Sourdough Proofing

Other Sourdough Recipes to Consider…
If you tried this sourdough bread rye recipe or any other recipe on my website, please leave a 🌟 star rating and let me know how it went in the 📝 comments below. Thanks for visiting!

Easy Sourdough Rye Bread
Equipment
- Dutch oven - 4 to 5 quart, with lid, or a heavy pot with tight-fitting lid, rated to 450°F
- banneton proofing bowl - optional
- dough whisk - optional
- warming mat - (I recommend this if your room is cooler than 70°F)
Ingredients
- ¼ cup sourdough starter fed 12-24 hours prior, 65 grams
- 1 ½ cups filtered or spring water about 100°F or baby bottle warm, 350 grams
- 1 ½ cups light rye flour medium, or dark rye, 150 grams
- 3 cups bread flour 360 grams
- 2 teaspoons fine salt 9 grams
- 1 tablespoon molasses 15 grams, can substitute with honey
- 1 teaspoon caraway seeds 2 grams, optional
Instructions
- In a large bowl, add the sourdough starter and warm water. Use a dough whisk or wooden spoon to stir until the starter is mostly dissolved. Add molasses (or honey) and stir until combined. Stir in both flours, salt, and caraway seeds (if using) until a shaggy looking dough forms. Finish mixing the dough by hand (wet your hands to prevent sticking) in the bowl until all the flour has been absorbed. The dough will feel stickier than sourdough with all wheat flour. Cover the bowl with a clean, damp kitchen towel and let the dough rest for 30-45 minutes.
- If your bowl is large enough, stretch and fold the dough in the bowl. If not, flour a wooden board or clean countertop to stretch and fold. How to stretch and fold: grab the edge of the dough and bring it straight up about 4 inches and tuck it into the center. Then, turn the dough (or bowl) 1/4 a turn and stretch and fold the dough again. Continue this process until the dough has come full circle and has tightened. Optional: Do this stretch and fold once every 30 minutes for the next 90 minutes. Although this optional, I’ve found that it helps create a lighter, air loaf.
- Return the dough to the bowl, if needed, and cover with a damp towel (or plastic wrap if you live in a dry area) and let rise at room temperature for 6-10 hours to ferment. See recipe notes for a rising times chart. Do not refrigerate the dough.
- After the fermentation, the dough should have relaxed, spread, and be doubled in size. If you are able to look at the bottom of the dough, it will look like a sponge underneath. Lightly flour your wooden board or clean countertop. Pull the dough from the bowl and shape the dough by stretching and folding it again. Cup your hands and slide the dough 10 inches towards you to along your work surface to tighten the dough. Cover and let the dough rest for 10-15 minutes. Meanwhile, line a medium-sized bowl with a towel, or use a banneton bowl with a linen cover, and dust heavily with flour. Place your shaped dough seam-side down in the bowl. Let dough rise for 45-60 minutes in a warm location.
- Preheat your oven to 450°F. Do not add your Dutch oven or baking pot to the oven – it does not get preheated. Cover the dough bowl with a long piece of parchment paper (about 20 inches long) and turn it over onto the countertop. Slash the top of the loaf with a lame or sharp serrated knife. Gently lower the parchment paper dough into a heavy pot with a tight-fitting lid. NOTE: If using a pot with a dark interior, I recommend insulating the bottom with a round silicone sheet underneath the parchment paper. You can also place the Dutch Oven pot on a baking sheet to prevent over browning.
- Place the covered pot in the center of the oven and bake the bread covered for 25 minutes. Remove the lid and bake 20 minutes. Using oven mitts, carefully remove the bread from the pot. Bake it directly on the oven rack for up to 10 minutes to crisp the exterior (if needed). To ensure your bread is cooked through you can check the internal temperature. It should be 195°F to 205°F.
- Let the bread cool on a wire rack for at least 1 hour before slicing. For best flavor, wait 24 hours before cutting.
Notes
- FOR GRAMS MEASUREMENTS: Click on black METRIC tab above ingredients.
- This recipe uses an unfed sourdough starter, which means one that was fed 12-24 hours before starting the recipe. I recommend waiting a minimum of 8 hours after feeding before starting this recipe. A 100% hydration sourdough starter works best with this recipe.
Rye flour has less gluten than wheat flour, so the dough will feel stickier. This is normal! Don’t add extra flour.
You can use light rye, medium rye, or dark rye flour. Darker rye gives more intense flavor. Rise times: I recommend using a clear glass mixing bowl for fermentation (rising). This allows you to see the activity on the dough’s top and bottom.
Do not refrigerate the dough! Our recipe does not use a refrigerated rise.
Overnight Bulk Fermentation rising guidelines: Rising times will vary according to your room temperature and humidity
-80°F – about 4-6 hours
– 75°F – about 5-7 hours
– 70°F – about 6-8 hours
– For temperatures under 70°F, it can take 8-10 hours
TFN Pro Tips for keeping dough warm for the bulk rise:
- Place the bowl in the oven with the door propped open and the light on to create a slightly warmer climate without actually turning the oven on.
- Use a heated mat (like those used for germinating seeds) for rising. Fold a kitchen towel up and place 2-3 layers between the mat and dough bowl.
- Use the “proof” setting of your oven (I set mine at 85°F) and set a timer. This will speed up the rising process, so check it at 4 hours.
- If there is a sunny room in the house that stays warm, keep the dough covered in that area.
Let the bread cool completely. Store it in a plastic bag at room temperature for 4-5 days. This bread stays fresh longer than regular sourdough! Can be frozen for up to 3 months. Slice before freezing and separate slices with parchment paper.
Nutrition


Julie says
It was a learning curve getting used to working with the dough with rye in it but the bread turned out amazing. I love how rustic it looks and the taste is good!