

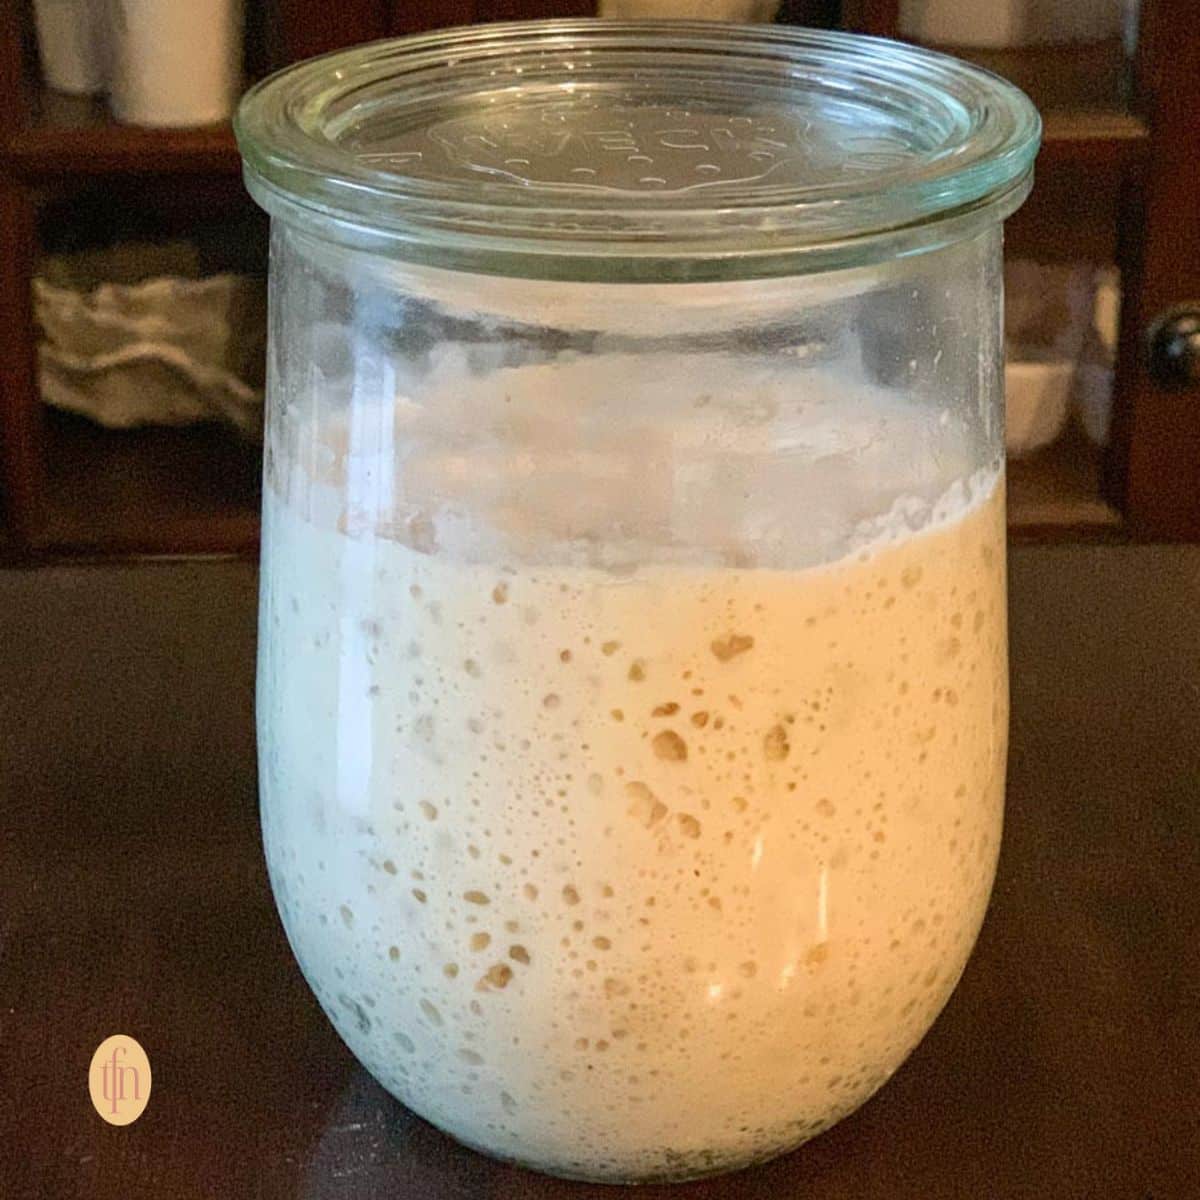
Are you wondering how to make a sourdough starter? Well, it’s so much easier than you think! All you need is flour and water for our recipe. Don’t worry—our pro tips and troubleshooting topics will help you from start to finish. Follow everything closely, and in about a week you will have an active sourdough starter ready to use!
Already have a starter? Jump right in and make a loaf of sourdough bread!
Content Covered Here
How I Got Started
Maybe you’ve heard that making a sourdough starter from scratch is really hard. I used to believe that, too. In fact, when I was first starting out, I got my starter from a friend.
There was a sad ending when the oven was turned on, with my sourdough starter inside and the heat ruined it. Learn from my mistake! After you make yours, find out how to dehydrate your starter so you always have a backup.
Sourdough starter is wild, natural yeast. It’s a simple combination of water and flour that slowly ferments over time.
This living, fermented culture needs nutrients and air to thrive. As a result, you will see bubbly activity occurring daily in your sourdough starter.
Ingredients You’ll Need To Get Started
You only need two ingredients to make a sourdough starter recipe – flour and water! However, the type of flour and water used are important.
The Best Flour to Use
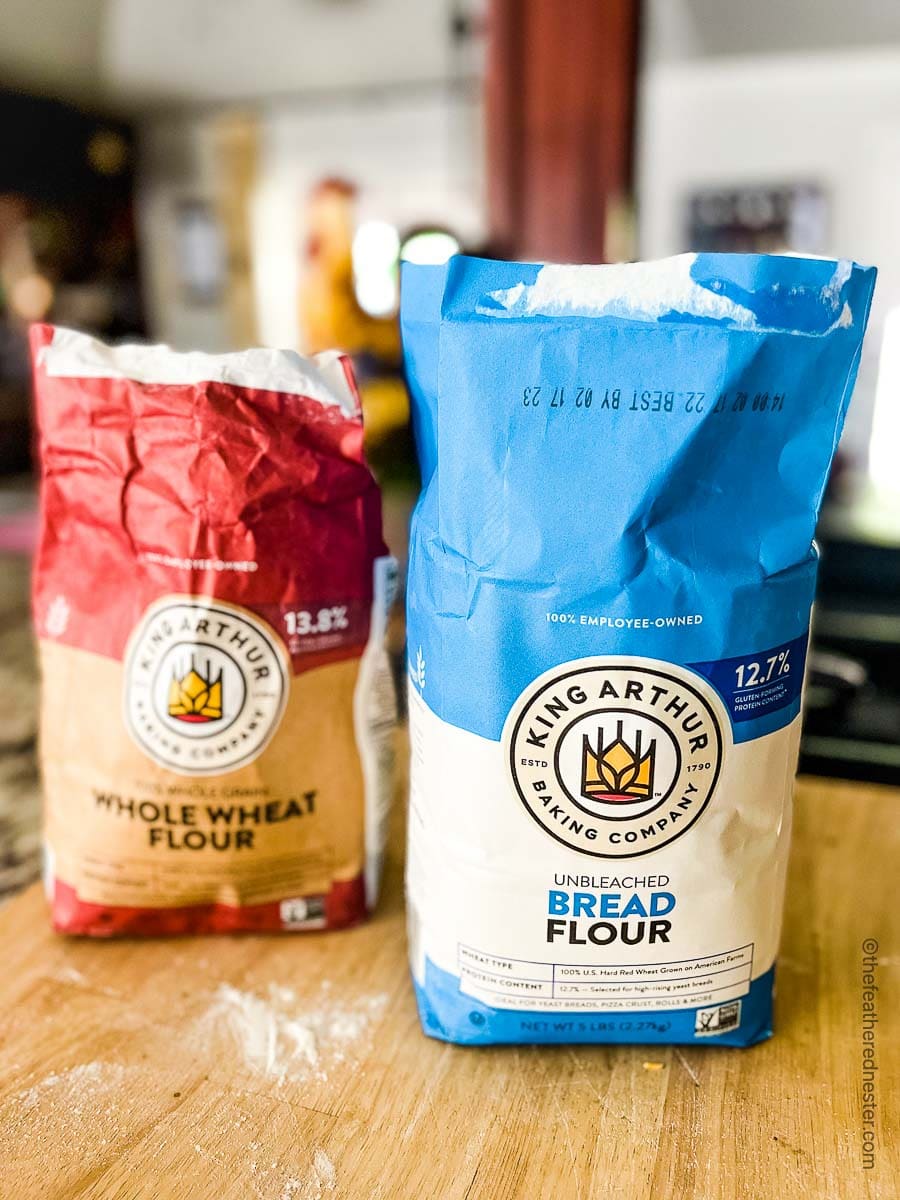
- We feed and maintain our starter with unbleached, all-purpose flour. For the best results, start with a fresh bag of high-quality flour like King Arthur or Kirkland All Purpose flour and use the same brand and type for the first few weeks.
I cannot stress enough the importance of using the same brand of flour for the first few weeks of feedings. The protein percentages can vary from brand to brand, as can the type of wheat used. This can cause a reduction in growth and activity.
Using bleached flour won’t ruin your starter, but will cause it to become less active over time. If you can’t find unbleached, use bread flour instead. - If possible, start the starter with some rye flour or whole wheat flour for the first day. Rye gives the starter a nutritional boost and makes it more active. If you don’t have it on hand, no worries, unbleached, all-purpose flour will work just fine.
🎯 TFN Pro Tip
If you already have bleached flour, save it for sourdough recipes instead of your starter. The bleaching process strips the natural coating of the wheat. A sourdough starter thrives on friendly bacteria that’s on the outside of the wheat.
What about organic flour?
Although some bakers don’t recommend organic flour for feeding newly established sourdough starters, I’ve used organic all-purpose and rye flour when making starters before and they turned out fine.
Why the Water you use Matters
Water straight from the tap often contains chlorine. If filtered water isn’t an option, let the tap water sit out for 24 hours, so the chlorine can evaporate.
This sourdough starter recipe makes a 100 hydration-type starter, which means, it has equal amounts of water and flour by weight.
This is where a digital food scale comes in handy. If you use measuring cups, you’ll need twice as much flour as water, since water weighs more than flour. For example, 1/4 cup of water and 1/2 cup of water weigh about the same.
Sourdough Starter Fermentation
We’ve already covered the importance of using the right flour and water. The next one is keeping your new starter warm enough to encourage proper fermentation. Keep your sourdough starter in a warm environment as it ferments and grows. It needs a cozy place to ‘snuggle.’ Ideally, it should be in a location that is 75-80°F.
Over the past few years, we have helped troubleshoot many problems with sourdough. The most common issues and questions relate to trying to grow a sourdough starter in too cool an environment.
This post contains affiliate links. As an Amazon Associate I earn from qualifying purchases.
Storing and feeding sourdough starter in a cooler climate
Cooler indoor temperatures can make it difficult for starters to thrive. Keeping your starter at a consistent warm temperature 24/7 makes a difference – we’ve tested it out repeatedly. We found an inexpensive, handy solution.
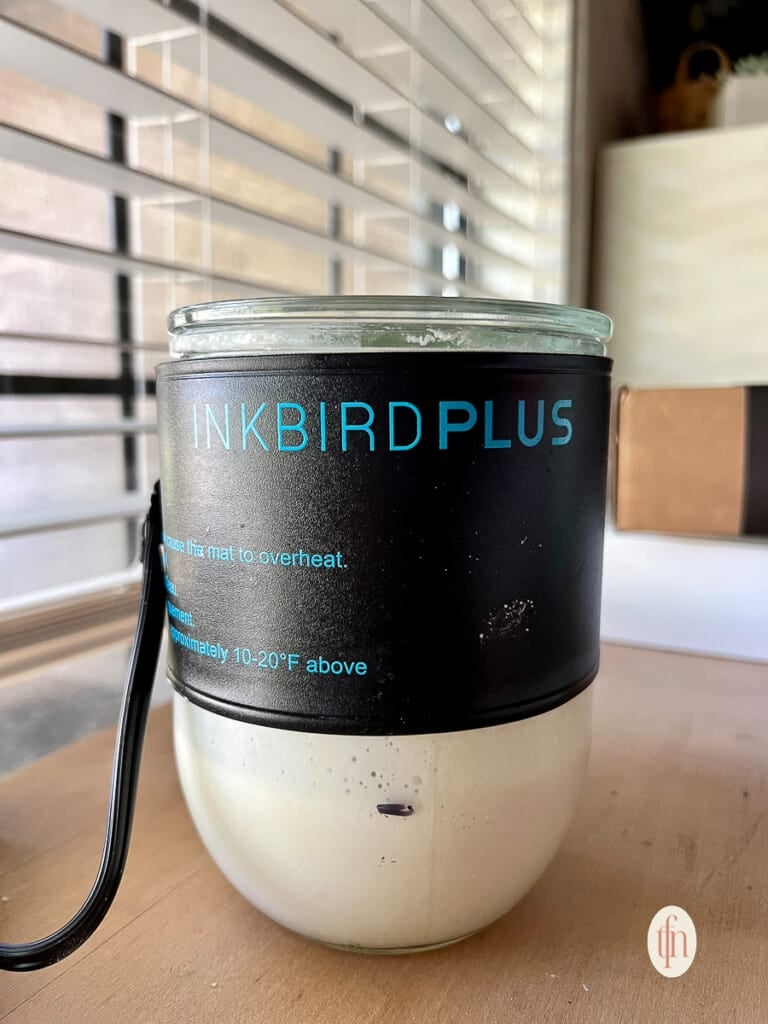
I use and recommend a warmer to maintain the proper temperature while you’re making your starter. This is sourdough starter jar warmer is the one I personally use and recommend. I keep my starter set at 80ºF on it 24/7. My second favorite tool is to use a jar warmer wrap like shown below. The reason it’s my second favorite is that you can’t set the temperature on it.
🎯 TFN Pro Tip
Do not keep your starter in a dark or overly warm place for more than 12 hours at a time. This includes a cabinet, microwave, or an oven with the light turned on. Like living organisms, sourdough starter needs light and air to thrive.
Sourdough Starter Recipe
Day 1
Add the following to a 1-liter glass, ceramic, or stoneware jar or crock:
- 1 cup (120 grams) unbleached, all-purpose flour, rye flour, or whole wheat flour
- 1/2 cup (120 grams) filtered, warm water (85 to 90° F.)
Stir to combine. The mixture will be very thick and pasty. This is normal – do not thin it out! Your sourdough starter needs that flour for fermentation and energy. The mixture thins out 12-24 hours after each feeding.
Day 2
Look for signs of fermentation: tiny bubbles on the bottom of the starter, and pinprick-sized bubbles on top. If you don’t see any signs after 24 hours, ensure your starter is in an area between 75º and 80ºF.
How and When to Feed a Sourdough Starter
Feeding and maintaining your starter is as simple as stirring in more flour and water, and discarding a little bit of the mixture along the way.
What is sourdough discard?
The discard is the portion you remove from a starter during feedings. Throw out the discard for the first 5 days (don’t use it for any recipes). At this point, it isn’t fully grown and active.
For an established, active sourdough starter, the discard is the portion you will for the recipe you’re making.
Day 3
- Remove 1/4 cup (60 grams) of starter and throw it away.
- Add 1/4 cup (60 grams) of warm, filtered water. Stir to combine, then stir in 1/2 cup (60 grams) of unbleached, all-purpose flour.
🎯 TFN Pro Tip
I recommend adding your water before the flour during feedings.
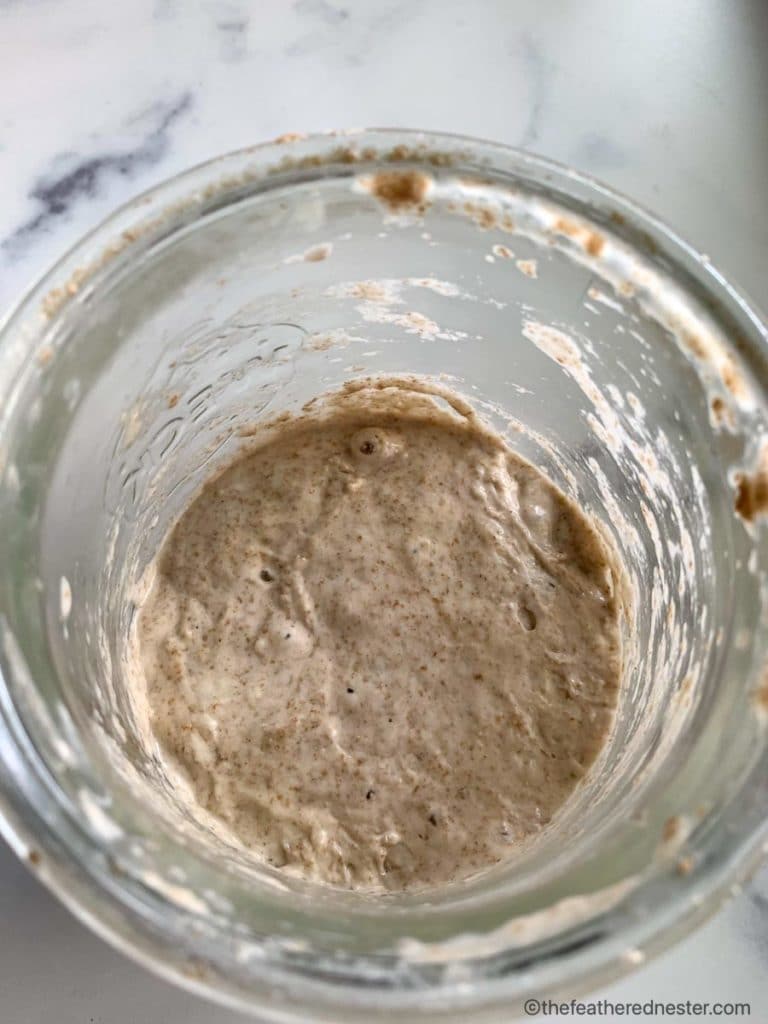
Watch for signs of activity – larger bubbles and a hungry starter that is thinner than when you mixed it.
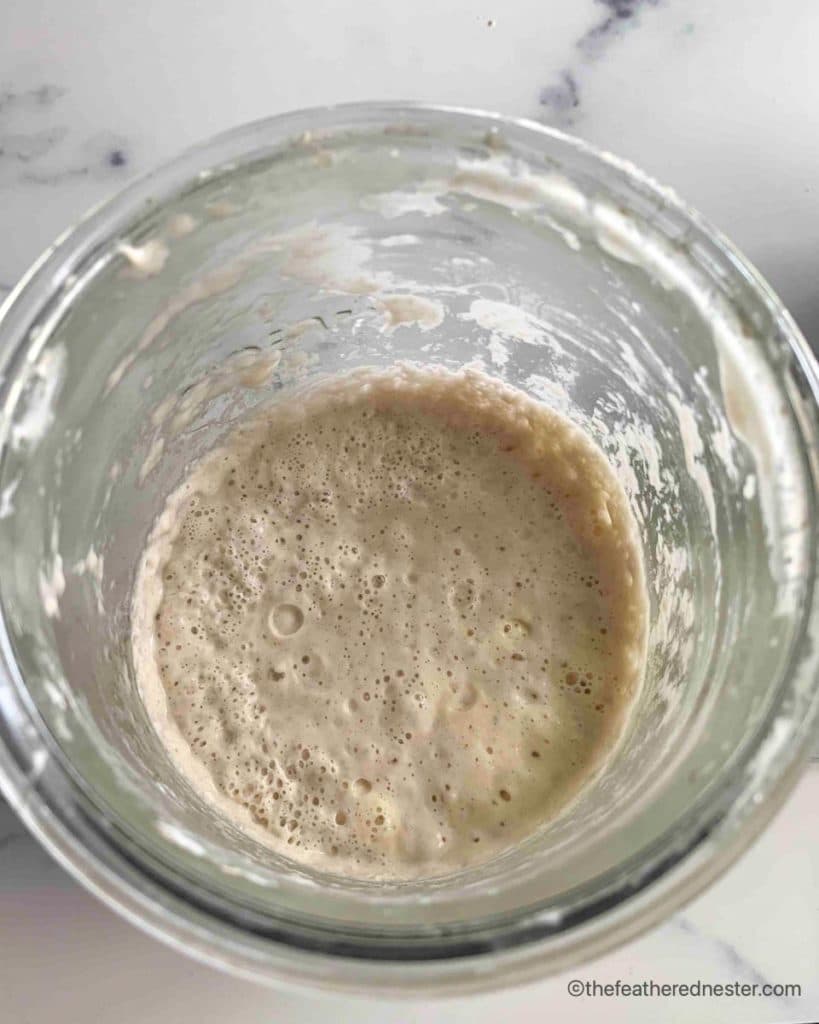
Day 4
Your starter might have a strong odor. This is completely normal.
- Remove and discard 1/4 cup (60 grams) of sourdough starter, and stir in 1/4 cup (60 grams) of warm, filtered water.
- Mix in 1/2 cup (60 grams) of unbleached, all-purpose flour.
Day 5
Once again, follow the steps and ingredient amounts from day 4 to feed the sourdough starter. Depending on altitude and temperature, your starter may start showing a lot of activity.
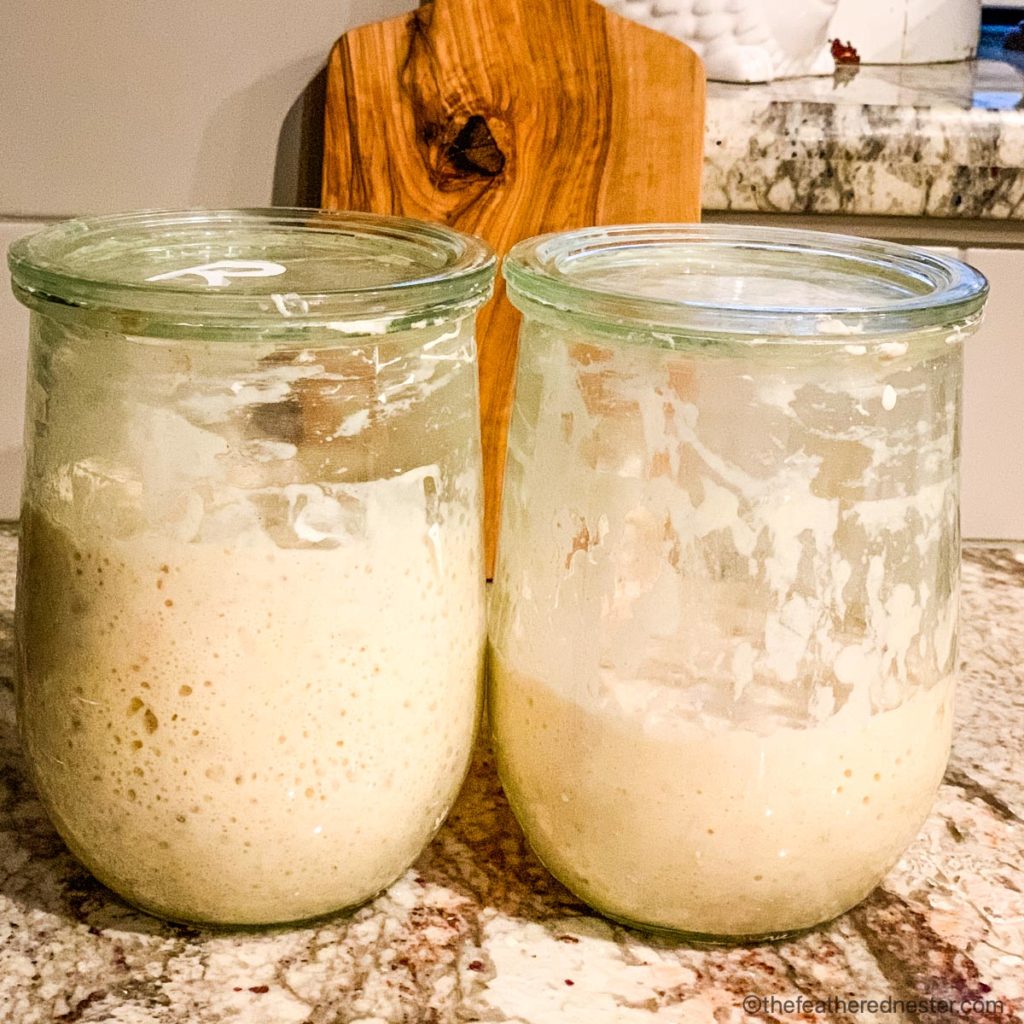
Feeding Days 6 and 7
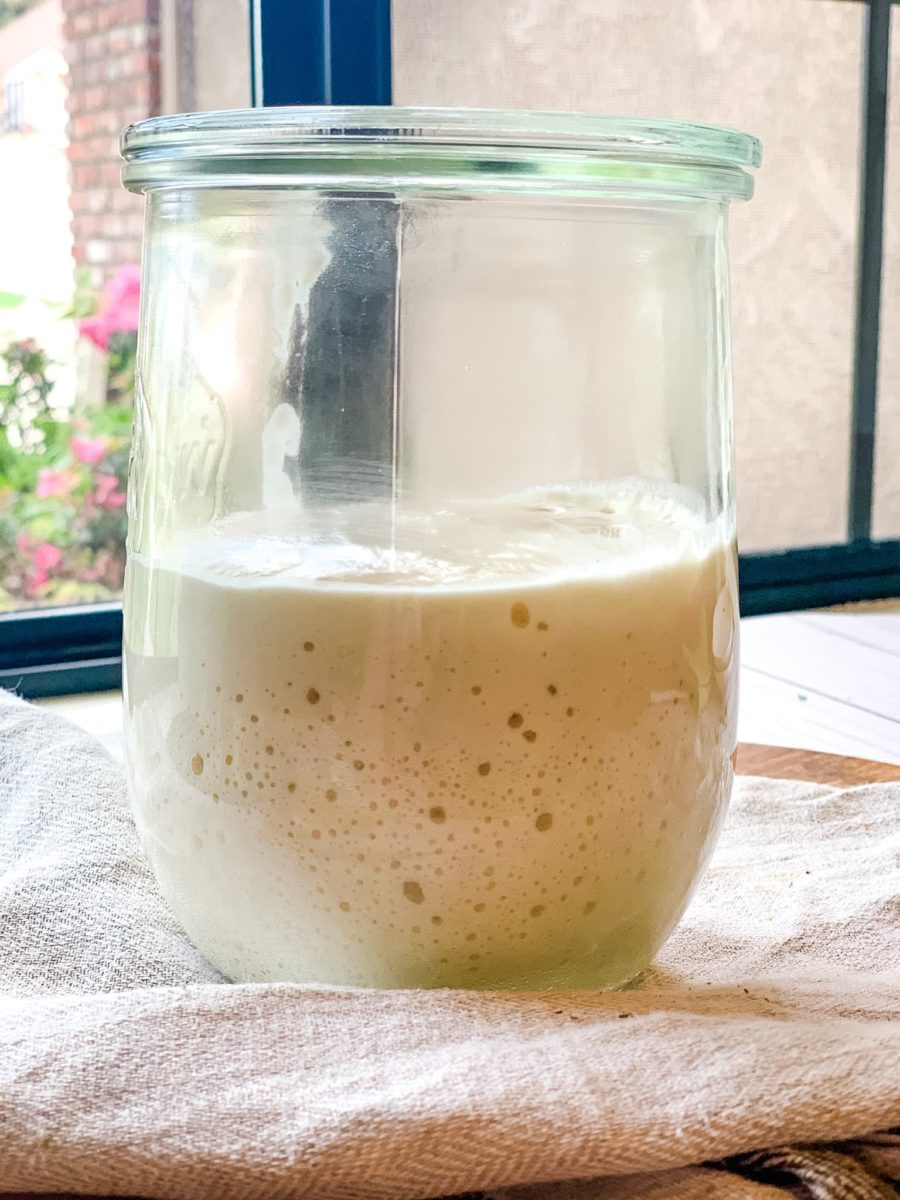
By the 6th day, your jar of sourdough starter should be very active and bubbly!
Day 6
- Feed starter normally Once again, remove 1/4 cup (60 grams) of starter. Either discard it, or use it to make a sourdough discard recipe.
- Stir in 1/4 cup (60 grams) of warm, filtered water, then mix in 1/2 cup (60 grams) of unbleached, all-purpose flour.
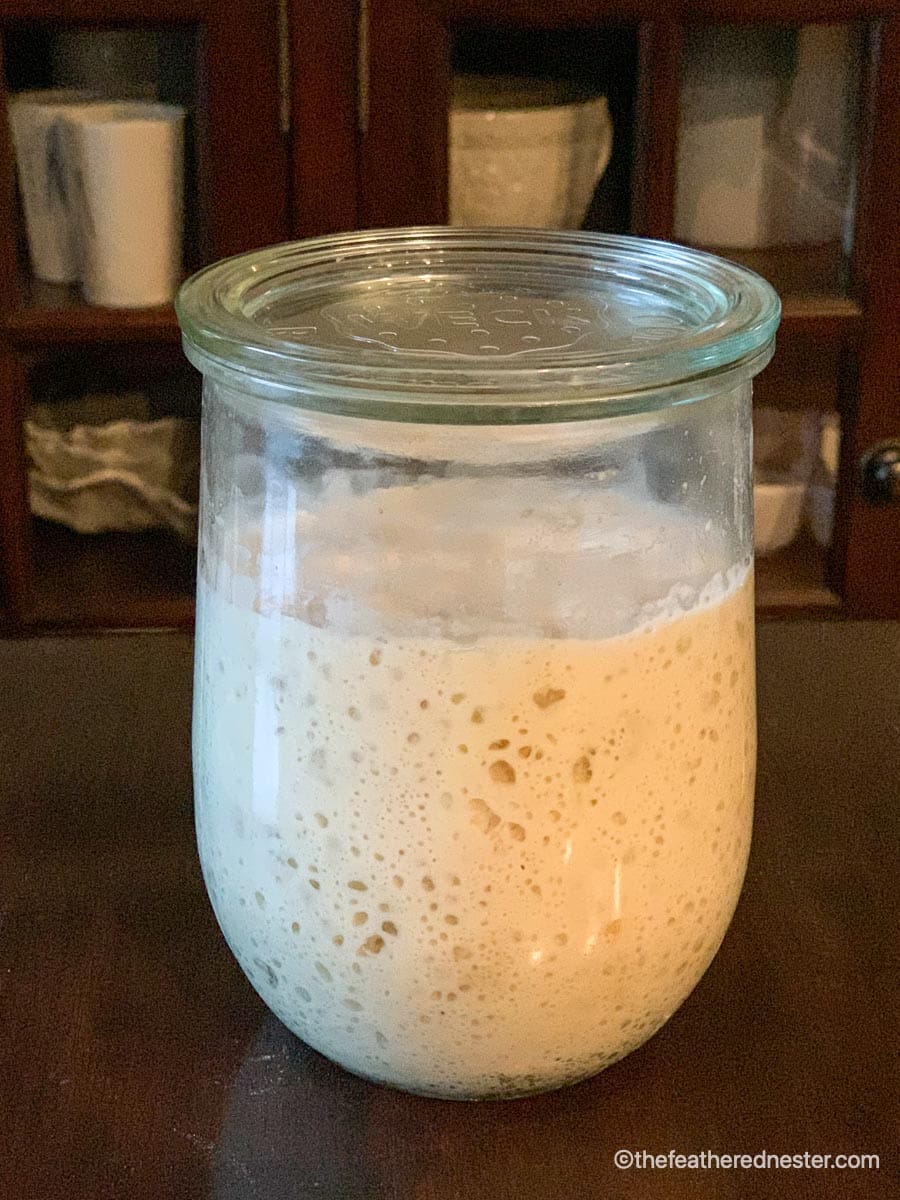
At this stage of the sourdough starter recipe, you may see the contents double in size 4-6 hours after feeding. After 12 hours, it will have a lot of bubbles and will look very much like a sea sponge.
Day 7
If the contents are doubled in size in 4-6 hours after feeding, you can use it! If not, keep feeding it for a few days, following the same schedule of daily feeding.
If it doubles in size within 4-6 hours of feeding, use it for low rise recipes. Here are some suggestions: old-fashioned sourdough cake, tortillas, or see a lit of our 15+ Easy Sourdough Discard Recipes.
Wait until day 10 to make high rise recipes like sourdough bread.
It takes a solid, active starter to rise several cups of flour for a loaf of sourdough bread. Consider your first few attempts as a starter or trial loaves. Your starter will become stronger as you feed it over the course of several weeks.
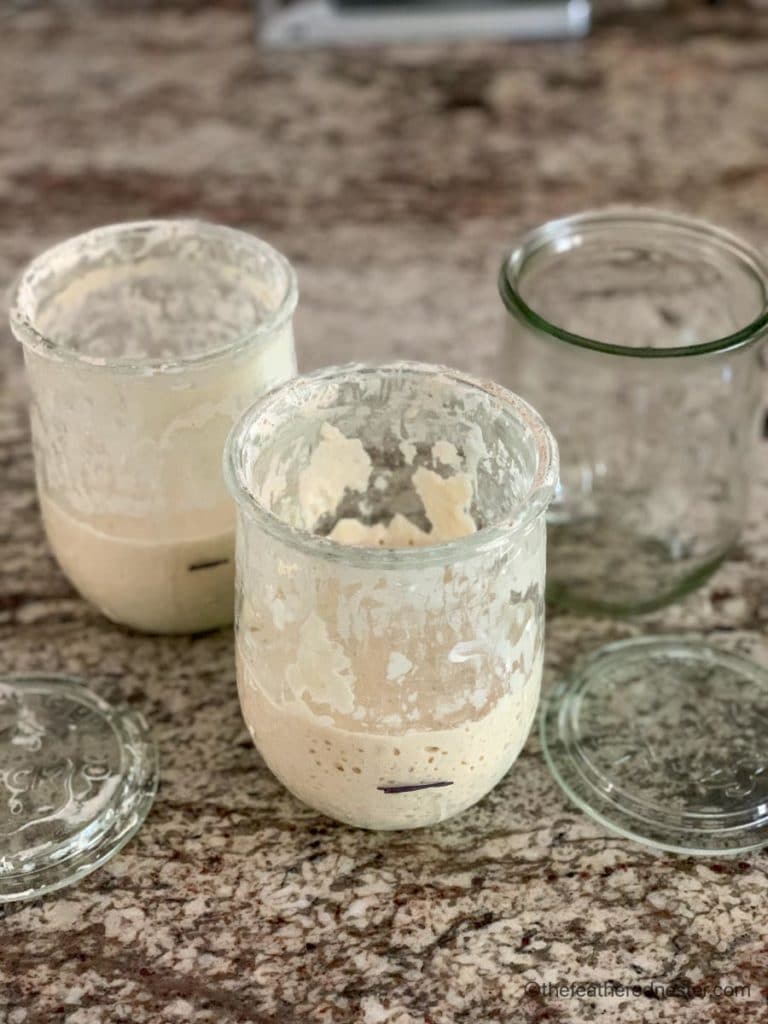
Knowing When Your Starter is Ready to Use
🎯 TFN Pro Tip
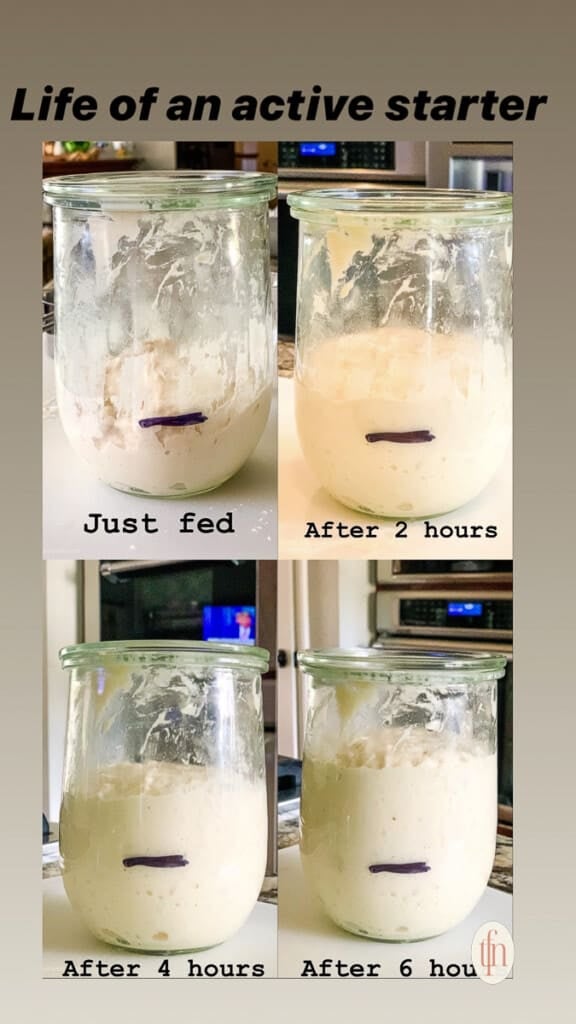
Just after feeding a sourdough starter, the contents will be at their lowest point. Use an erasable marker to note the level of the contents, or mark the level with a rubber band around the jar.
Set a timer for 4 hours. How much has your starter risen? Has It doubled? If not, set a timer for 2 more hours. This is the best way to see how much your starter is rising and falling.
Here are some signs that you have an active sourdough starter.
- Your starter is at least 7 days old (for low rise recipes) or 10 days old (for bread).
- Within 4-6 hours of a feeding, your starter consistently doubles in size.
- Your starter looks spongy and full of bubbles all over.
Ready to make something? Here are our recommended beginner’s sourdough recipes.
What is the Float Test?
We do not recommend using a “float test” to see if your starter is ready to use. Some perfectly active starters (including the ones we make) never pass this test.
As you can see, though, ours makes amazing sourdough bread.
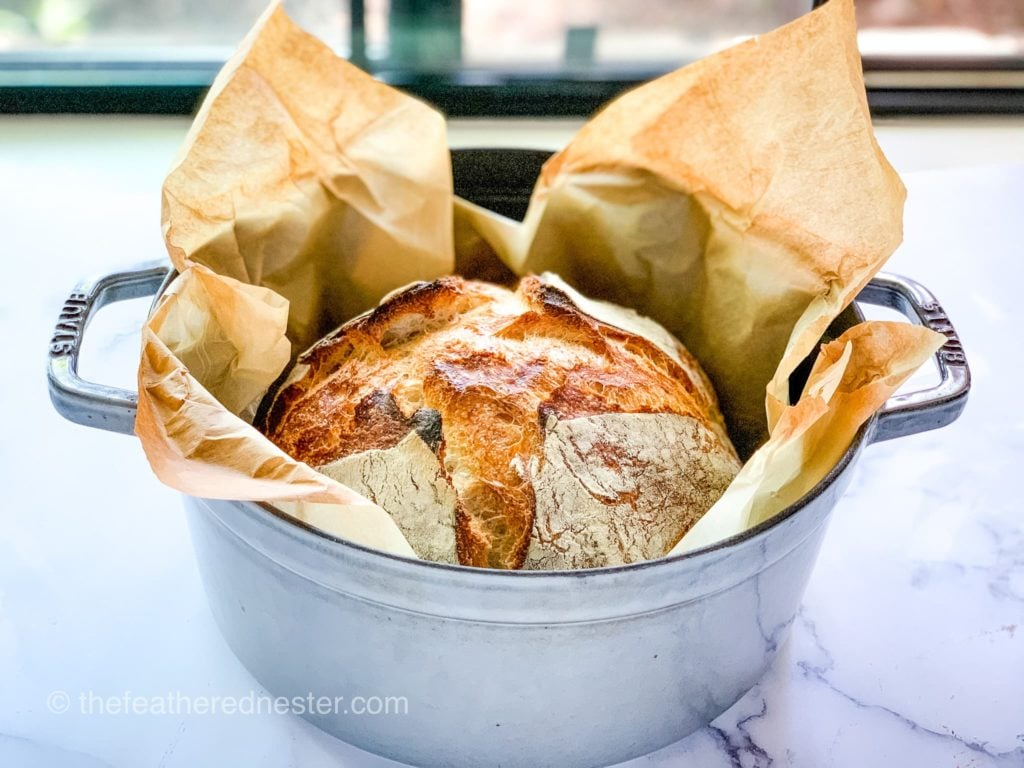
Care and Maintenance
A sourdough starter is a live culture that needs regular feeding to survive.
For weekly (or less frequent) use
Keep the starter in the refrigerator. Take it out 12 hours before you want to use it. Depending on how much starter you need for the recipe, discard (or save for later) half, then feed the remaining starter.
We recommend keeping a discard jar inside of your fridge. perfect for recipes that use a large amount of starter, like sourdough starter cinnamon rolls.
For daily use
If you will be using it every day, keep your sourdough starter on the counter and feed it once daily. 8-12 hours after feeding, it is active and ready to use.
How to Bake With Your Sourdough Starter
Feed it as usual 12 hours beforehand by removing 1/4 cup of starter (60 g). Add 1/4 cup of warm, filtered water (60g), then mix in 1/2 cup of unbleached, all-purpose flour (60 g).
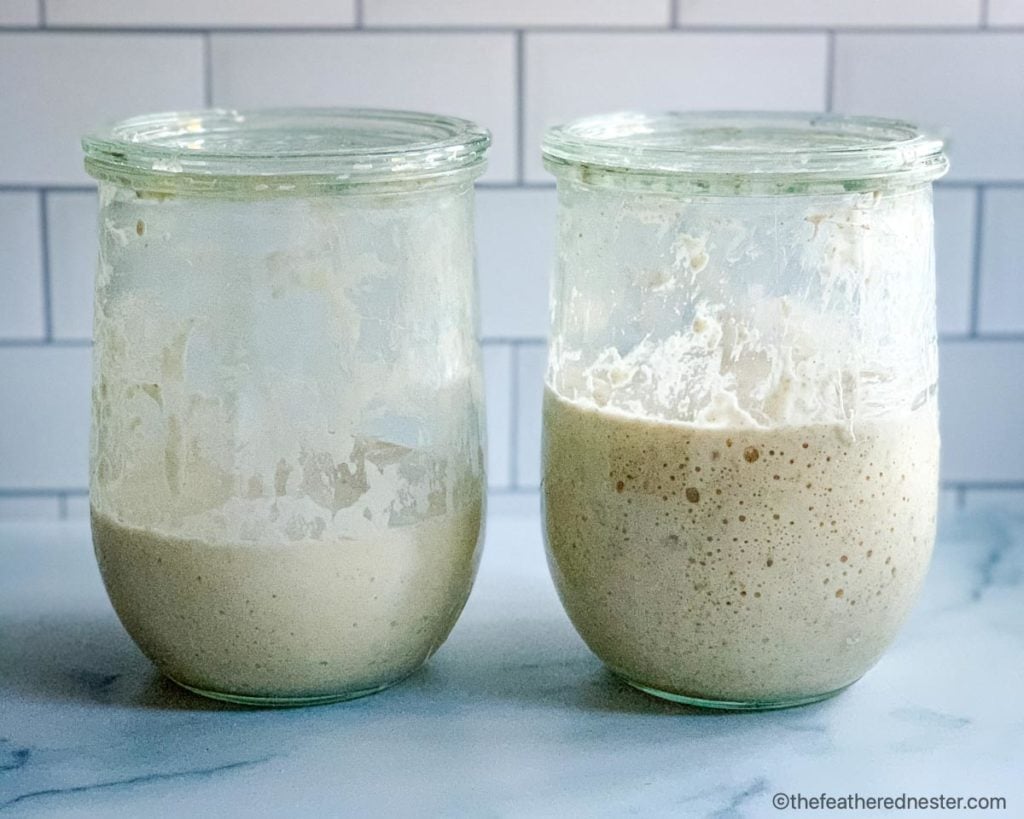
How to Increase The Amount of Starter
There will be times when you need a larger amount of starter for a baking recipe. In that case, you’ll need to know how to increase the sourdough starter. There are two ways to do this:
- Feed your starter without discarding it.
First, measure your starter. For example, if it’s 1 cup of starter, add 1 cup of water and 2 cups of flour. Or, weigh your starter, then add equal amounts of water and flour. - Divide the starter.
If you need a large amount of starter, then split your starter into two containers. Feed both without discarding until you have the amount of starter you need. Save enough to keep your starter, then use the rest for your recipe.
Preserve your starter by drying it, which is also perfect for long-term storage or as a backup. Check out our full guide on Dehydrated Sourdough Starter.
Container Recommendations
To keep your starter healthy and active, using a proper container is important. A glass container is ideal. Don’t store your sourdough starter in plastic or metal containers.
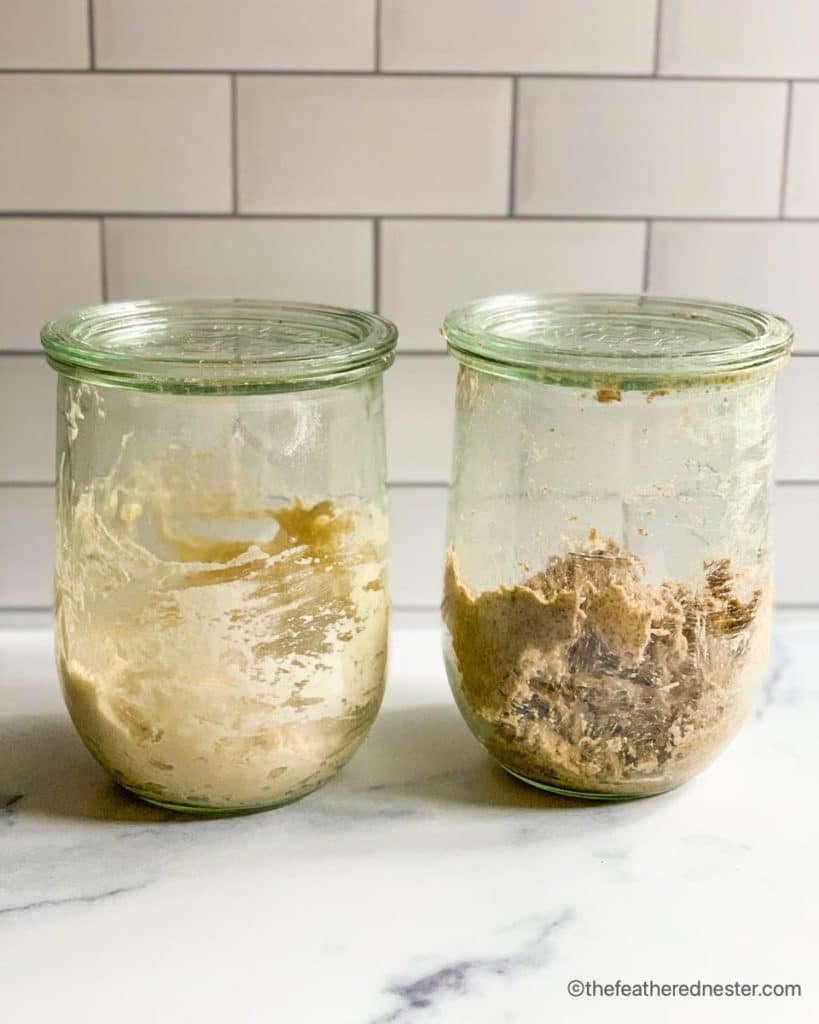
After much trial and error over the past several years, we recommend using a Weck 1-liter tulip jar.
If you’re having sourdough starter problems, check our post for easy tips!
Recipe FAQs
Yes and No. We do not recommend making a sourdough starter recipe using bread flour. However, after 7-10 days, it will be fully active. At that point, you can feed your established sourdough starter with bread flour.
Initially, discarding half of a sourdough starter keeps it a manageable size. Although it may seem difficult or sad to discard half of your starter, it is a necessary step. Do not use the discard for the first 6 days, it is really of no use for cooking or baking.
Although everyone’s sense of smell is different, as your sourdough starter goes through the stages of fermentation, the smells change.
In the beginning, it may smell fruity or sour. Some people say that they think it smells like sweaty gym socks, and others say it smells yeasty, like beer. All of these aromas are perfectly normal for sourdough starter.
Are you keeping the starter in a warm area, 75 to 80º Fahrenheit? Are you using unbleached all-purpose flour for feedings? And warm, filtered (spring) water for feeding? If so, wait for another day or two – the starter will become active soon!
Consider Making These Easy Sourdough Recipes…
If you tried this sourdough starter recipe or any other recipe on my website, please leave a 🌟 star rating and let me know how it went in the 📝 comments below. Thanks for visiting!
Sourdough Starter Recipe
Equipment
- glass jar - or ceramic jar, with a tight-fitting lid
- heating wrap or - recommended
- heated warmer - recommended
- small spatula - or non-metallic spoon
Ingredients
Inital starter (day 1)
- 1 cup unbleached all-purpose flour 120 g = 1 cup dry measure. Can substitute with rye flour or whole wheat flour
- ½ cup warm filtered water 118 g = 1/2 cup liquid measure
Subsequent feedings (day 3 and beyond)
- ¼ cup warm filtered water 59 g = 1/4 cup liquid measure
- ½ cup unbleached all-purpose flour 60 g = 1/2 cup dry measure
Instructions
Creating the starter
- Day 1: In your glass or ceramic container, mix the flour and water. The mixture will be very thick and pasty. Do not thin it out! The starter needs that flour for fermentation and energy. Keep it at 75º to 80º F.
- Day 2: Look for signs of fermentation: tiny bubbles on the bottom of the starter, pinprick sized bubbles on top. If you don't see any signs after 24 hours, ensure your starter is being in an area that is 75º to 80º F. See our tips above on keeping your starter warm.
Feeding the starter days 3 and beyond
- Day 3: Remove 1/4 cup of starter (60 g) and discard it. Add 1/4 cup of warm, filtered water (60g) stirring, then mix in 1/2 cup of unbleached, all-purpose flour (60g). I find it's easier to mix if you add the water first. Watch for signs of activity – larger bubbles and a hungry starter that's thinner in texture.
- Day 4: Your starter might have a strong smell when you open the container to feed it. That's all normal. Remove 1/4 cup of starter (60 g) and discard it. Add 1/4 cup of warm, filtered water (60g) stirring, then mix in 1/2 cup of unbleached, all-purpose flour (60 g).
- Day 5: Remove 1/4 cup of starter (60 g) to discard (see below). Add 1/4 cup of warm, filtered water (60g) stirring, then mix in 1/2 cup of unbleached, all-purpose flour (60 g). Your starter will probably be very active and may be doubling in size within 4-6 hours of a feeding.
- Day 6: By now, your starter should resemble a sponge 12 hours after feeding. It should be doubling in size 4-6 hours after feeding. If not, see my troubleshooting tips. Feed starter normally: remove 1/4 cup of starter (60 g) as the discard (use or toss), and add 1/4 cup of warm, filtered water (60g) stirring, then mix in 1/2 cup of unbleached, all-purpose flour (60 g).
- Day 7 and beyond: If your starter is fully active, has been doubling in size within 4-6 hours after feeding, it's ready! If not, keep feeding it for a few more days, following the same schedule.If your sourdough starter is very active and doubles in size within 6 hours you can use today's discard in a low-rise recipe like or homemade tortillas. Wait until day 10 and beyond to bake high rise recipes like a loaf of traditional sourdough bread or soft sourdough sandwich bread. To use it for baking, feed it as usual 12 hours beforehand: remove 1/4 cup of starter (60 g) and set aside for baking, and add 1/4 cup of warm, filtered water (60g) stirring, then mix in 1/2 cup of unbleached, all-purpose flour (60 g).
Notes
- When it comes to most sourdough recipes, use unbleached flour. The bleaching process strips the natural coating of wild yeast on the grain. A sourdough starter thrives on friendly bacteria in the wild yeast.
- If you use organic flour and your starter looks thick and has less bubbly activity, switch to non-organic flour for several feedings.
- Do not keep your starter in a dark or overly warm place for longer than 12 hours. This includes a cabinet, microwave, or an oven with the light turned on. Like living organisms, sourdough starter needs light and air to thrive.
- Add your water before the flour during feedings to make it easier to stir.
- Just after feeding a sourdough starter, the contents will be at their lowest point. Use an erasable marker to note the level of the contents, or mark the level with a rubber band around the jar.
Set a timer for 4 hours. How much has your starter risen? Has It doubled? If not, set a timer for 2 more hours. This is the best way to see how much your starter is rising and falling. - To maintain your starter, feed it regularly. Discard (or use) 1/4 cup (60g) of starter, then add 1/4 cup (60g) water, and 1/2 cup (60g) all-purpose flour to feed it.
- For weekly or less frequent use, keep your sourdough starter in the refrigerator. Take it out 12 hours before baking. Depending on how much starter you will need for the recipe, discard (or save for later) half and feed your starter.
- For daily use, keep your sourdough starter on the counter and feed it once a day. Use it for baking 8-12 hours after feeding.
- If you use organic flour and your starter looks thick and has less bubbly activity, switch to non-organic flour for several feedings.
- Cooler indoor temperatures can make it difficult for starters to thrive. We found an inexpensive, handy solution! It’s a low-wattage heating wrap around the storage jar to keep it at the optimal temperature.
- To keep your starter healthy and active, using a proper container is important. A glass container is ideal. Don’t store your sourdough starter in plastic or metal containers.

 Previous
Karin says
Hi,
Ive been using, your recipe for about six months now. I think Im doing great at least everyone is telling me that it tastes great. But I’m from San Francisco and I know what sour dough tastes like. Mine does not have the flavor of sour dough. I read somewhere in your comments that if I add citric acid to your recipe it would taste more like sour dough. But I can’t find it now. Where do I find this statement and how much would I add and when?
Thank You for the help
Karin
Gianne - TFN Team Member says
There are a few ways to make your starter more sour. You can mix in hooch rather than discard it or go a little longer in between feedings to increase the sour flavor.
Taylor B says
Hi there! I started my starter with whole wheat flour like it stated but I am using the King Arthur organic on day 3 when I started to feed it I fed it unbleached all purpose, now it’s starting to look almost watery? There is a lot of moisture on top. It started off great day 1 and 2. It was already rising and bubbling a lot on day 2. I am wondering if I messed it up switching but I thought that’s what I was supposed to do was start with whole wheat day 1… and then switch to normal all purpose. Do I need to start over and use just all whole wheat or all all purpose? Thank you!
Renae says
There can be what I call a “stall” period in the first 3-4 days. I hope you didn’t give up. I have made this starter recipe using all unbleached flour, whole wheat and rye the first day, then successfully switched many times. If you checkout my profile page on Instagram, there’s day by day videos where I show the whole process: https://www.instagram.com/thefeatherednester/ under “starter” and “starter 101” as well as “sourdough FAQs” where I answer questions.
Angie Newell says
Just starting a new starter will post results in the future. Thanks
Cindy Blake says
Thank you for such clear and concise instructions. My sourdough starter is doing great and I have already baked the Sourdough Sandwich Bread with great success! It’s delicious and will be my go to bread from now on. I have also made the hamburger buns and conjured up my own recipe for cinnamon raisin bread, using the sourdough sandwich bread as my base. All of them turned out great! My only problem now is… How do I keep from eating all of this delicious bread?🤣
Renae says
I’m sorry I can’t help you out there! But, thanks so much for your feedback!
Erika C Strain says
Hi there! Do you put a lid on the jar for the whole process? Cheesecloth instead? Unclear on that…
Gianne - TFN Team Member says
I use weck jar and I add the lid that’s not air tight. Check my Instagram highlight stories with the title “starter”.