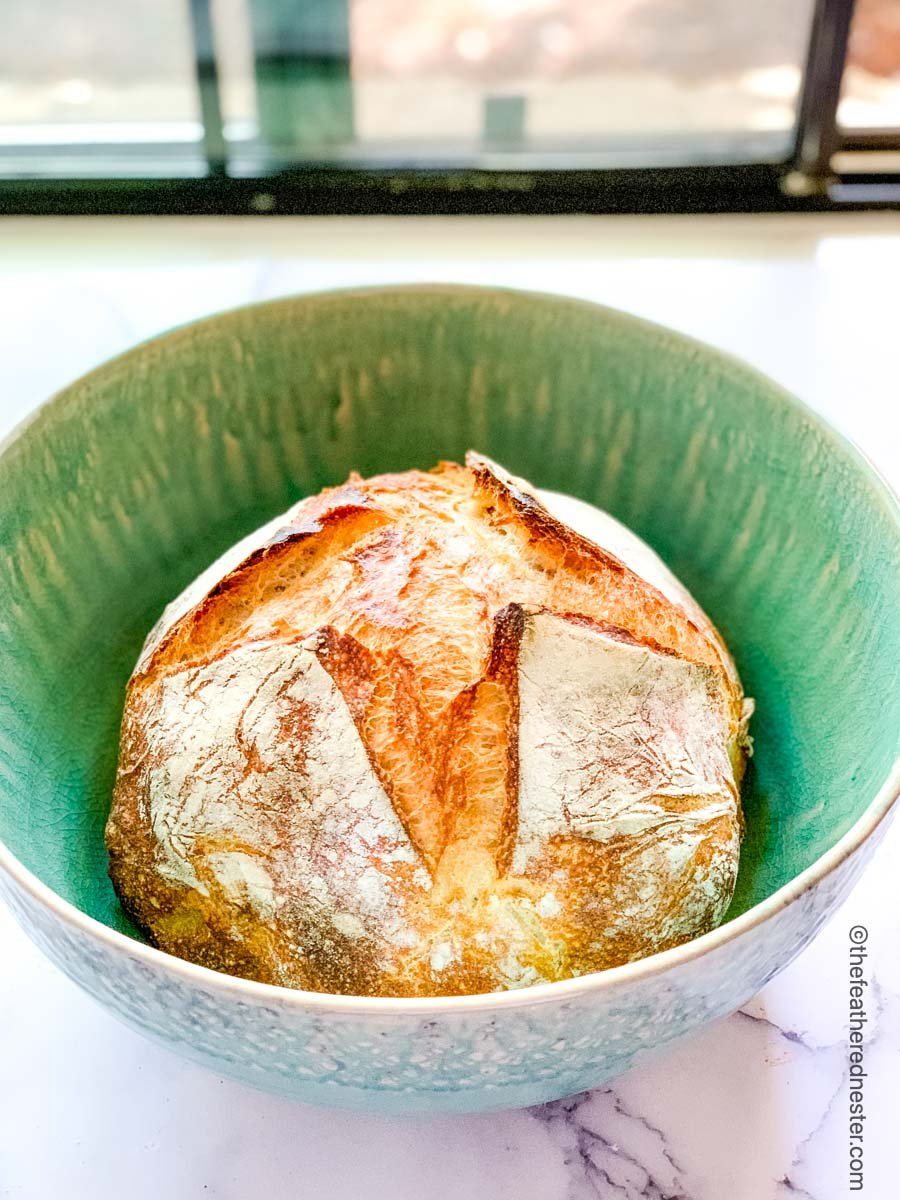
Whether you’re just starting out with sourdough or you’ve been making it for years, you will love this easy overnight sourdough bread! This easy no knead sourdough bread recipe uses simple stretches instead of kneading. And, our step-by-step instructions make it perfect for beginners.
Content Covered Here
Why We Love This Recipe
- No kneading necessary!
Unlike many other recipes, this easy no-knead sourdough bread recipe does not involve kneading. Instead, it uses an easy folding technique that stretches the gluten. - It rises overnight and is ready to bake the next morning.
Sourdough is made with a naturally fermented wild yeast and needs a longer rise time than doughs made with commercial yeast. This fermentation allows the natural yeast the time needed to raise the dough.
An 8-10 hour rise is common for this overnight fermented or “bulk” rise.
So, prepare everything in the evening and let the dough rise overnight. - It’s an ideal way to use up your starter discard.
Our recipe uses a discard, so it’s perfect to make when it’s time to feed your starter. Unlike other recipes that use active starters at their peak, our easy sourdough bread recipe uses one that was fed 12-24 hours prior.
Ingredients and Substitutions
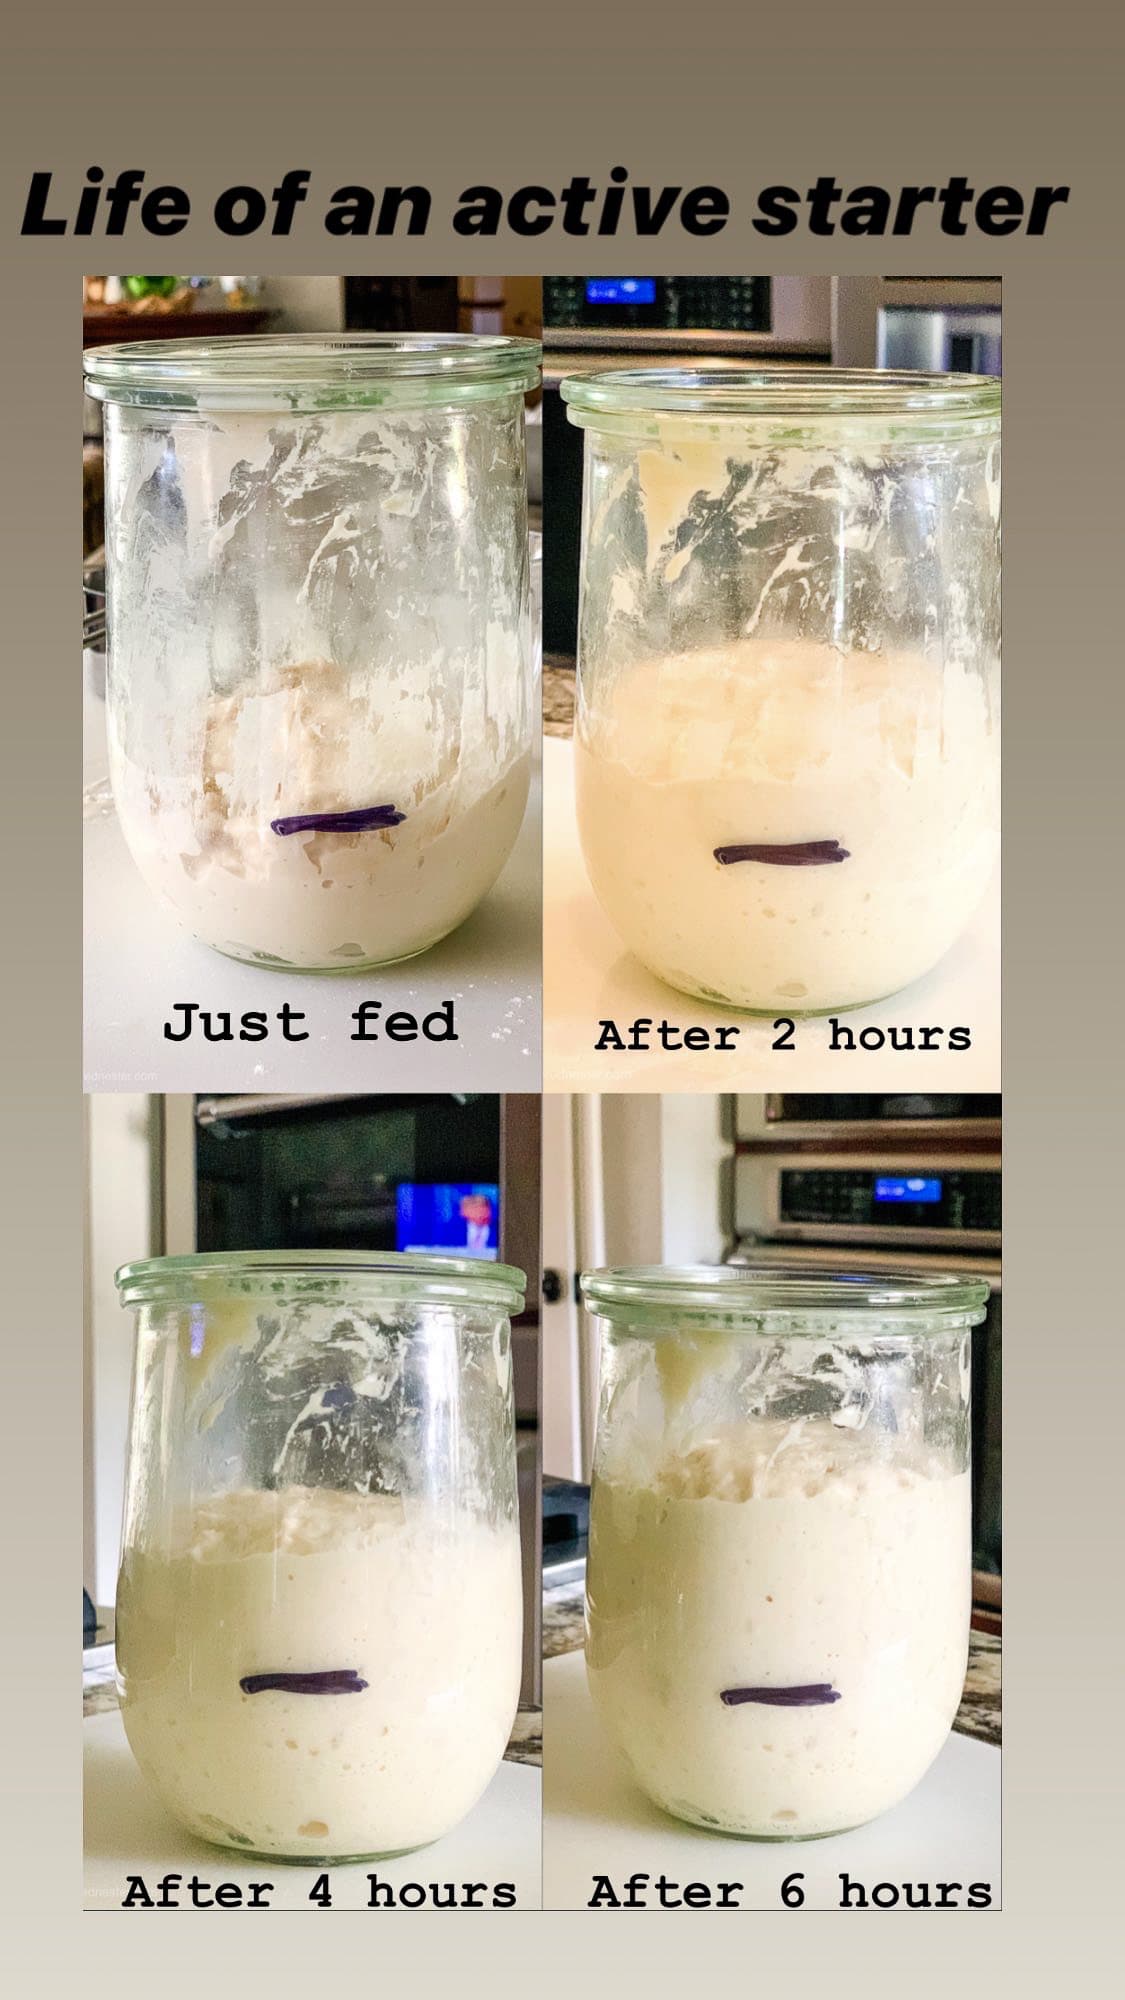
- Sourdough starter – an active, bubbly starter fed at least 12 to 24 hours prior. When we say active and bubbly, we mean a mature starter that is at least a week old and always doubles in size within 4-6 hours of feeding.
- Filtered water – or bottled water. Most tap water contains chlorine which can inhibit fermentation. If you must use tap water, leave the measuring cup out for at least 24 hours to let the chlorine dissipate.
- Bread Flour – or all purpose flour. I recommend using organic, unbleached flour.
- Fine salt – use fine table salt or sea salt. If you use Kosher salt, use about 25% more as Kosher salt is less “salty.”
If you need a starter, then our easy sourdough starter is literally fail-proof thanks to our pro tips. And it has step-by-step instructions so it’s perfect for a beginner.
If you don’t have a sourdough starter, you can make this easy sandwich bread or wheat sandwich bread that uses commercial yeast instead.
The fermentation process for our no knead sourdough bread creates gut-healthy enzymes and acids. Most yeast breads do not provide these healthy enzymes and acids.
Tools We Used For This Recipe
STAUB cast iron deep Dutch oven 5-Qt
Buy Now → Buy Now →
 How to Make This Easy Sourdough Bread Recipe
- Feed your starter at least 12-24 hours before starting the recipe.
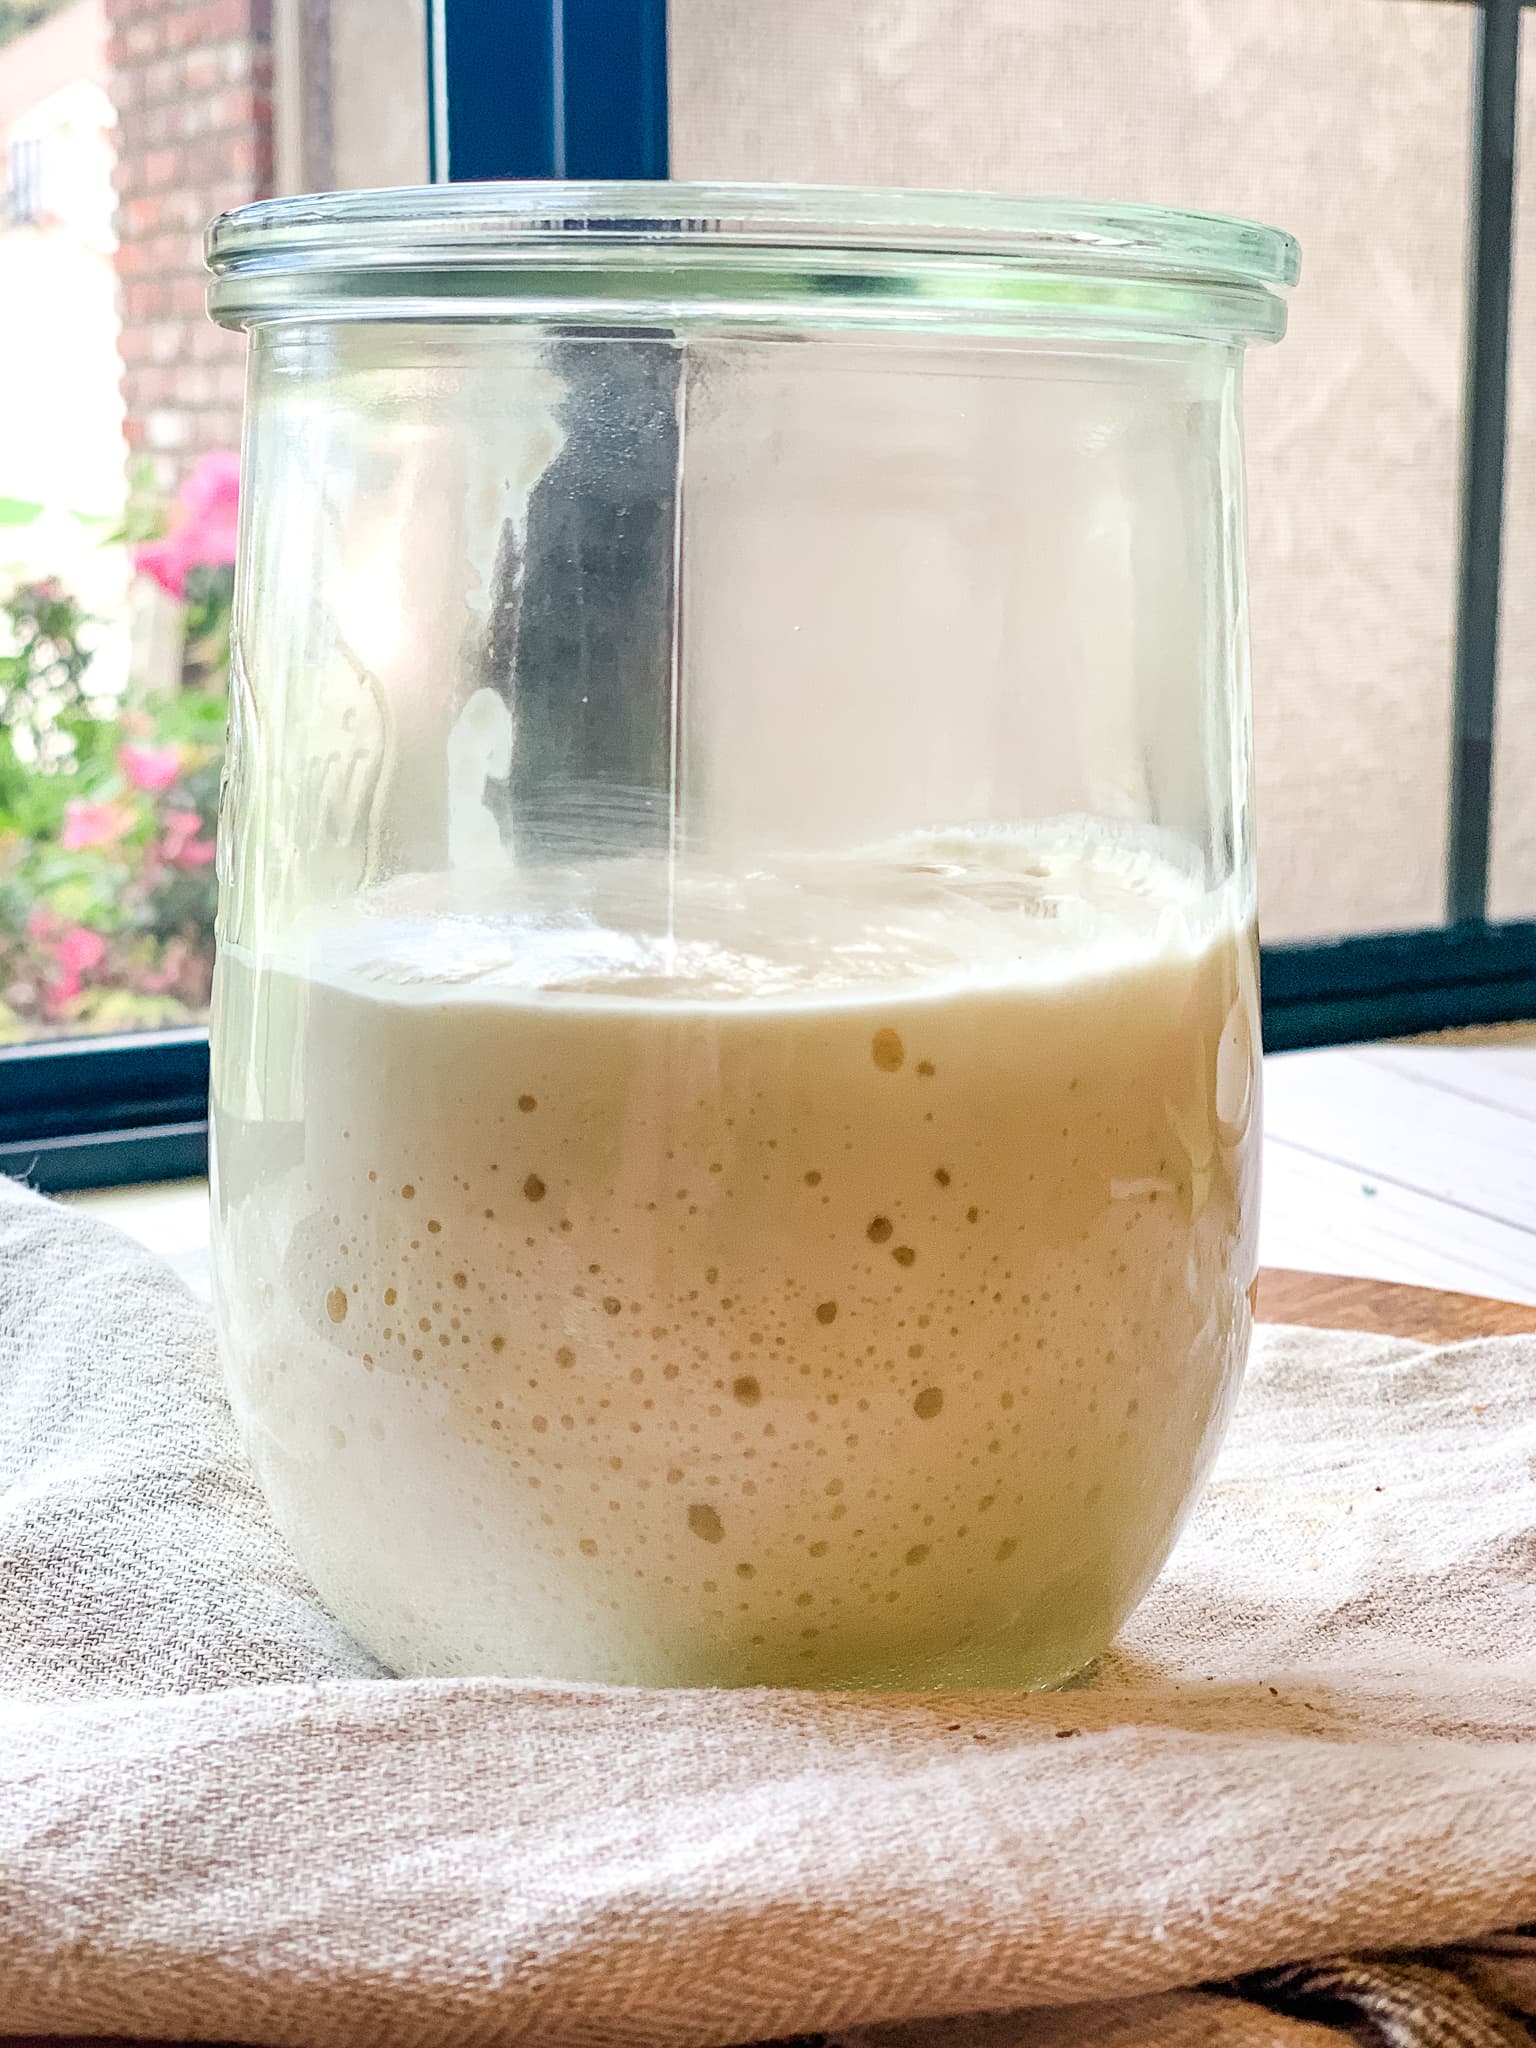
You want a hungry starter that takes in the flour and water for energy and uses that to raise the dough.
Below is an example of the rise and activity after a feeding:
🎯 TFN Pro Tip
Refrigerate your starter if you don’t bake often. See our post on How to store sourdough bread.
- Mix the dough.
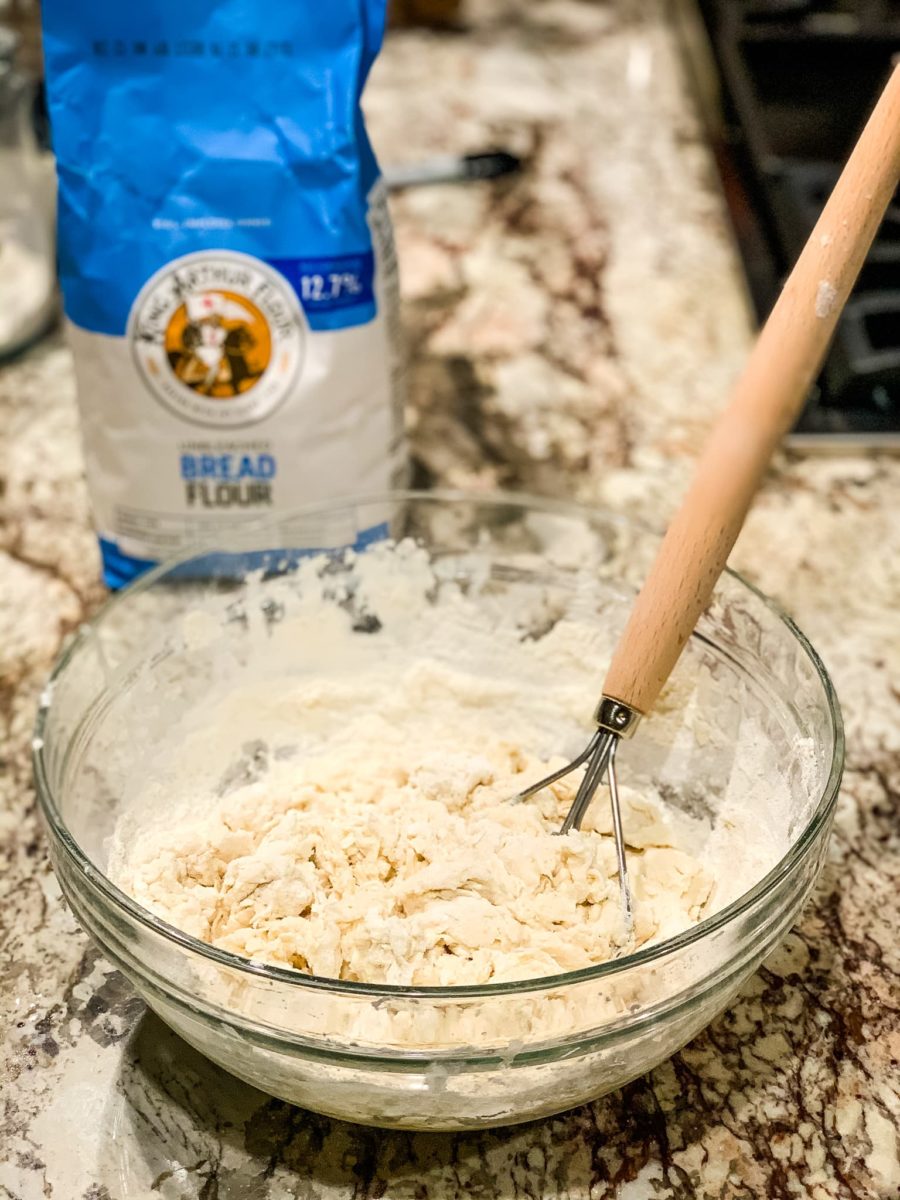
Stir in the starter, flour, water, and salt with a wooden spoon or a dough whisk until a thick, shaggy dough forms.
Then, cover the dough bowl with a clean, damp kitchen towel and let it rest for 30 minutes or so.
- Stretch the dough.
As mentioned earlier, we have a no-knead method for making overnight sourdough bread.
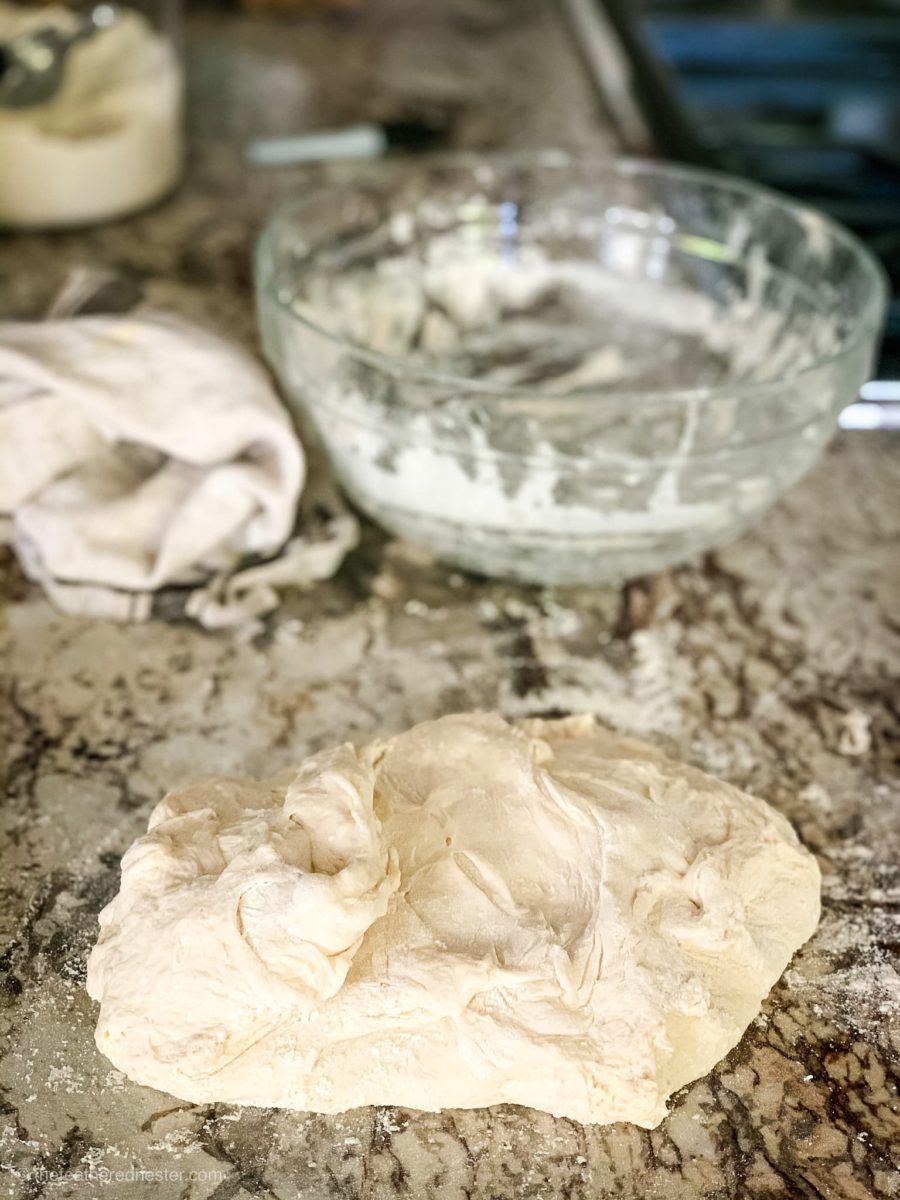
Simply pull up a section of the dough, stretch it out, push it into the back center of the dough, then turn the dough 1/4 a turn (see our video below in the recipe card).
Continue to pull, stretch, push, and rotate clockwise until you’ve gone in a circle.
Love to serve sourdough for breakfast? Here are some sourdough bread breakfast ideas for you. Try making a sourdough grilled cheese sandwich or lemon blueberry sourdough scones.
- Let the dough rise overnight to ferment it.
Keep the dough in a warm area for the overnight rise. Depending on the ambient temperature, this takes 8-10 hours, and sometimes even longer. Ideally, this should be in a room about 75° Fahrenheit.
🎯 TFN Pro Tip
Do not refrigerate the dough! Our recipe does not use a refrigerated rise. If it gets too cold, the fermented yeast will not rise overnight.
The Next Morning
- In the morning, lightly flour your countertop. Remove the dough from the bowl and shape it by stretching and folding it again. Let the dough rest for 10 – 15 minutes.
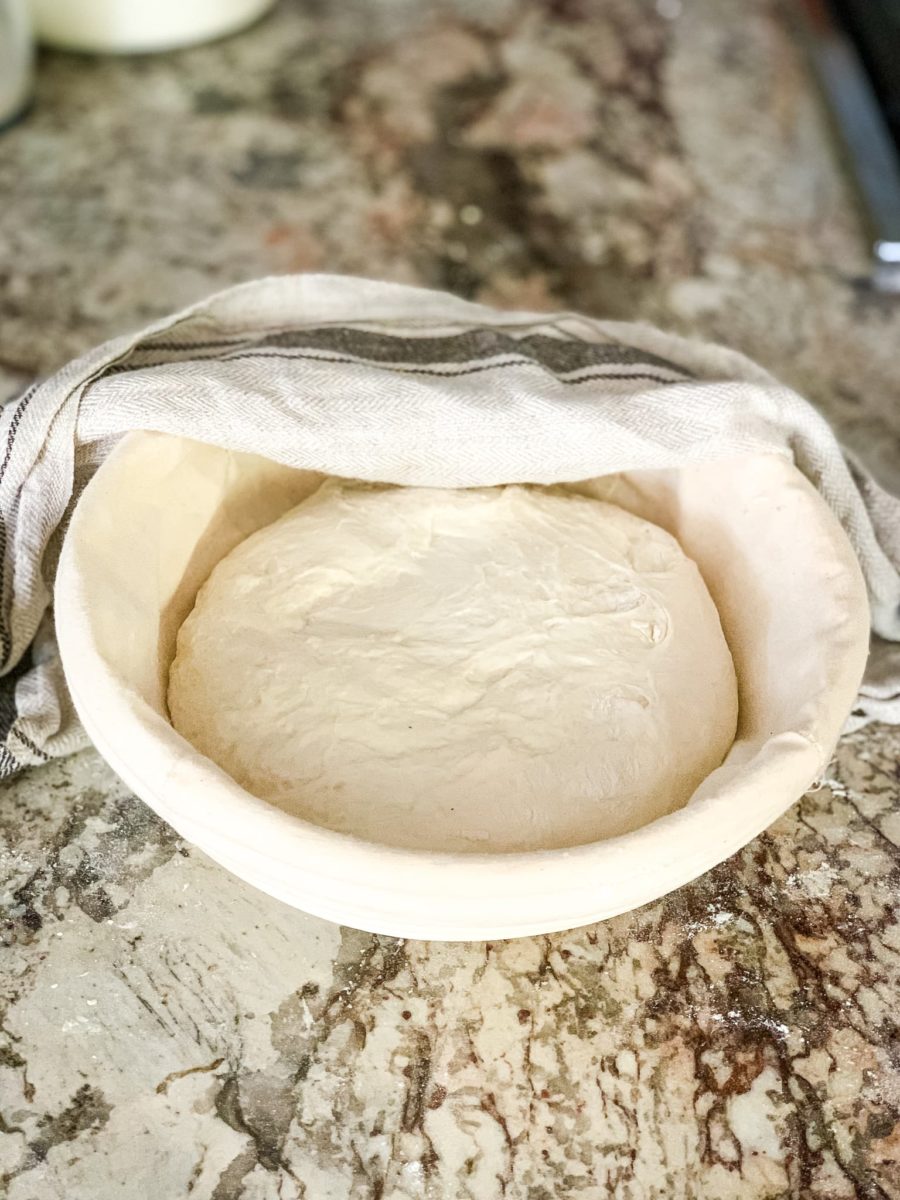
Line a medium-sized bowl with a towel, use a banneton bowl with a linen cover, as shown above, and dust heavily with flour. Or line a large bowl with a clean kitchen towel and dust it heavily with flour.
Let dough rise in it for 45-60 minutes.
How to Bake Sourdough Bread
Preheat your oven to 450ºF.
- Cover the dough bowl with a long piece of parchment paper, and turn it over onto the countertop (see the video below in the recipe card to see how this is done).
Next, score the top of the dough with a sharp, serrated knife or lame.
Use the parchment paper to lower your dough into the Dutch oven, as shown below.
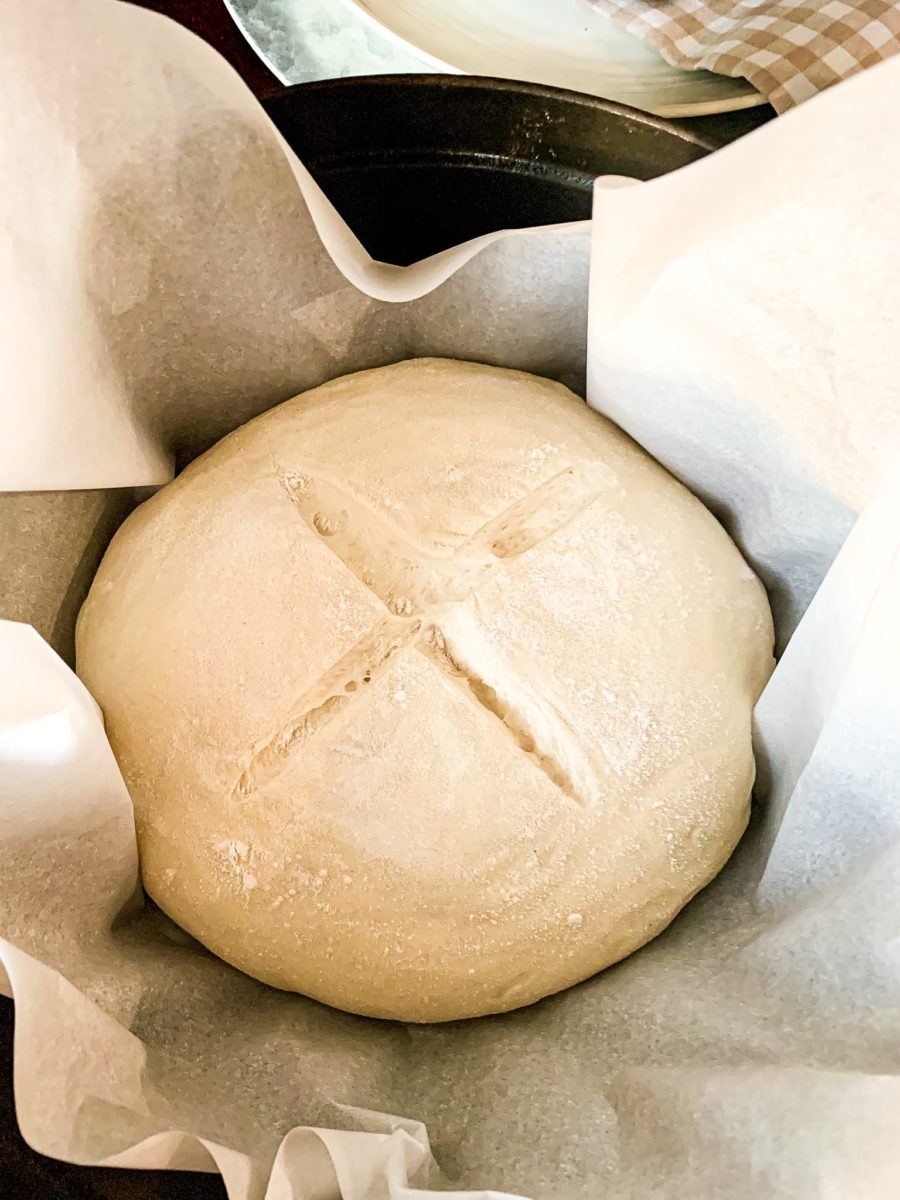
🎯 TFN Pro Tip
If you have a black-bottomed Dutch oven, I recommend using a round silicone sheet to keep the bottom of the loaf from browning too much. See below under “Troubleshooting Common Issues” for more information.
- Add the lid to the Dutch oven and bake covered for 30 minutes.
Then, remove the lid and bake uncovered for 20 minutes.
After that, carefully remove it from the pot and bake it directly on the oven rack for 10 minutes, to crisp the exterior.
🎯 TFN Pro Tip
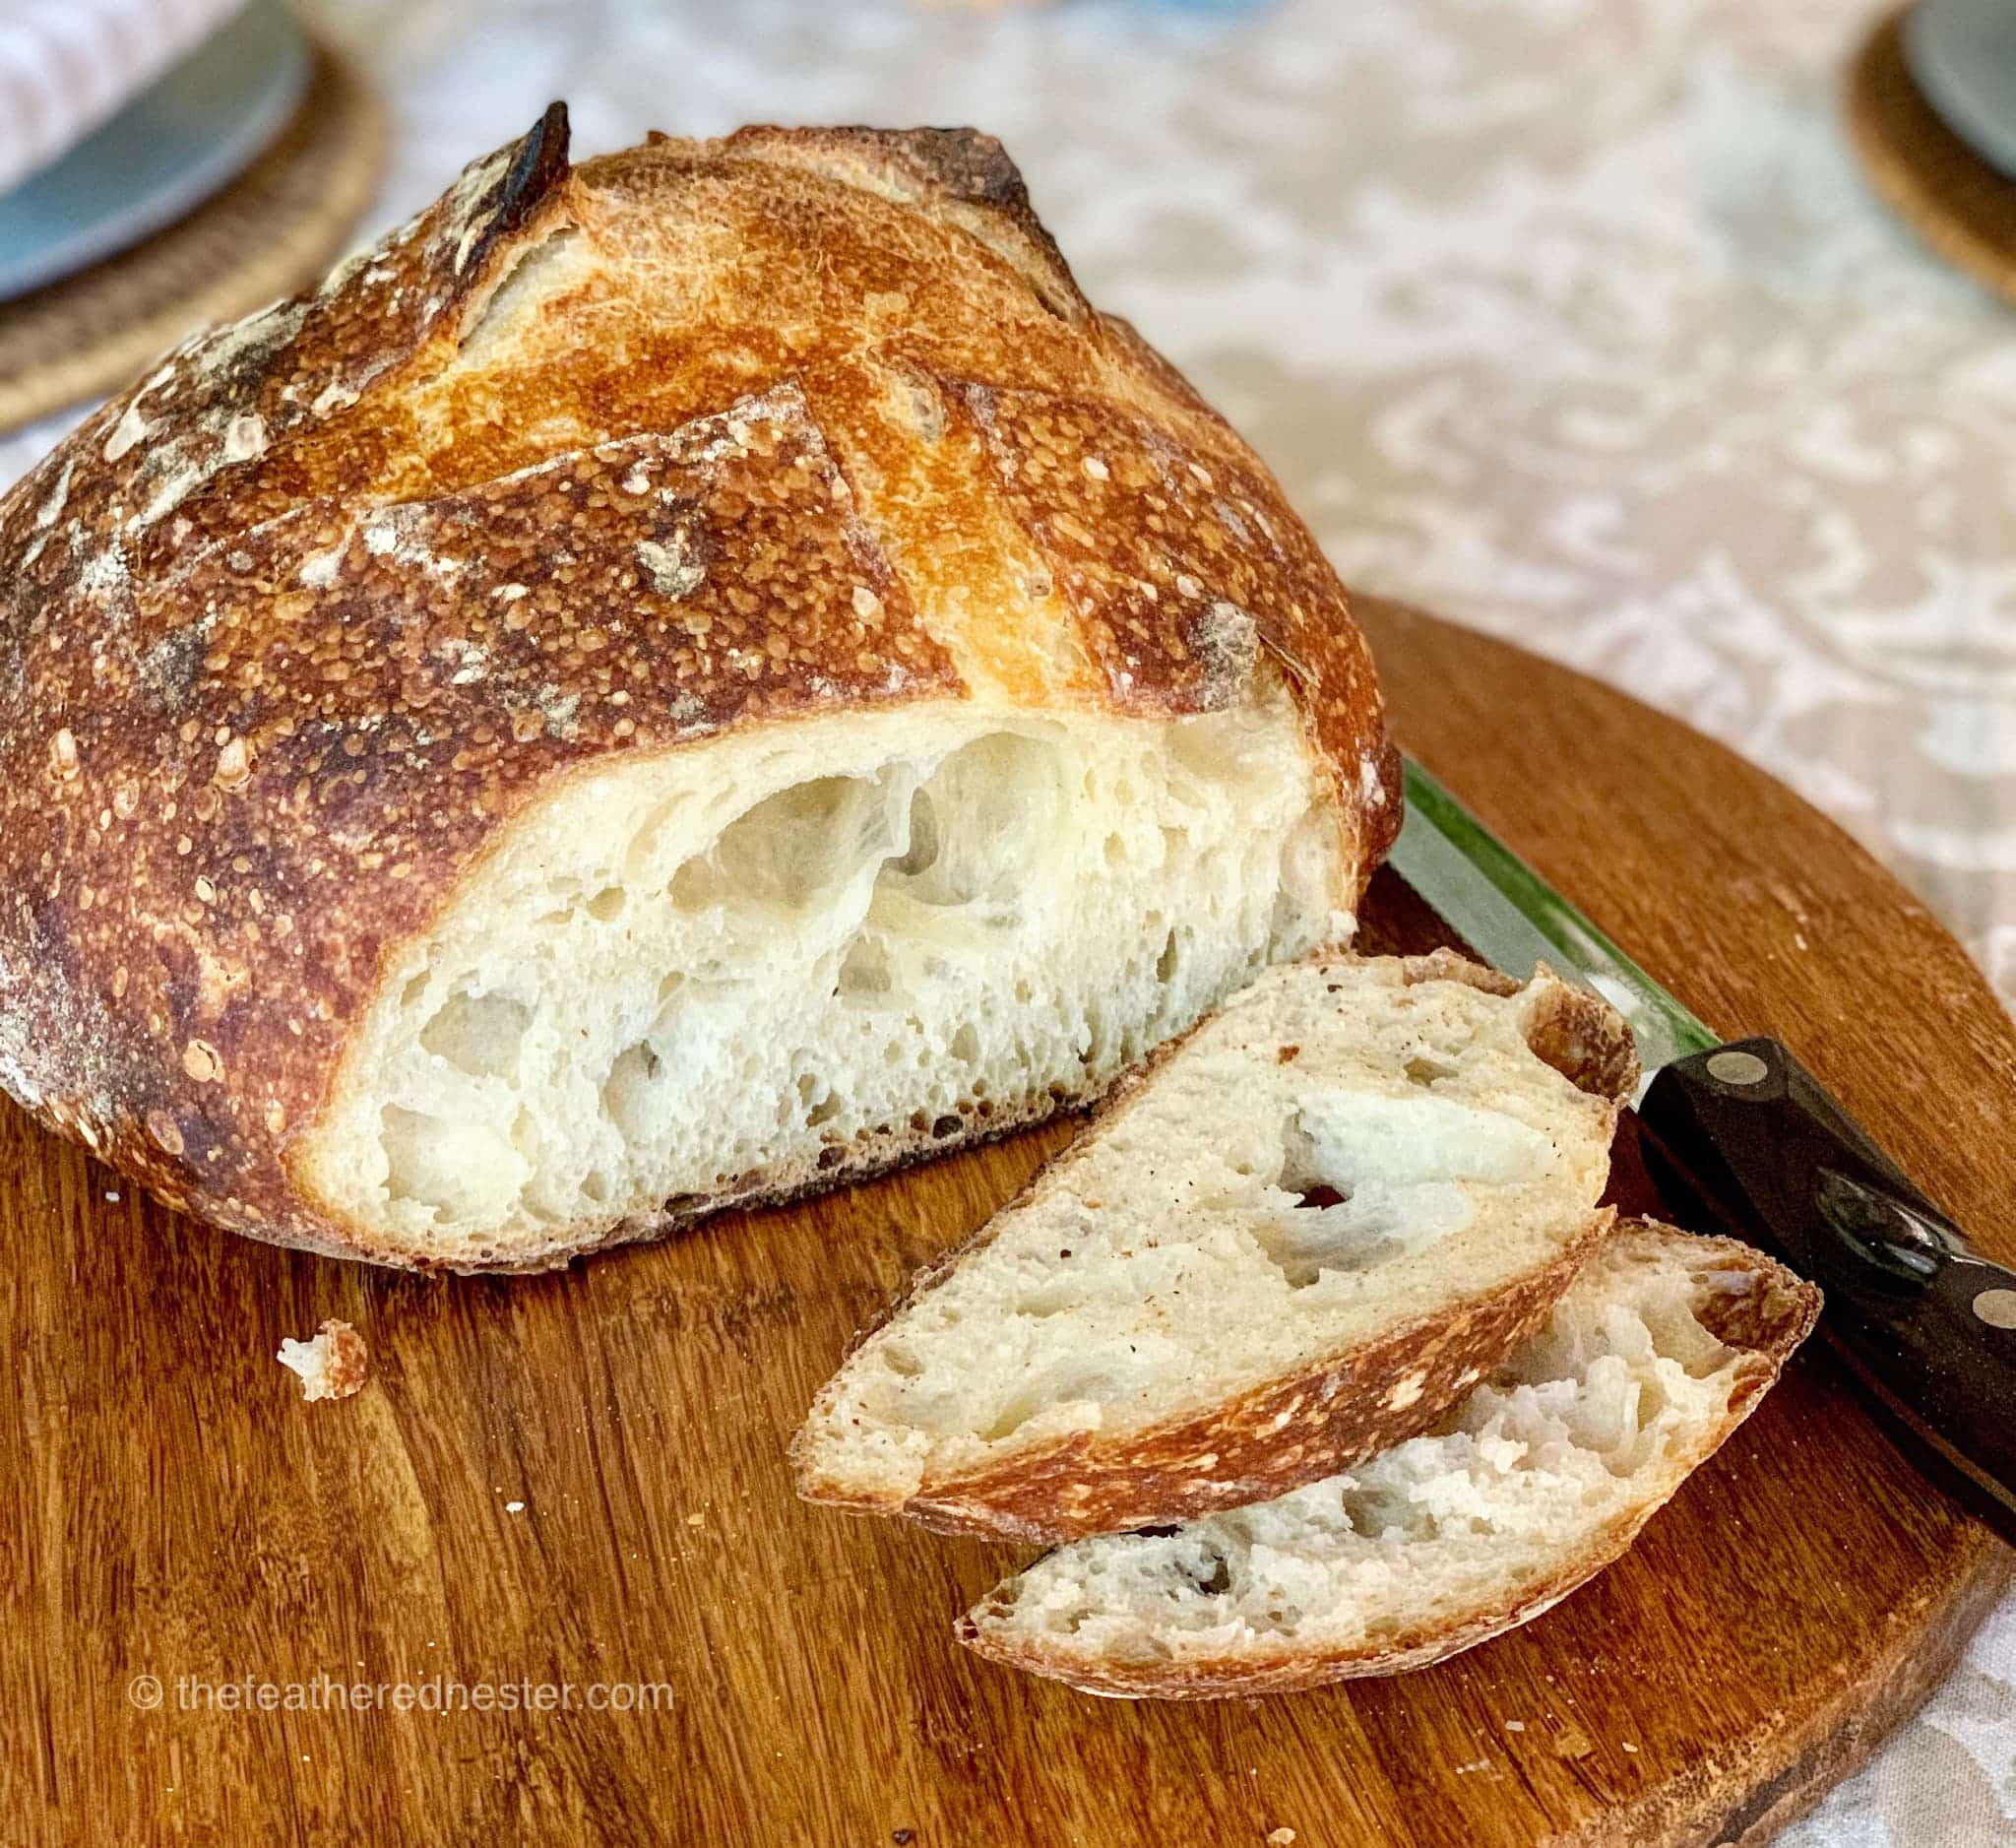
After baking, let your loaf cool for at least one hour before cutting it. Otherwise, the loaf could deflate.
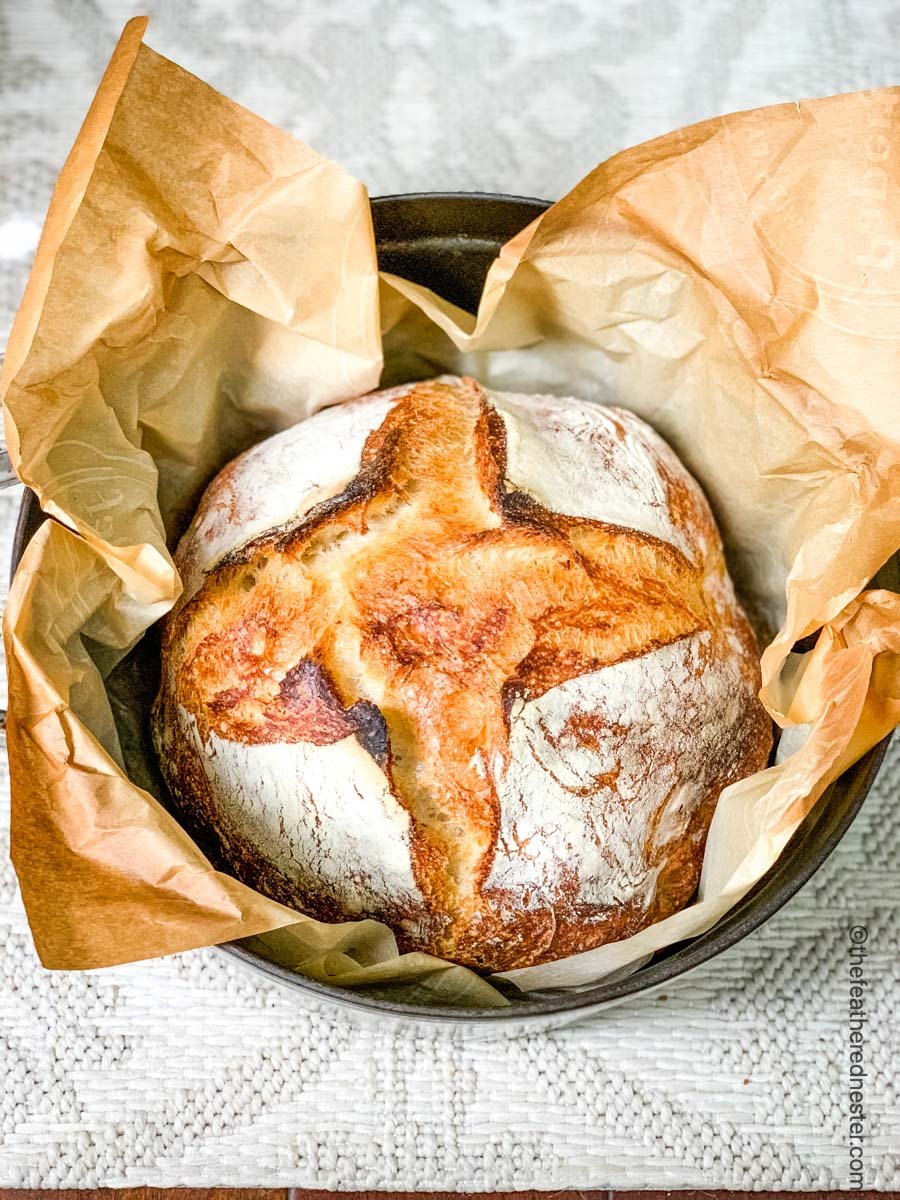
See our article on How to Store Sourdough Bread for the best ways to keep your bread fresh.
Troubleshooting Common Issues
My sourdough bread did not double in size overnight.
If your starter is active (it doubles in size 4-6 hours after feeding) and was fed within 12-24 hours of starting the recipe, your dough might not be warm enough during the overnight rise.
Find a warm place (ideally 75º- 80º F) like a cool oven with the light on, a warm window, or above the refrigerator or dryer, and let it rise for 2 hours. Then continue with the recipe.
What should I do if my dough is too sticky?
- Before the overnight rise: Sprinkle 1-2 tablespoons of flour on top of the dough and flour your hands before stretching.
- After the overnight rise: The dough has likely not fermented enough. It should have doubled in size and show bubbles on the top and bottom. If not, see the notes above to let it rise for 1-2 more hours.
How can I keep the bottom of my bread from turning so brown?
An easy fix is to add a layer of cornmeal to the bottom of the Dutch oven and place the parchment paper on top of that. Or, use a 9″ round Silpat silicone sheet, as I do. I place it in the bottom of my Staub cast-iron Dutch oven.
Dutch ovens that are darker in color tend to brown the bottom of the loaf more.
Get more tips in our Troubleshooting Sourdough Starter article.
Recipe FAQs
Yes, a heavy oven-safe pot with a lid will work. Use one that is about 9″ to 10″ in diameter and 6″ high. Just be sure your pot and lid are rated for oven use of at least 450ºF.
Don’t use wax paper. The wax will melt in the oven at this high temperature and you’ll have a mess on your hands. Instead, use a long sheet of aluminum foil that has been sprayed with cooking oil.
Yes, our Dutch oven sourdough bread recipe uses all-purpose flour. Just let it rise overnight as in this recipe.
If you’re unsure if the bread is fully baked, the internal temperature should be around 195º – 200ºF.
You can easily soften stale bread in the microwave. Cover it with a damp paper towel and microwave it at 50% power for 30 – 60 seconds. However, I like using my leftover, hardened bread for sourdough stuffing or air fryer croutons.
Other Sourdough Recipes to Consider…
- Sourdough Discard Blueberry Scones
- Chocolate Chip Bread Pudding
- Chocolate Sourdough Bread
- Sourdough Bread Bowl
If you tried this overnight sourdough bread recipe or any other recipe on my website, please leave a 🌟 star rating and let me know how it went in the 📝 comments below. Thanks for visiting!
Easy Overnight Sourdough Bread
Equipment
- dough whisk - optional
- banneton proofing bowl - optional
- warming mat - (I recommend this if your room is cooler than 75ºF)
Ingredients
- ¼ cup (60 grams) sourdough starter (fed within 12-24 hours)
- 1 ⅔ cups (350 grams) filtered or spring water (about 100ºF or baby bottle warm)
- 4 ¼ cups (500 grams) bread flour (can substitute with all purpose flour)
- 2 teaspoons (9 grams) fine salt (I prefer sea salt)
Instructions
- In a large bowl, add the sourdough starter. Add in water and use a dough whisk or a wooden spoon to stir until dissolved. Stir in the flour and salt until a shaggy looking dough forms. Finish mixing dough by hand in the bowl until all the flour has been absorbed. Cover the bowl with a clean, damp kitchen towel and let the dough rest for 30-45 minutes.
- Lightly flour your countertop. Pull the dough from the bowl with a dough scraper or by hand onto the countertop. Stretch and fold the dough for 15 seconds (see video below): grab the edge of the dough and bring it straight up it about 4 inches and tuck it into the center of the dough. Then, turn the dough 1/4 a turn. Continue this process until the dough has come full circle and it has tightened. Return the dough to the bowl, cover with a damp towel (or plastic wrap if you live in a dry area). Let rise overnight for at least 10 hours at room temperature or a warm location (72º and 80ºF degrees to ferment). Do not refrigerate the dough. The dough should double in size and look bubbly on the surface and under the dough when fermented.
- In the morning, lightly flour your counter-top. Pull the dough from the bowl and shape the dough by stretching and folding it again. Let the dough rest 10 – 15 minutes. Line a medium sized bowl with a towel, or use a banneton bowl with linen cover (see photos), and dust heavily with flour. Let dough rise in it for 45-60 minutes.
- Preheat your oven to 450ºF. Do not add your Dutch oven or baking pot, it does not get preheated. Cover the dough bowl with a long piece of parchment paper, about 20 inches long, and turn it over onto the countertop (see video). Slash the top of the loaf with a lame or sharp serrated knife. Gently lower the parchment paper dough into a heavy pot with a tight-fitting lid. NOTE: If using a pot with a dark interior cast iron pot, I recommend insulating the bottom with a round silicone sheet underneath the parchment paper. You can also place the Dutch Oven pot on a baking sheet. This helps the bottom crust of the bread from getting too dark in color.
- Place the covered pot in the the oven and bake the bread covered for 30 minutes. Remove the lid and bake 20 minutes. Using oven mitts, carefully remove the bread from the pot. Bake it directly on the oven rack for 5-10 minutes to crisp the exterior (if needed). To ensure your bread is cooked through you can check the internal temperature. It should be 195ºF to 205ºF.
Video

Notes
- If your starter is active (it doubles in size 4-6 hours after feeding) and was fed within 12-24 hours of starting the recipe, your sourdough might not be warm enough during the overnight rise.
- Find a warm place (ideally 75º- 80º F) like a cool oven with the light on, a warm window, or above the refrigerator or dryer to set the bread for 2 hours. Then continue with the recipe.
- Use a 9″ round Silpat silicone sheet, as I do. I place it in the bottom of my Staub cast-iron Dutch oven.
- Dutch ovens that are darker in color tend to brown the bottom of the bread more.








Shirley says
Brilliant, think I’ve finally cracked how to make Sourdough Bread
Haley says
Hello, can I add anything to this recipe such as jalepeno and cheddar cheese chunks? If so, at what point would I add those ingredients?
Gianne - TFN Team Member says
Hello, You might want to check Renae’s other recipe – https://thefeatherednester.com/jalapeno-cheddar-sourdough-bread/