
Enjoying warm sourdough bread bowls filled with creamy hot soup or award winning clam chowder recipe at a restaurant always feels like a cozy, comforting treat. But did you know you can easily make them at home? With our easy and reliable sourdough bread bowl recipe, you’ll get perfectly crusty, tender bowls ready to fill with your favorite soups. These homemade bread bowls are the perfect edible upgrade to any meal!
If you’ve ever thought that making a recipe for sourdough bread bowls at home was too complicated, we’re here to change your mind. This beginner-friendly process uses simple ingredients and sourdough starter to create four perfectly round loaves that bake up beautifully and hold up to thick, hearty soups and chowders.
The beauty of this sourdough bread bowl recipe is that it uses natural fermentation to develop deep flavor and a sturdy texture, ideal for holding hot soup without turning soggy. Once baked to a perfect golden crust, each bowl can be cut, hollowed out, and served alongside a salad, appetizer, or even as part of a soup and sandwich spread. If you’re looking for more ways to use your starter, this is one of our favorite sourdough bread recipes yet!
Content Covered Here
Why We Love This Recipe for Sourdough Bread Bowls
- They’re so impressive!
Serving the edible bowls to your guests is a major awe factor and they’ll want your easy sourdough recipe. - They can be used for more than just serving soup.
The most common use as an edible soup bowl, but you can use them to serve party dips, too! Some great options are a pretzel cheese dip recipe, dip for peppers, and smoked Rotel dip. This crack chicken noodle soup is delicious served in a bread bowl! - They hold up well to hearty fall soups and stews.
The inner walls are sturdy enough to hold heavier dishes, like Crock Pot 15 bean soup or Instant Pot tortellini soup with sausage. Of course, you can eat away at them while you enjoy your meal, too. It’s a fun alternative to a side of bread!
Ingredient Notes and Substitutions

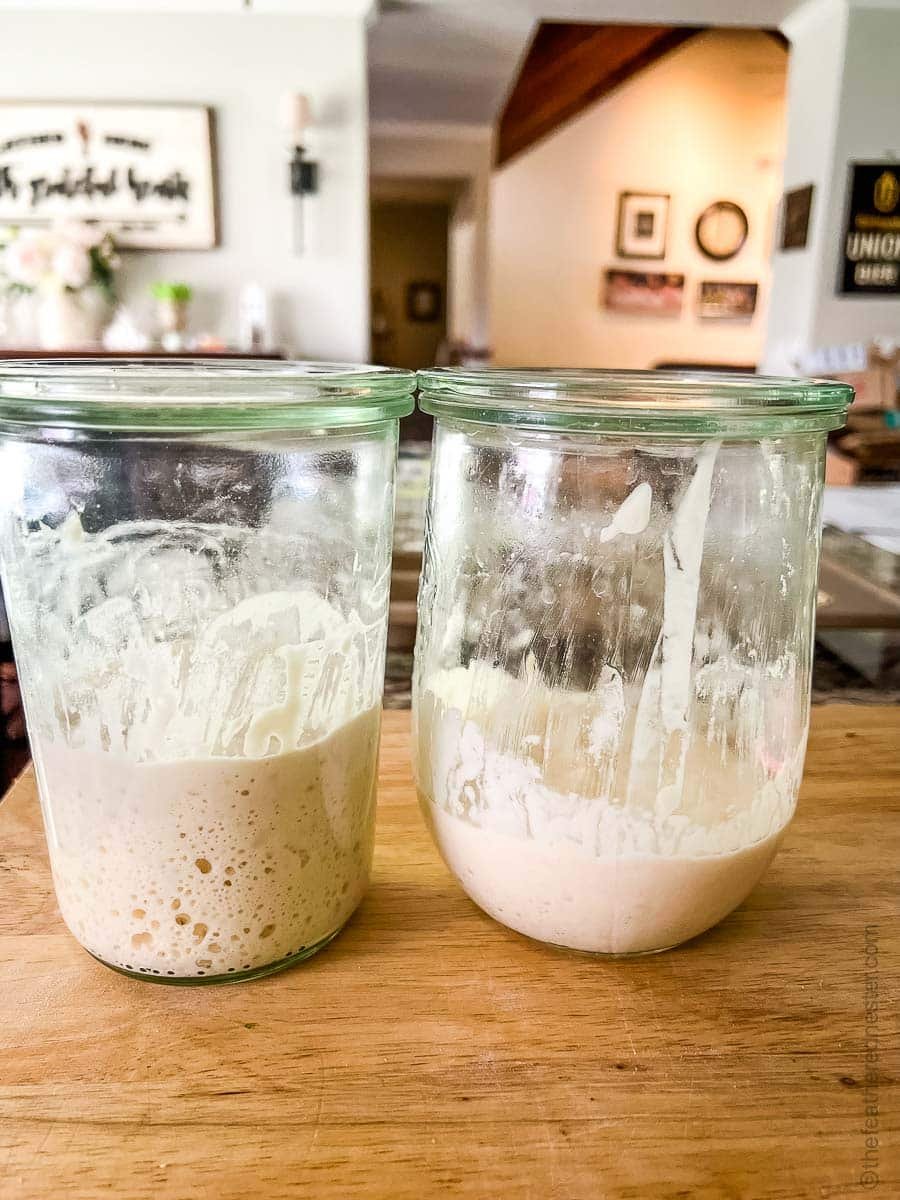
- Active Sourdough starter: fed 12-24 hours before starting the recipe. Check our best sourdough starter recipe to make your own starter at home.
When we say active, we mean a mature starter that is at least a week old and always doubles in size within 4-6 hours of feeding. It doesn’t mean you need to use it at the peak activity after a feeding. - Warm water: The water needs to be just the right temperature to make the starter work properly.
- Granulated sugar: We only use granulated cane sugar. Granulated sugar substitutes don’t always work, so we don’t recommend making any changes to the sweetener.
- Bread flour: There needs to be enough protein in the dough for it to hold up properly. As a result, you shouldn’t use regular all-purpose flour or another substitute.
Recipe Variations
- Whole wheat flour twist: Replace up to half the bread flour with whole wheat flour for a nuttier flavor and heartier texture.
- Cheddar crust: Before baking, sprinkle shredded cheddar cheese on top for a cheesy finish.
- Mini bread bowls: Divide the dough into 6 portions instead of 4 to make smaller servings—perfect for appetizers or dips.
- Seeded topping: Brush with egg wash and top with sesame or poppy seeds before baking for a bakery-style finish.
- Dutch oven crust boost: For extra crispy crust, bake the dough balls in a Dutch oven (one at a time) with the lid on for 20 minutes, then uncovered for another 10.
Equipment Used in This Recipe
- Baking sheet
- Large mixing bowl
- Dough whisk
- Wooden spoon
- Kitchen towel
- Bench scraper
- Non-stick cooking spray
- Parchment paper
- Oven rack
- Serrated knife
- Optional: Banneton basket (for shaping, if you prefer)
How to Make Sourdough Bread Bowl Recipe
- Be sure to use an active starter.
It’s important that the starter be recently fed. You’ll want to see lots of bubbly activity in order to make homemade sourdough bread bowls.
This requires feeding it no more than 12 to 24 hours beforehand.
- In a large mixing bowl, combine sourdough starter, warm water, and sugar. Stir with a dough whisk.
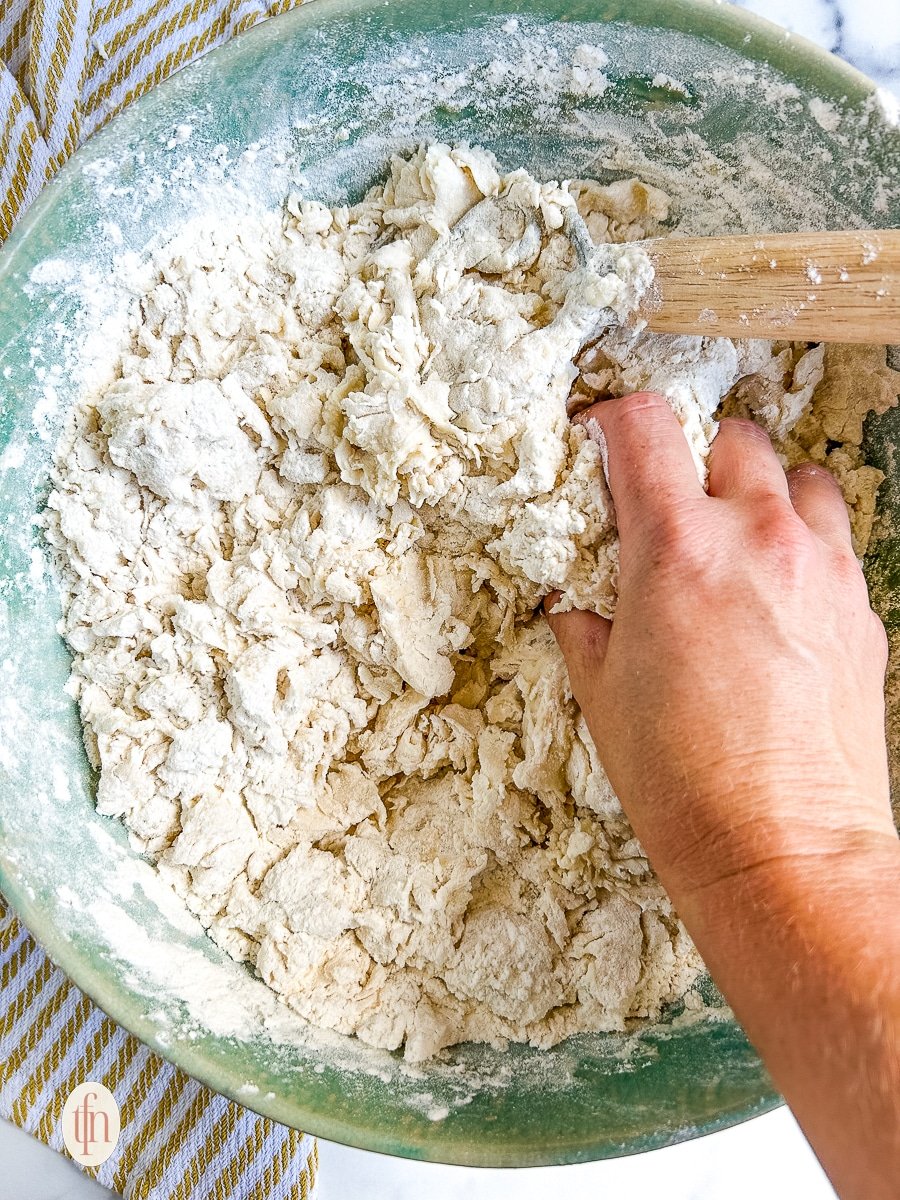
- Add bread flour, salt, and oil. Mix until a shaggy dough forms. Finish mixing by hand with your floured hands.
Don’t be afraid to get your hands dirty! The perfect dough for a sourdough bowl will be shaggy. This signifies that the mixture is complete, yet some lumps remain. It’s rough and messy, but it’s supposed to be!
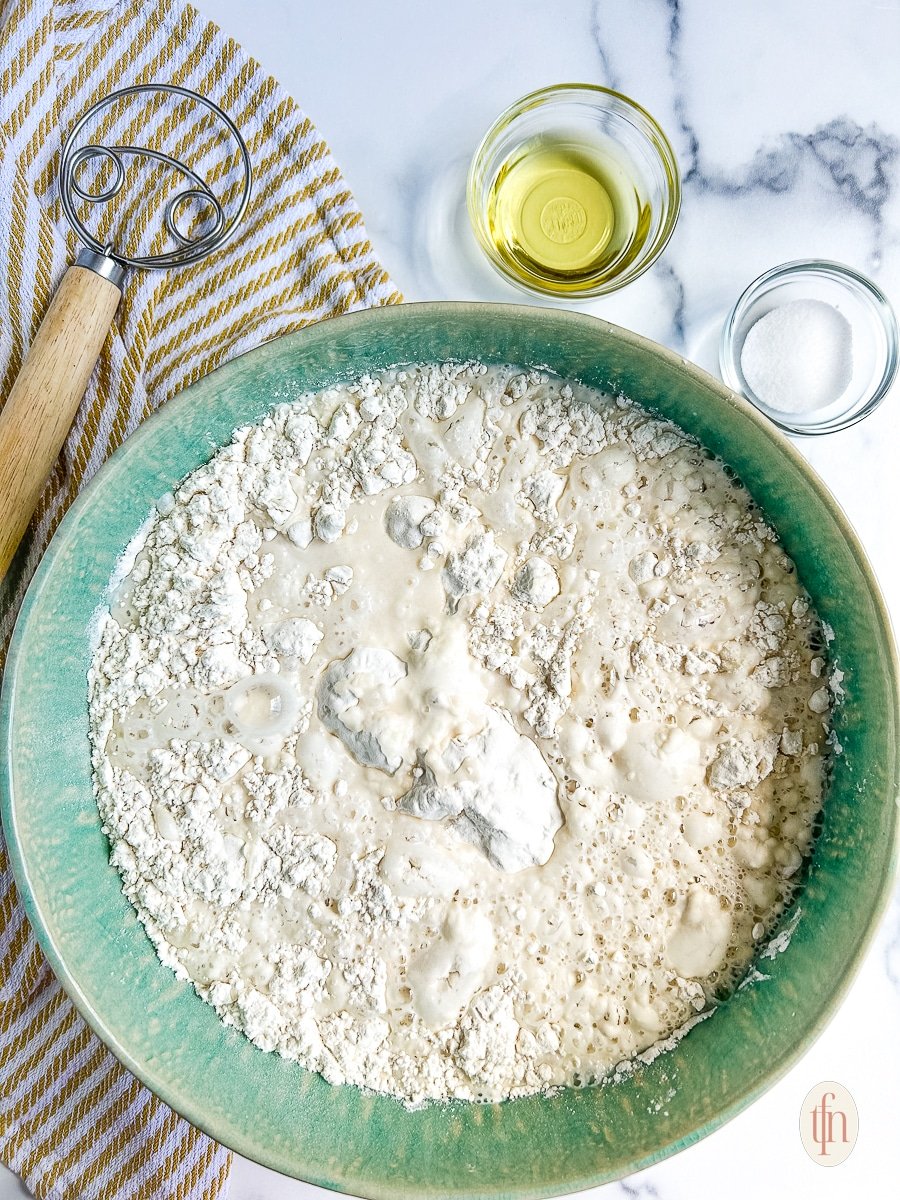
To prevent overmixing, finish mixing with your hands. Sure, it’s a little messy, but it’s the best way to incorporate the ingredients without mixing too much and risking dense, tough bread bowls.
- Cover with a damp kitchen towel and let rest 30–45 minutes.
Letting the dough rest is an important part of the recipe.
And you have to do it twice!
You first need to let it rest for 30 to 45 minutes after mixing the first time. This step is crucial for allowing the protein to relax. Rushing the process will make for a firm, almost stale-tasting crust.
Secondly, the dough needs to rise after kneading until it has at least doubled in size. This takes some time — 1 to 2 hours — but is, again, crucial to the recipe.

- Turn dough onto work surface and knead using the stretch-and-fold method until smooth.
It’s normal for the dough to be sticky. Be prepared for it to adhere to your hands, the counter, and other surfaces.
You’ll probably need to gently work the dough out of the bowl with your fingers. This is to be expected, so don’t worry that something went wrong during that first resting phase! Help keep the stickiness under control by coating your hands and work surface with a little bit of bread flour. - Stretch and fold – don’t knead. Take a look at the photos in this post to see the stretch and fold method in action!
After placing the dough on the counter, you’ll want to stretch it forward 4 inches or so before pushing it back down to the middle. Lift the dough, turn it clockwise, then stretch and fold it again.
Continue these steps until you’ve completed a full circle.
This method activates the gluten, which is important when shaping the dough for your sourdough bread bowl.

- Return to bowl, cover again, and let it rise at room temperature for 8+ hours (overnight is best).
- When doubled in size, turn out onto a lightly floured surface and dimple the dough to release air.

- Divide into 4 equal pieces using a bench scraper. Let rest 10 minutes.
When you’re ready to make your individual bowls, divide the dough into equal portions using a metal cutter or knife.
Then, roll the dough into balls and pinch off the bottom. - Shape into tight dough balls, place 2 per baking sheet lined with parchment, and cover with a towel.
- Let rise for 1–2 hours until doubled in size. Learn the essentials of proofing sourdough with our helpful tips to get that ideal texture and rise.
- Preheat oven to 350ºF and ensure your oven rack is centered.
- Bake both sheets together for 25 minutes until golden brown.
- Cool completely—at least 1 hour—before cutting.

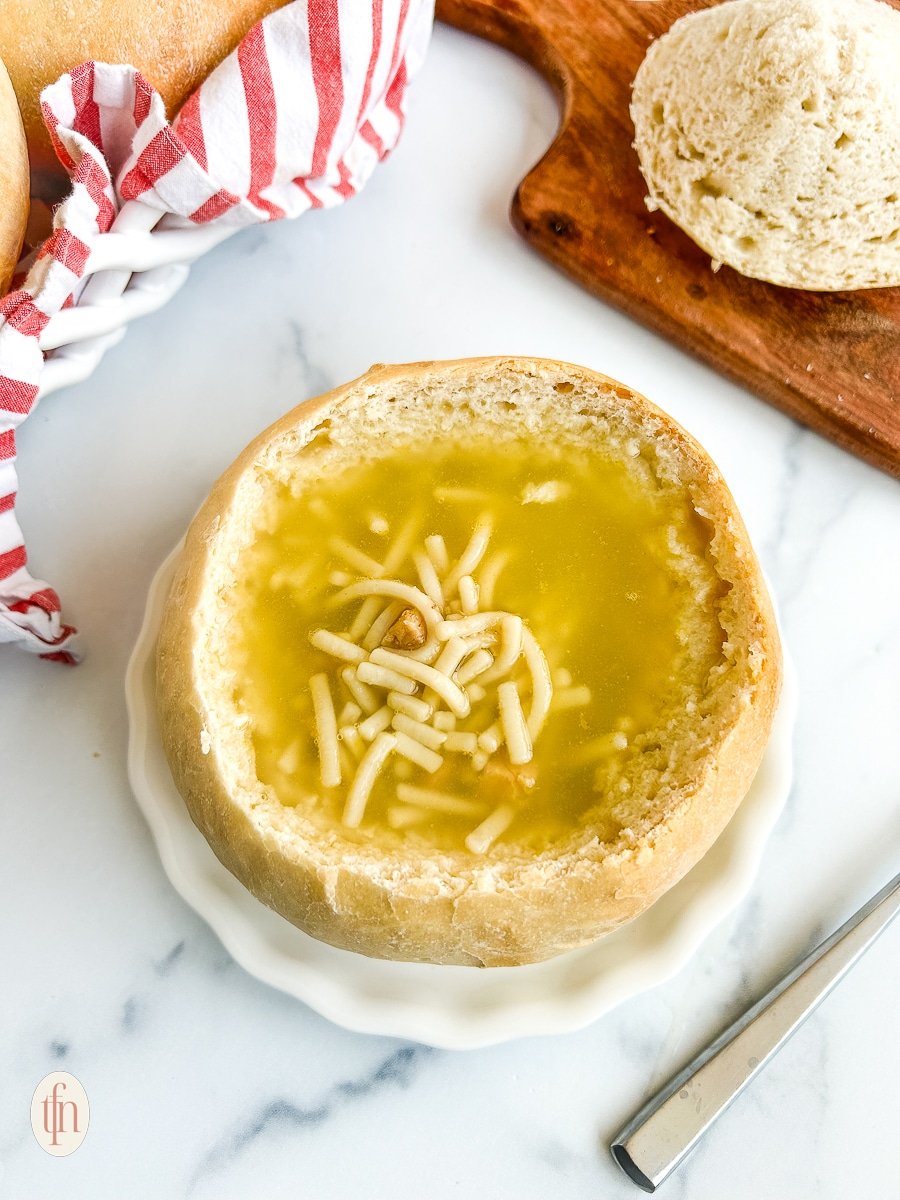
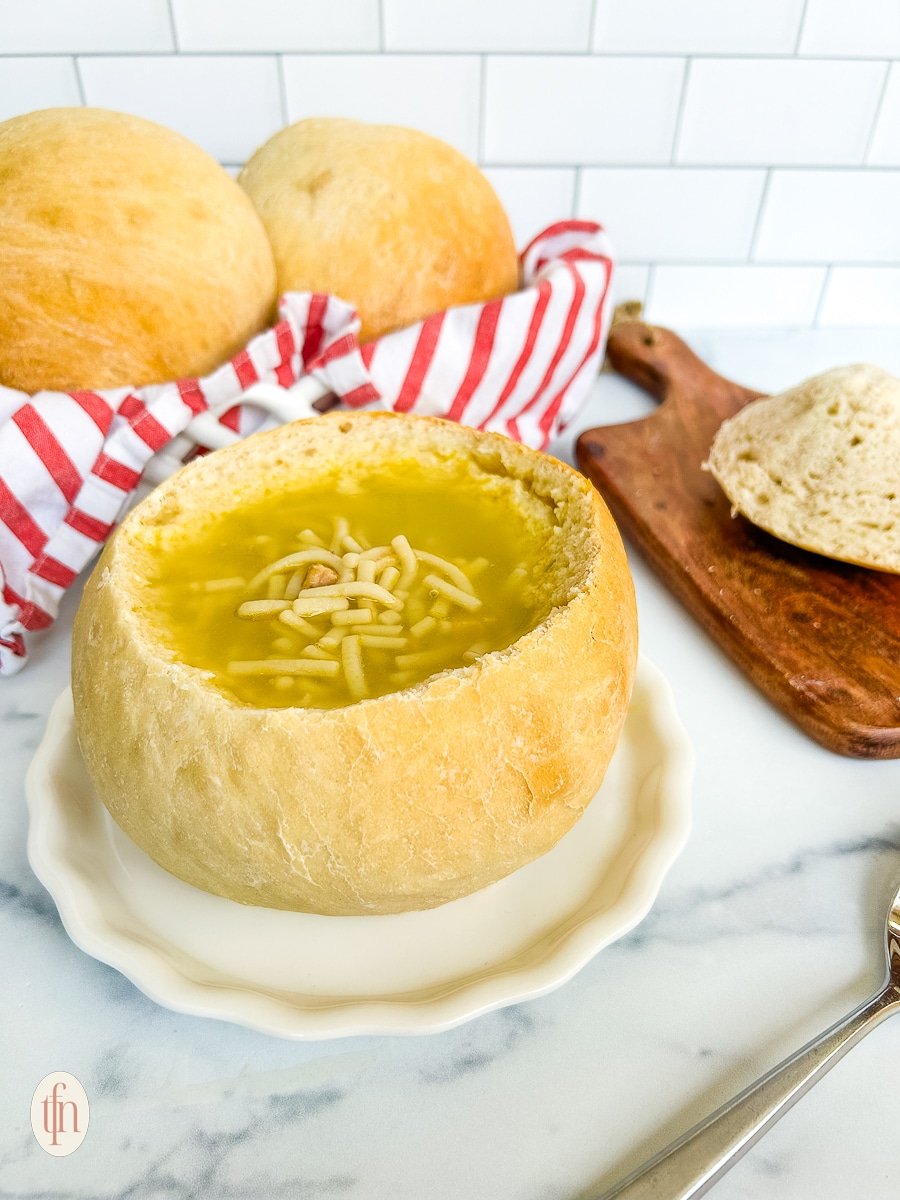
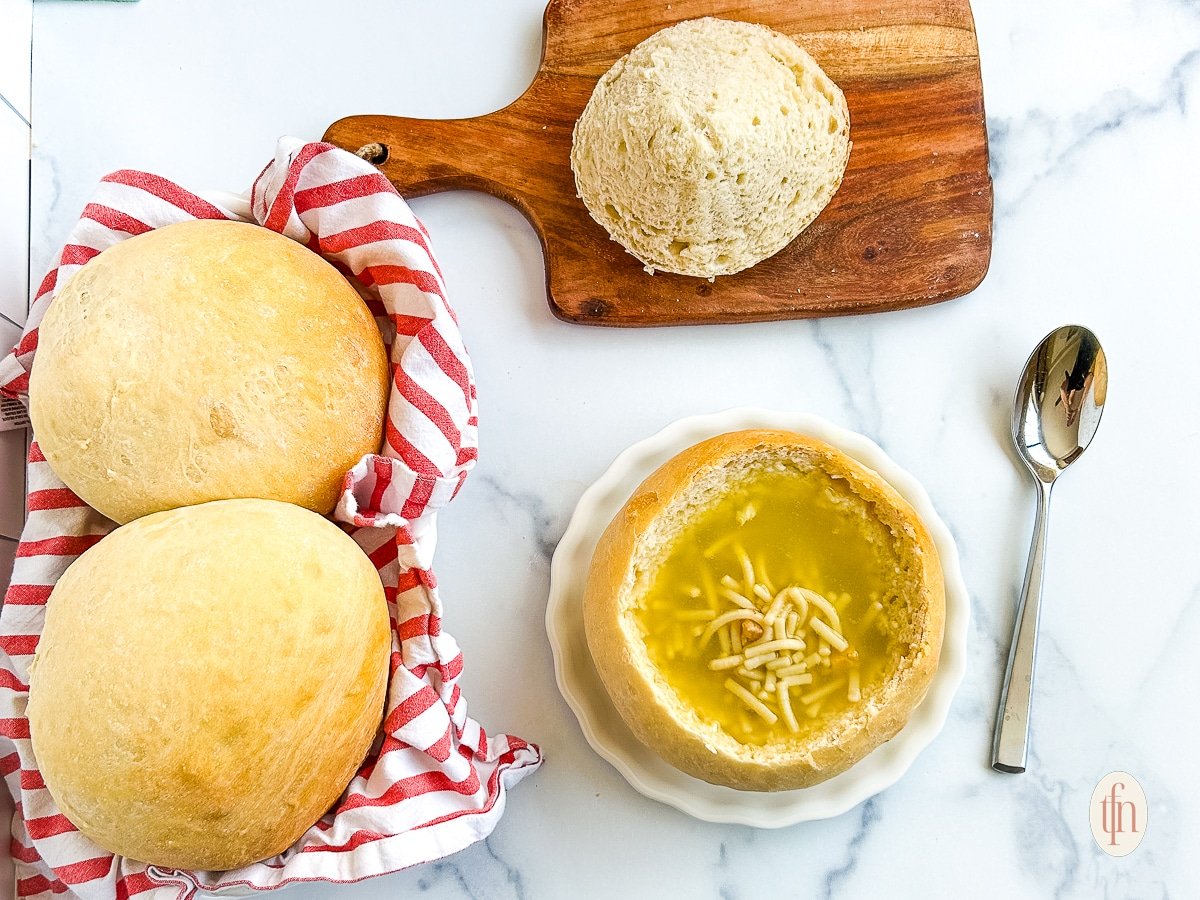
How To Cut Bread Bowls
Here’s how to cut the center portion of the bowls easily and safely. You’ll need a serrated knife with a sharp tip.
- Hold the tip facing down at a 45º angle and cut a circle around the widest part of this recipe for sourdough bread bowls.
- Lift off the top.
- To make more room in the bowl, use your fingers to flatten the bread down and against the insides.

🎯 TFN Pro Tip
For the best structure and crust, place a small oven-safe dish of water on the lower oven rack while baking your sourdough bread bowls. The steam helps create a beautifully crisp exterior while keeping the inside soft—perfect for holding thick soups or stews without leaking!
Serving Suggestions
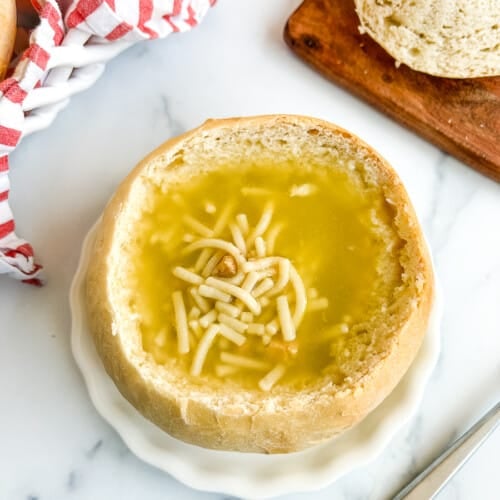
These homemade sourdough bread bowls are perfect for holding your favorite soup, chowder, or stew. We love filling them with creamy broccoli cheddar or hearty chili. Serve with a crisp green salad, a drizzle of olive oil over the top, or even homemade croutons made from the scooped-out bread. Pair with a glass of white wine or a warm seasonal cider for a cozy night in. Bonus: use the leftover tops as dippers!

Recipe FAQs
Yes. Some people do think they’re just for presentation, but they’re completely edible!
The trick is to eat it after finishing everything that’s inside, of course. We’ve seen plenty of dinner guests start to tear away too soon or too large a chunk, then get soup all over the table — and themselves!
The most common way to use them is as edible bowls for soup.
Once you’ve savored every last drop, using your hands is the most convenient way to consume it! There’s plenty of thick crust around the fluffy center to prevent your fingers from getting too messy… even though that’s part of the fun!
Absolutely. Luckily, breads freeze and defrost wonderfully while maintaining their original flavor and pillowy texture. They can be frozen for up to 3 months.
The most space-efficient way of storing a sourdough bread bowl is in a gallon-size Ziploc bag.
Thaw bread bowls right on the countertop for best results.
Breads are best kept at room temperature to prevent them from going stale too soon in the fridge.
We’d recommend storing your sourdough bread bowl in a bag on your countertop for up to 5 days. Keep the bag out of direct sunlight so no condensation forms.
More Easy Baked Recipes To Love…
If you tried this sourdough bread bowl recipe or any other recipe on my website, please leave a 🌟 star rating and let me know how it went in the 📝 comments below. Thanks for visiting!
Sourdough Bread Bowls
Equipment
- bench scraper - optional
- oven rack - optional
- serrated knife
Ingredients
- ⅔ cup sourdough starter (165 grams) fed 12-24 hours prior *see notes below
- 2 ⅔ cups filtered water (640 grams) 95º to 100º F.
- ½ cup granulated sugar (100 grams) or 4 tablespoons honey
- 8 ¼ cups bread flour (1000 grams) see notes below about flour notes substitutions
- 3 tablespoons extra-virgin olive oil (40 grams)
- 1 tablespoon fine salt (20 grams)
Instructions
- Place sourdough starter in a large mixing bowl. Add warm water and sugar, and stir well with a dough whisk to combine.Add bread flour, oil, and salt. Stir with a dough whisk or wooden spoon until a thick, shaggy dough forms. Flour your hands, then finish mixing dough by hand until all the flour has been absorbed. Cover with a clean, damp kitchen towel and let the dough rest for 30 to 45 minutes.
- Turn the dough out from the bowl onto your work surface. *Use your fingers to help coax it out.Knead by stretching the dough out 4 inches, then pushing it back down to the middle. Turn dough clockwise 1/4 turn and repeat kneading motion. Repeat two more times, until you have turned the dough in a full circle. Return the dough to the bowl, cover with a damp towel (or plastic wrap if you live in a dry area) and and let rise at room temperature or a warm area 4-12 hours (see chart in notes) to ferment.
- After bulk rise, lightly flour your work surface. Gently emove the dough from the bowl, then use your fingers to make dimples in the dough to release the air. Use a bench scraper or sharp knife to cut dough into 4 equal pieces. Cover with a clean kitchen towel and let the dough rest 10 minutes. Meanwhile, spray two baking sheets with non-stick cooking spray, or line each with parchment paper or a silicone baking mat.
- One at a time, tighten the sourdough balls by gently pulling the dough towards you 5 to 8 inches along the countertop.Arrange two dough balls on each prepared baking sheet, leaving plenty of space between them. Cover with a clean kitchen towel and move pan to a warm area to rise for 1-2 hours, until the dough has doubled in size. After rising time, use the tip of your finger to make a 1/2-inch deep indentation in the corner edge of the dough. If the indentation remains, it is ready to bake. Otherwise, allow it to rise longer.
- Place an oven rack in the center position of your oven and preheat oven to 350ºF. Place an oven rack in the center position of your oven and preheat oven to 350ºF. Arrange both pans on the center rack; Bake bread for 25 minutes, or until golden in color. Wait at least 1 hour before cutting (to prevent the bread bowl from deflating).
- To cut bread bowls, use a serrated knife with a sharp point. Hold the tip facing down at a 45º angle and cut a circle around the widest part of the bread bowl. Using your fingers, lift the top off. To make room inside the bowl, run your fingers along the inside, flattening excess bread.
Notes
- 80ºF about 4-5 hour
- 75ºF about 6-7 hours
- 70ºF about 8-9 hours
- For temperatures under 70ºF it can take up to 12 hours or more
- Place the bowl in the oven with the door closed and light on to create a slightly warmer climate without actually turning the oven on.
- Use a heated mat (like those used for germinating seeds) for rising.
- Use the “proof” setting of your oven (I set mine to 85ºF) and set a timer. This will speed up the rising process, so check it at 4 and 6 hours.
- If there is a sunny room in the house that stays warm, keep the dough covered in that area.
- Check to see if the top of the loaf is golden and if it sounds hollow when tapped on.
- Check the internal temperature in the center of the bread. It should 195º – 200ºF when done.
- Let the bread cool completely. Store it in a plastic bag at room temperature. I use a plastic bread bag with a twist tie to seal it and it stays fresh for about 5 days.
- This sandwich bread is also great to freeze. Place in an airtight bag and store in the freezer for up to 3 months. Thaw the loaf at room temperature, then slice and enjoy.
- Check out our in-depth guide on how to store sourdough bread for more storage tips.

Ronda says
Loved the recipe. The only issue is the size of the bowls, they are really large. I will make them again, but make 6 or 8 bowls.