
Bisquick pizza dough is a quick and easy way to bring homemade pizza night to life without needing yeast or extra rise time. With just a few pantry staples, you can roll out a soft, flavorful crust that’s ready for all your favorite toppings. It’s a great shortcut when you’re short on time but still craving a freshly baked slice.
Making pizza crust with Bisquick is one of the easiest ways to get a golden brown, homemade crust on the table without the extra steps of traditional dough. The mix of Bisquick and flour creates a soft, chewy base that holds up well under sauce and your favorite pizza toppings. If you’ve never tried pizza crust from Bisquick before, this is the recipe to start with—it’s quick, easy, and turns out beautifully every time.
Content Covered Here
Why We Love This Pizza Crust with Bisquick
- It’s fast and easy to make!
With no yeast or expensive flour blends, this pizza crust from Bisquick recipe comes together quickly and is on the table in minutes. - You can easily double the recipe to make multiple pizzas.
Make a double batch to keep on hand for easy weeknight dinners, game day, tailgating, or when you’re pressed for time and need a quick meal. - Let the kids help make it!
This is a fun recipe to make with your kids. Let them get creative with toppings – they’ll love customizing their own from start to finish!
Looking for other budget-friendly, cheap meal ideas?
Run to the kitchen and whip up a delicious the best smothered chicken in crock pot for dinner!
Ingredient Notes and Substitutions

- Bisquick baking mix: You can buy a box from the store or make your own Bisquick baking mix with simple pantry ingredients. Either way, using an all-purpose baking mix makes the entire process is practically fail-proof!
- Flour: Use all-purpose or 00 flour (what some of the best Italian chefs and home cooks use in their pizzas!). Using a little flour creates the light texture everyone loves!
- Baking powder: No-yeast pizza dough uses baking powder instead of yeast to help rise the crust.
- Dried Italian seasoning: This seasoning is optional but it adds a nice flavor to the crust.
Recipe Variations
- Extra rich dough: Substitute ¼ cup milk for part of the water in the recipe to create a richer, more tender dough. This adds a subtle creaminess that pairs well with white sauce and roasted veggies.
- Garlic herb crust: Mix 2 tablespoons melted butter with minced garlic and Italian herbs, then brush it over the rolled dough before baking. This adds flavor and gives the Bisquick mix a beautifully golden edge.
- Deep dish-style pizza: Use 2 tablespoons of vegetable oil in place of olive oil and press the dough into a greased cast iron skillet. The oil helps the bottom crisp up while the inside stays fluffy—perfect for deep dish lovers.
- Cheese-stuffed crust: Roll the edges of the dough around shredded mozzarella before baking. Use the classic Bisquick mix dough recipe and a bit of extra flour to seal in the cheese—no rising time needed!
Need a gluten-free option? You can use gluten-free Bisquick (by following the replacement instructions on the box) and any cup-for-cup gluten-free flour. King Arthur Flour even has a gluten free pizza flour.
For a low-carb and dairy-free option, you can make this cauliflower pizza crust without cheese!
Equipment Used in this Recipe
- Large mixing bowl
- Dough whisk
- Rolling pin
- Baking sheet
How to Make Pizza Crust from Bisquick
- Be sure the water is warm enough.
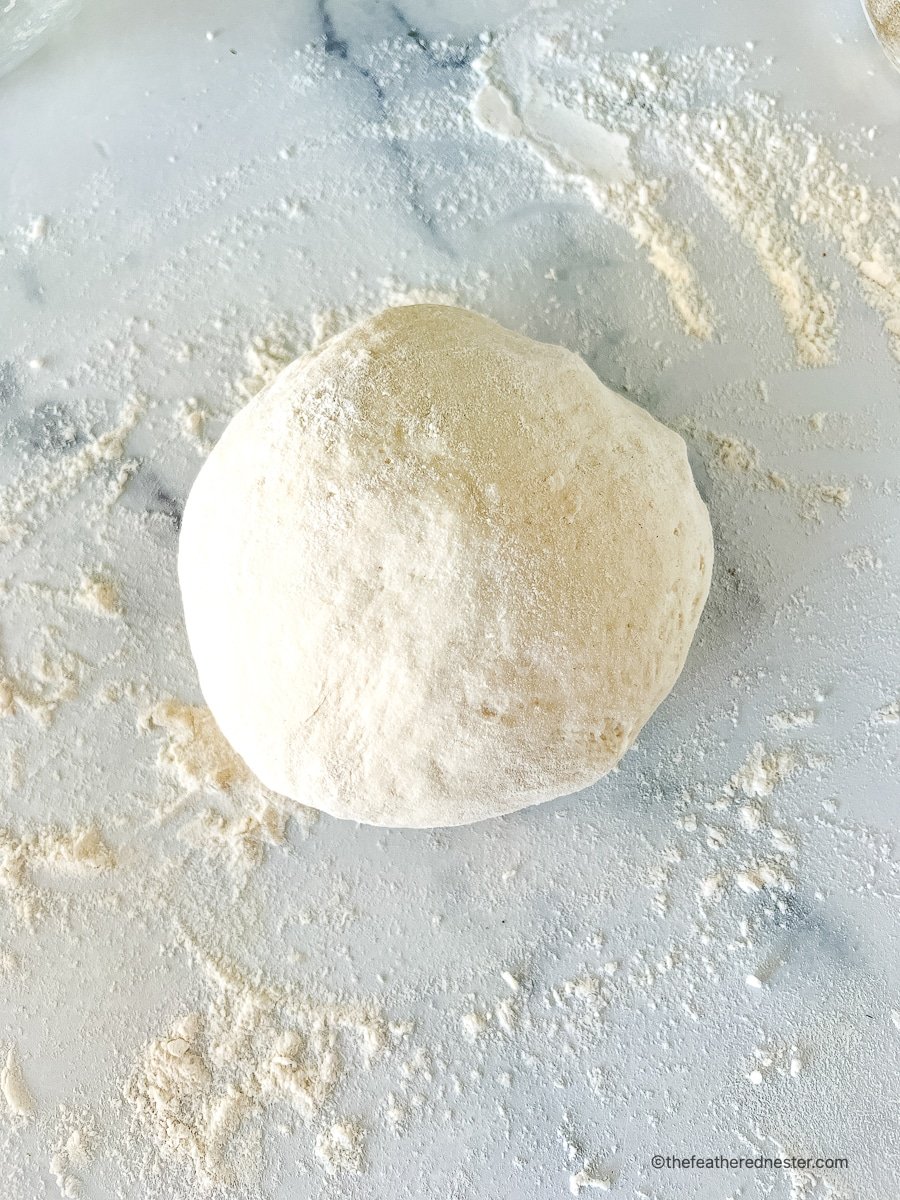
The water for your batter needs to be between 105ºF and 115°F. This encourages the leavening and rising agents to do what they do best: create a soft and fluffy crust. - Let the dough rest
Allow the protein strands (gluten) to relax to make it easier to stretch and roll out. Allow at least 20 minutes of rest time for this; the crust will also rise.
- Aim for a soft but slightly tacky texture.
After the rest, the dough should be soft, but slightly tacky.
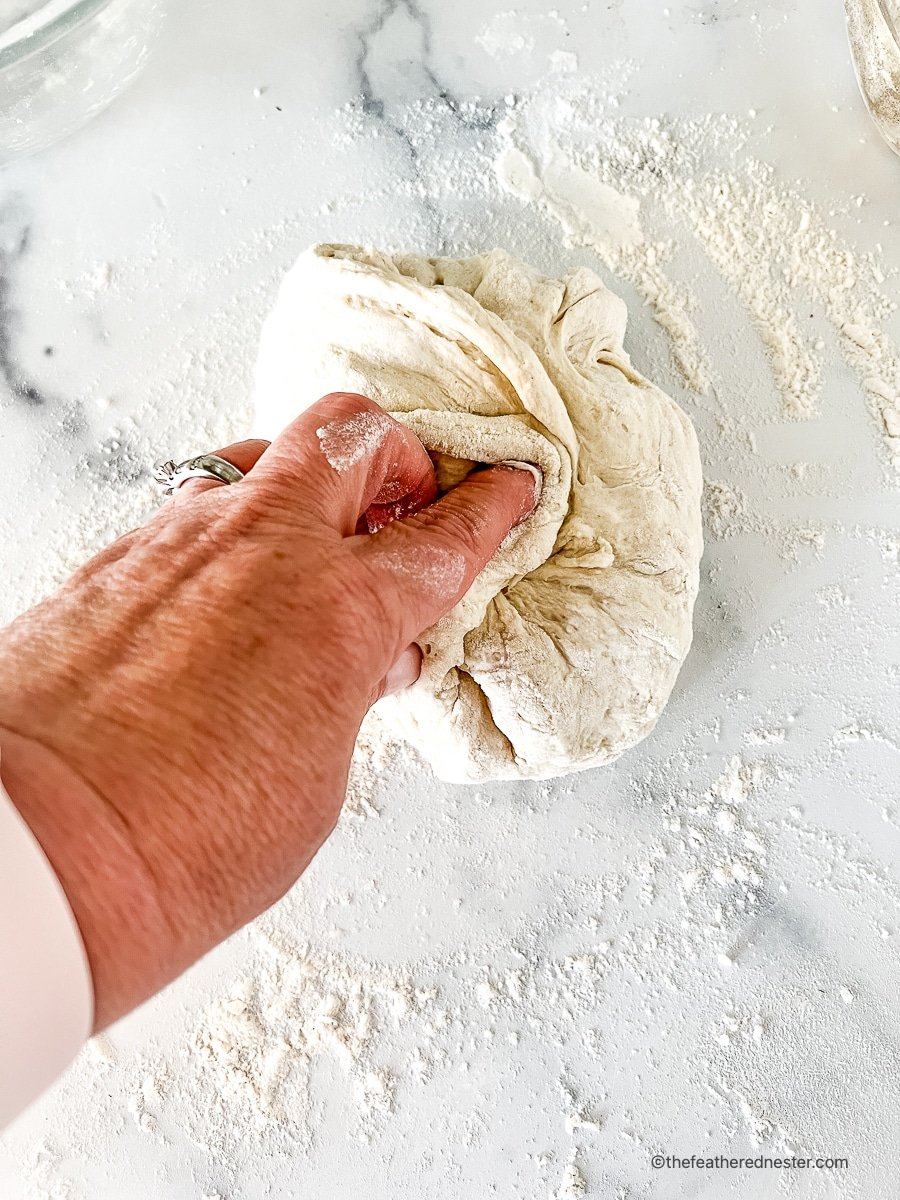
- Knead and stretch the dough before rolling it.
Working with dough that won’t hold its shape can be so frustrating! We suggest you knead and stretch the crust for about 15 seconds before rolling it — this tightens the crust so that it doesn’t shrink down as you roll it.
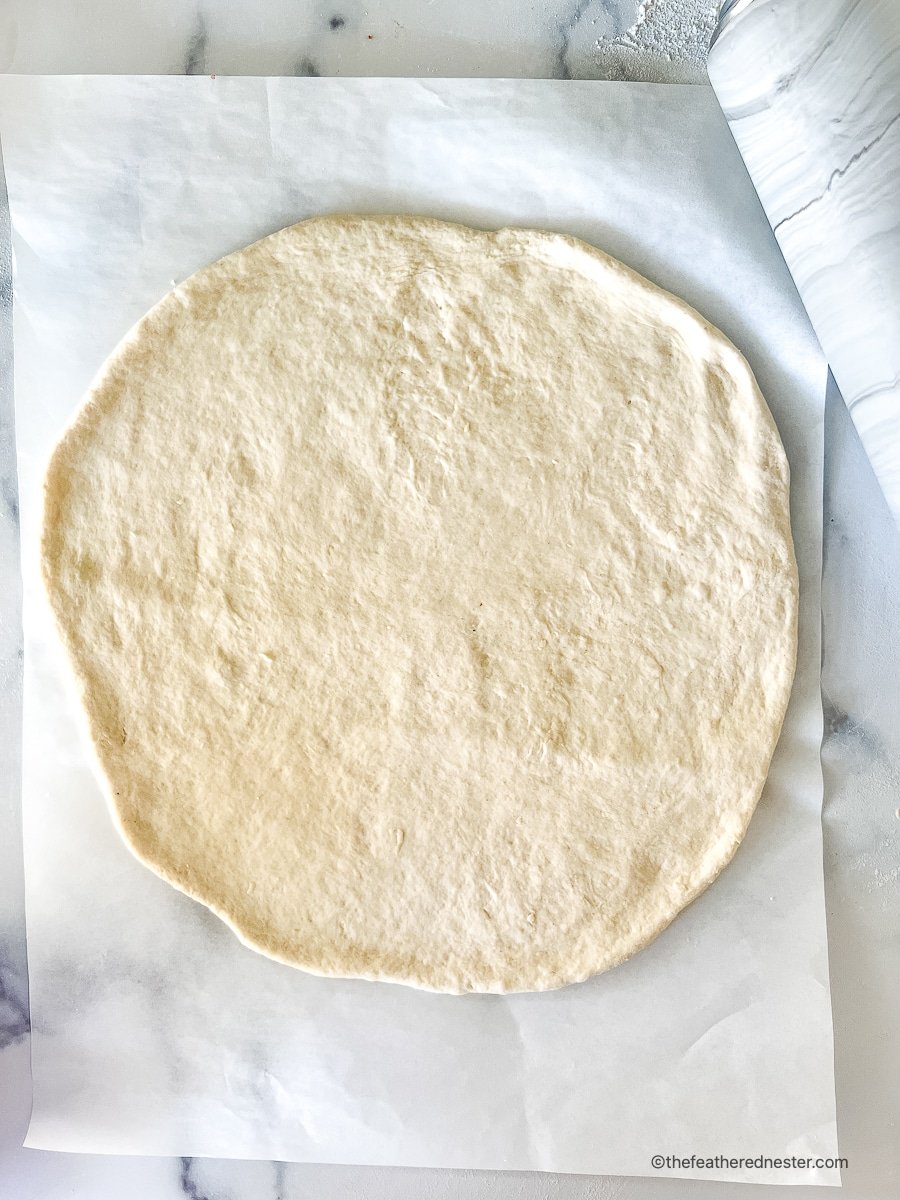
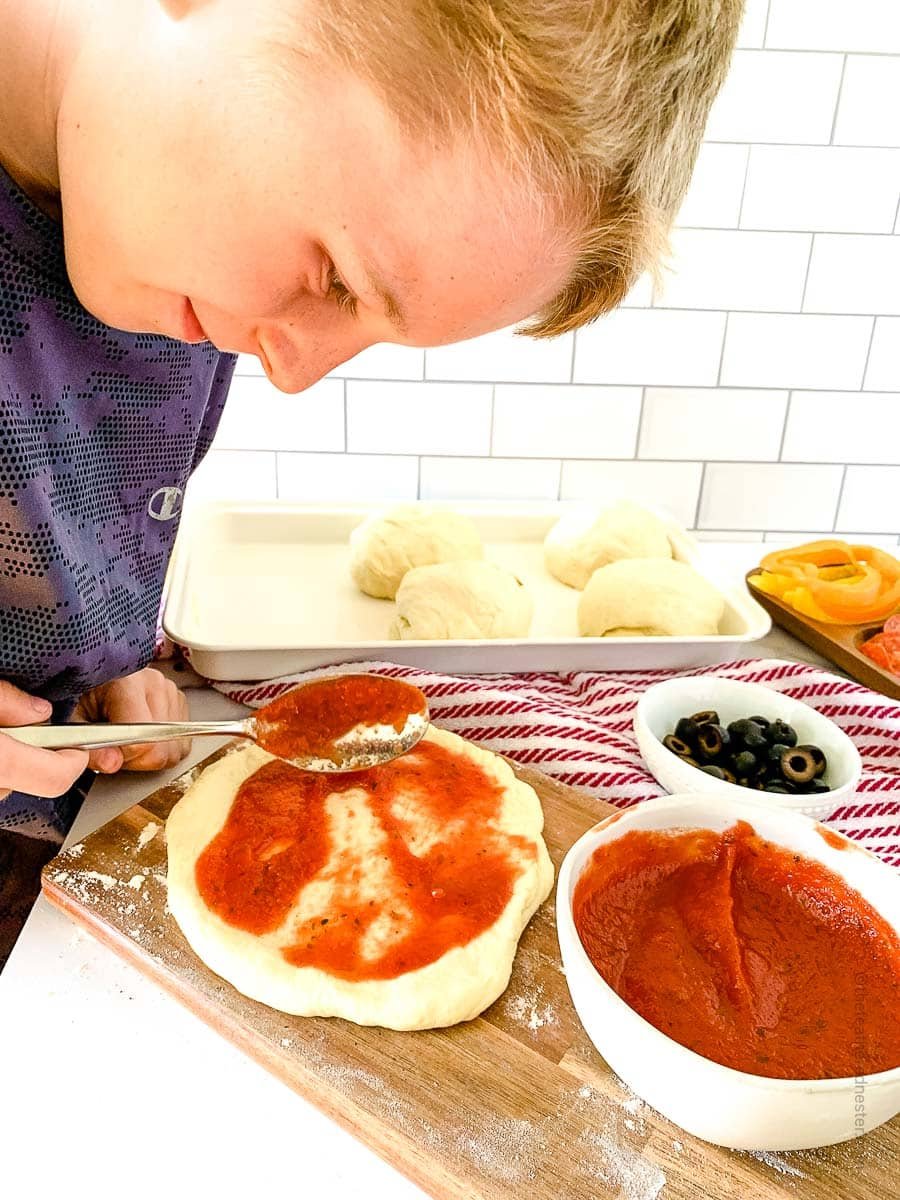
- Use parchment paper for the best results.
After you’ve formed the dough ball, place it on a sheet of parchment paper before you take your rolling pin to it. Transferring the dough to the sheet pan or stone so much easier.
- Get your kids involved.
Once you have your perfectly shaped crust ready, it’s time to add your favorite toppings! This is a great moment to get your kids involved. They’ll love watching their creations bake up in the oven.
Serving Suggestions
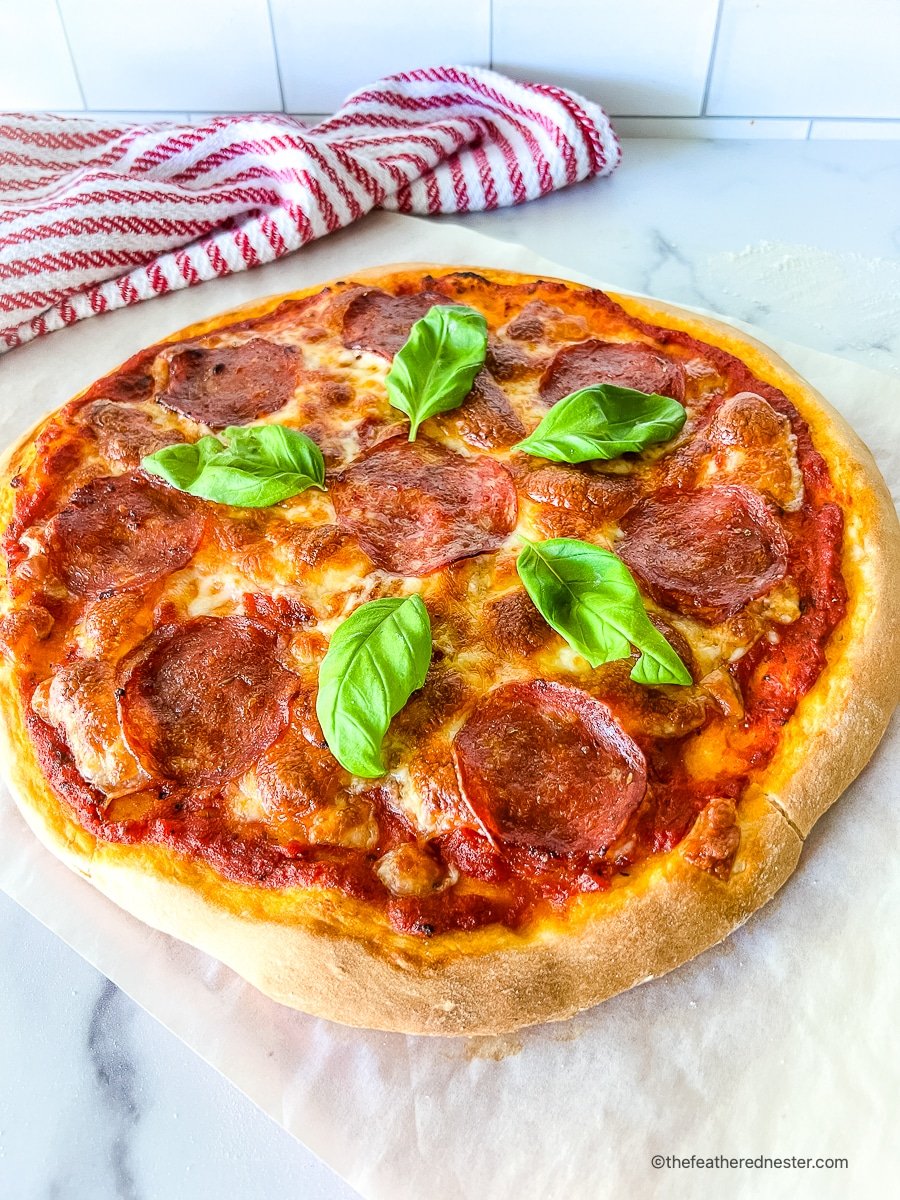
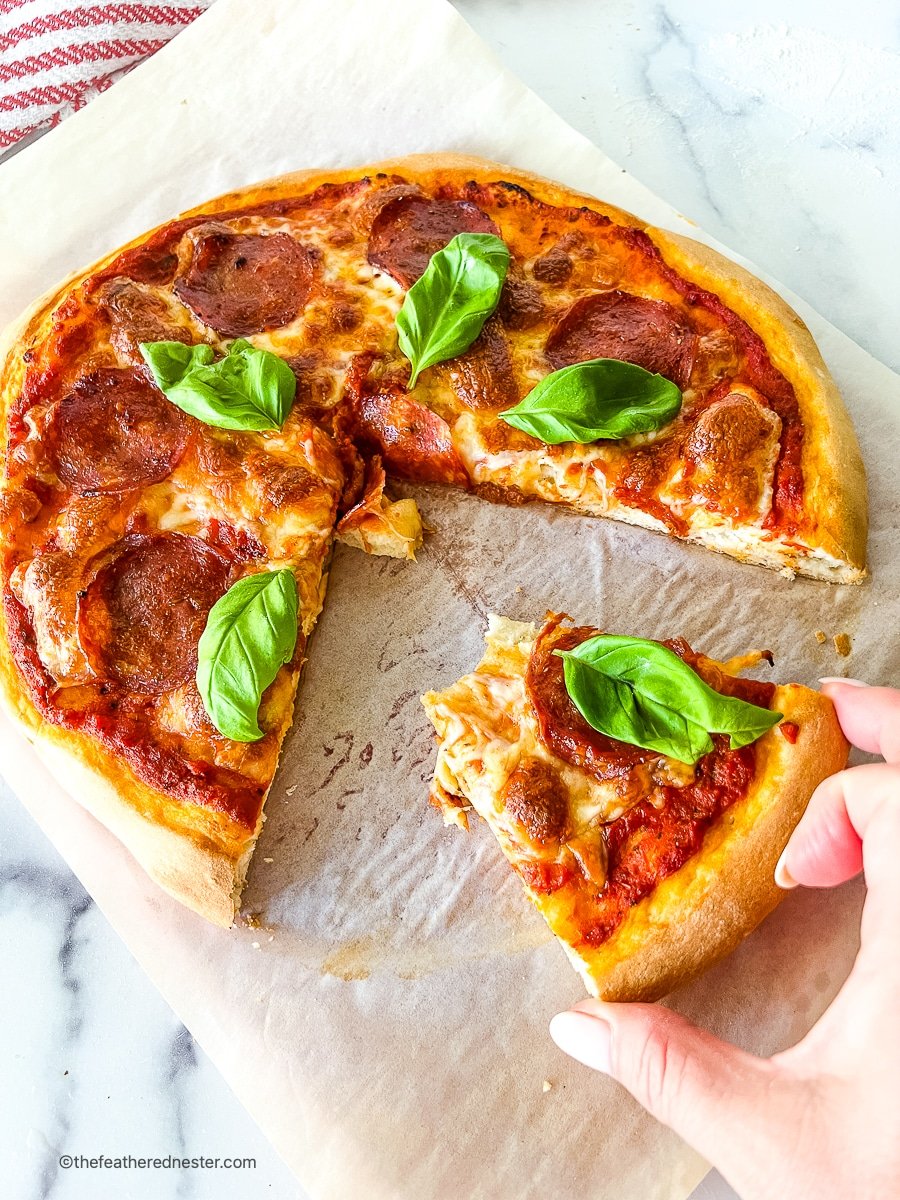
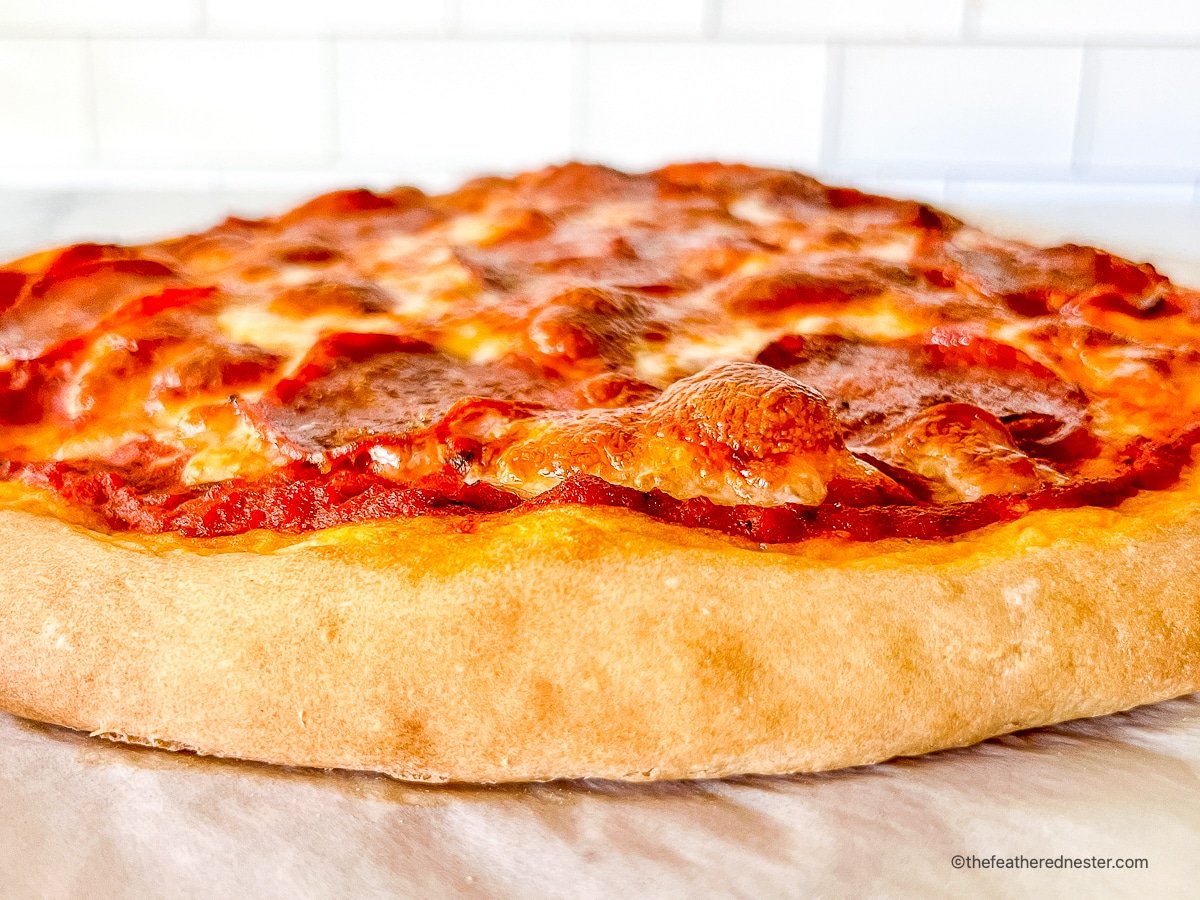
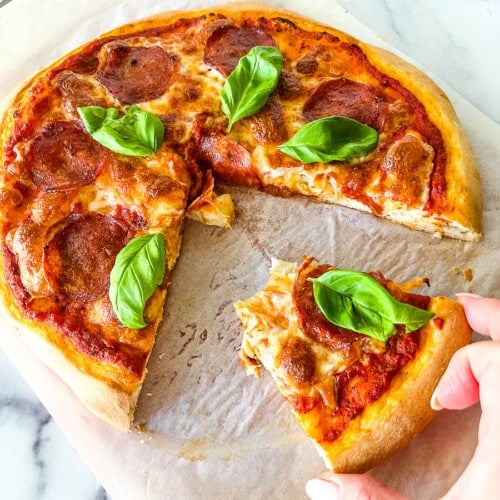
This Bisquick pizza dough is the start of a delicious homemade pizza night! Once you’ve rolled it out on your favorite pizza pan, top it with pizza sauce, then load it up with classic favorites like sausage, pepperoni, onions, mushrooms, and a generous layer of mozzarella cheese. A sprinkle of parmesan cheese before baking adds extra savory flavor and golden color.
Serve your freshly baked pie with a chilled glass of lemonade basil for a refreshing sip between bites. Want to make it a full meal? Pair your pizza with a helping of cowboy corn salad or try some crispy Wingstop voodoo fries recipe for a little heat. And if you’re feeding a hungry crowd, oven fried chicken is always a hit. Don’t forget to finish strong with one of our sweet Bisquick dessert recipes—you’ve earned it!
🎯 TFN Pro Tip
We recommend using a cookie sheet, stone, or a baking pan without rimmed sides for baking. This allows the hot air to circulate the entire pizza crust with Bisquick creating the best possible rise and golden color.
Recipe FAQs
The key is hydration with warm water. Homemade pizzas are baked at lower temperatures than in a restaurant oven, so they bake longer. The higher heat is what gives the crust the light, airy, bubbly texture we love.
Bake it at 450ºF for a high-rise crust that’s bubbly on top and perfectly baked underneath. If your oven goes above 450ºF, we have modifications in the recipe for higher heat.
Store leftovers in an airtight container in the fridge for up to 4 days.
Yes, roll the dough into a ball and place it in a freezer-safe sealed container for up to three months. For more tips on freezing, see our how long can pizza dough last in the fridge post.
If you have leftovers, wrap them in plastic and keep them in the fridge for 3-4 days. Our favorite way to reheat pizza is in the air fryer at 400ºF for 5-10 minutes. Or, reheat it in the microwave or oven at 350ºF for 10 minutes.
The great news is that this is a yeast-free pizza dough recipe. So, you’ve got the amazing flavor of a classic pizza dough with 00 flour, but without the hassle of using yeast!
Other Pizza Recipes to Consider…
- Neapolitan Pizza Dough
- Sourdough Pizza Crust
- Pizza from Frozen Bread Dough
- Pizza Monkey Bread
- Homemade Pizza with Pizza Dough
If you tried making our pizza crust with Bisquick recipe or any other recipe on my website, please leave a 🌟 star rating and let me know how it went in the 📝 comments below. Thanks for visiting!
Bisquick Pizza Dough
Ingredients
- 1 ½ cups Bisquick baking mix
- ¾ cups 00 flour or all purpose flour
- 1 ½ teaspoons baking powder
- ½ teaspoon kosher salt or 1/4 teaspoon sea salt
- ½ teaspoon dried Italian seasoning optional
- 2 teaspoons olive oil
- ⅔ cup hot water
Instructions
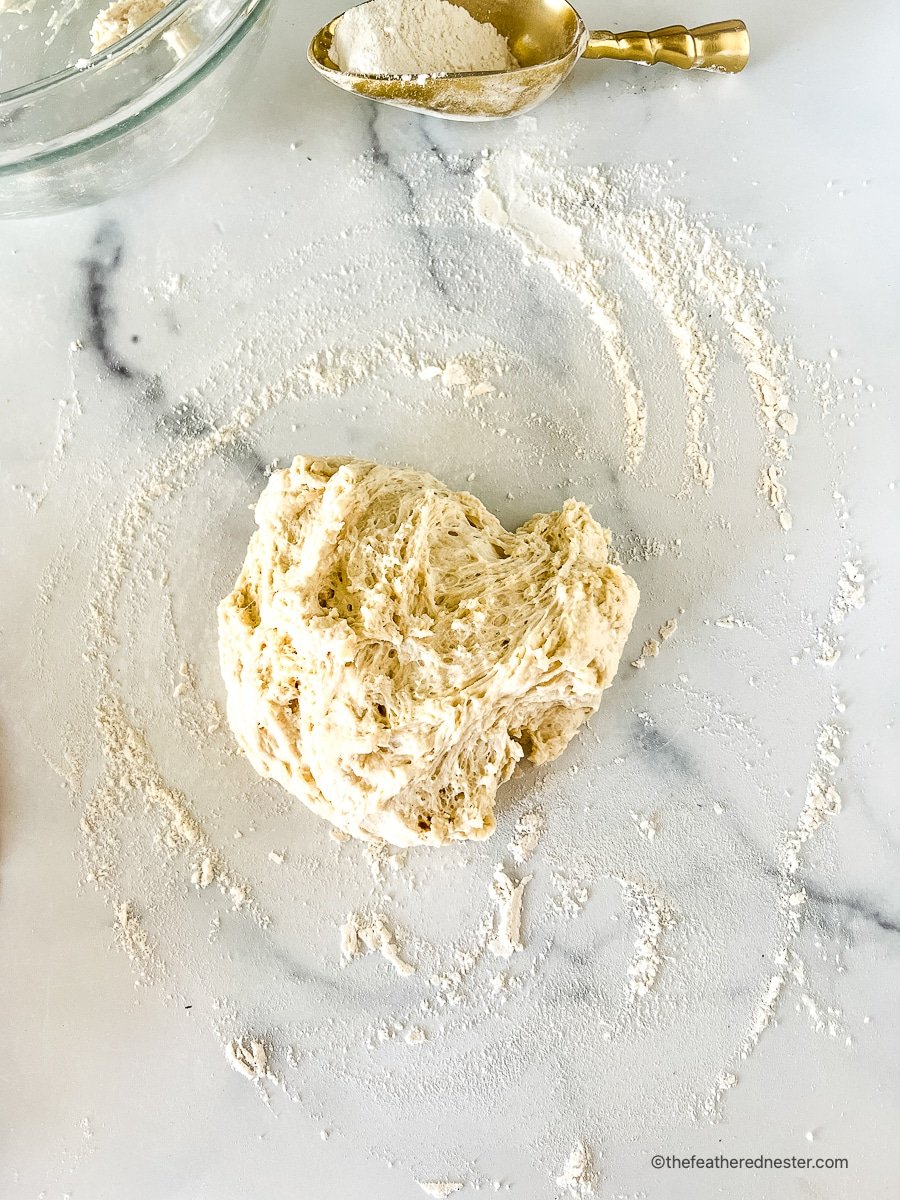
- To a large mixing bowl, add Bisquick, flour, baking powder, salt and optional Italian seasoning; whisk to combine. Add hot water and olive oil to the bowl and using a dough whisk, stir to combine until the dough comes together and clears the sides of the bowl.
- Cover bowl with a clean kitchen towel and let the dough rest for 20 minutes.
- The dough can be rolled out (below) for a 12-14-inch crust or 3-4 stromboli or calzones.
Rolling and Baking Instructions
- Preheat oven to 450°F. See notes for higher temperature.
- Set the dough on a lightly floured work surface and sprinkle a little flour on top. Knead the dough for 15 seconds until it tightens.
- Transfer the crust to a sheet of parchment paper or a well-oiled cookie sheet. **See Notes belowUse a rolling pin to roll the crust into a 12 to 14-inch circle, about 1/4-inch thick.
- Use a large spoon to spread the sauce over the crust, leaving a 1-inch margin on the outer edge. Add desired toppings.
- If using parchment paper, gently lift or slide the paper to move both the paper and the pizza onto a baking sheet. Bake in preheated oven for 15-18 minutes, until the crust is golden and the center is bubbly.
Notes
- We recommend using a cookie sheet, stone, or a baking pan without rimmed sides for baking. This allows the hot air to circulate the entire crust, creating the best possible rise and golden color.
- Extra rich dough: Substitute ¼ cup milk for part of the water in the recipe to create a richer, more tender dough. This adds a subtle creaminess that pairs well with white sauce and roasted veggies.
- Garlic herb crust: Mix 2 tablespoons melted butter with minced garlic and Italian herbs, then brush it over the rolled dough before baking. This adds flavor and gives the Bisquick mix a beautifully golden edge.
- Deep dish-style pizza: Use 2 tablespoons of vegetable oil in place of olive oil and press the dough into a greased cast iron skillet. The oil helps the bottom crisp up while the inside stays fluffy—perfect for deep dish lovers.
- Cheese-stuffed crust: Roll the edges of the dough around shredded mozzarella before baking. Use the classic Bisquick mix dough recipe and a bit of extra flour to seal in the cheese—no rising time needed!
- If you have leftovers, wrap them in plastic and keep them in the fridge for 3-4 days. Our favorite way to reheat pizza is in the air fryer at 400ºF for 5-10 minutes. Or, reheat it in the microwave or oven at 350ºF for 10 minutes.
- If you have leftovers, wrap them in plastic and keep them in the fridge for 3-4 days. Our favorite way to reheat pizza is in the air fryer at 400ºF for 5-10 minutes. Or, reheat it in the microwave or oven at 350ºF for 10 minutes.
- Roll the dough into a ball and place it in a freezer-safe sealed container for up to three months. For more tips on freezing, see our how long can pizza dough last in the fridge post.

Seema Sriram says
This is a super cool idea. WE loved making pizza this way.
kushi says
WOW. This pizza looks amazingly delicious. The crust looks so crispy. Thanks for sharing.