

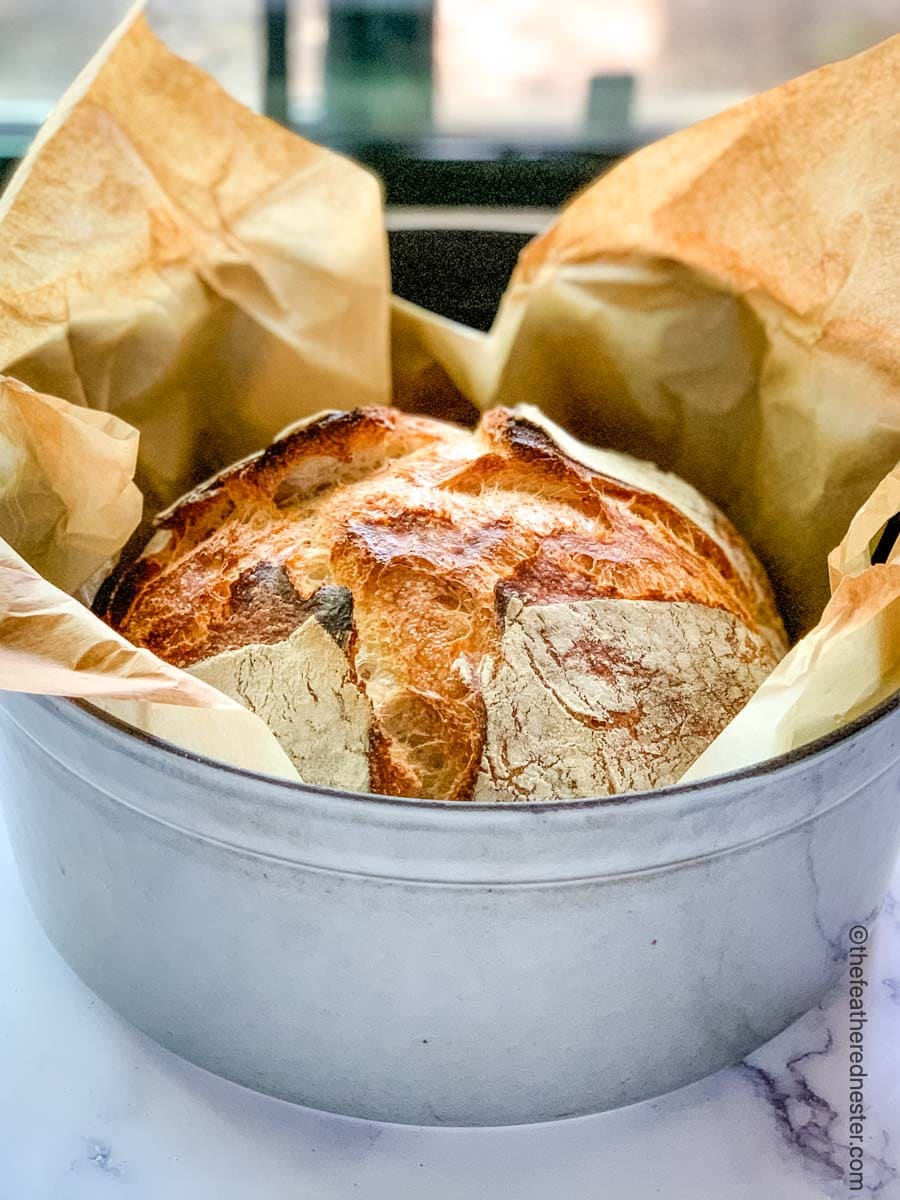
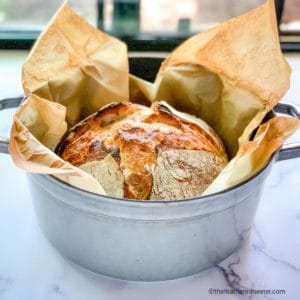
When you take your first bite from a warm slice of dutch oven sourdough bread, you’ll realize that nothing tastes better than the flavor of freshly baked bread made from scratch at home! This classic, no-knead sourdough bread recipe has just 4 ingredients, and the dough can rise throughout the day or overnight. With sourdough bread rising in popularity, there are a lot of different recipes out there. What makes ours different is the ease…we have cut out any unnecessary steps to bring you an uncomplicated, beginner-friendly sourdough bread recipe! So let use teach you how to bake sourdough bread!
This page contains affiliate links. As an Amazon Associate, I may earn from qualifying purchases.
Content Covered Here
Dutch Oven Sourdough Bread Video Tutorial
Why We Love This Recipe
- This no-knead sourdough recipe makes a classic round boule, baked in a Dutch oven or pot using wild yeast to rise your bread. Instead of kneading, you just do an easy set of stretching and folding.
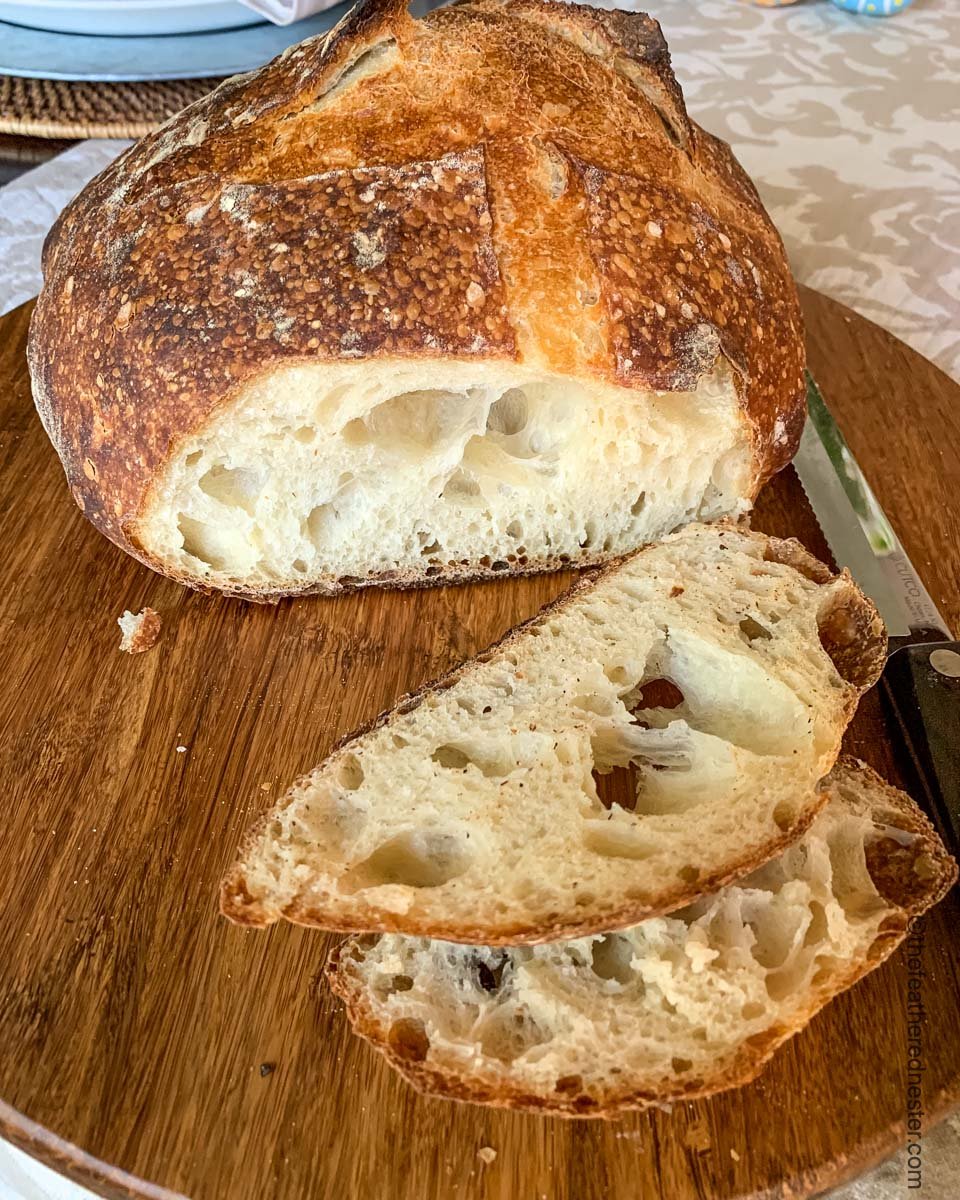
- Each bite has that signature sourdough tanginess that will have you craving another slice. This yields a rustic, artisan-style loaf that is slightly crispy and chewy on the outside, and fantastically fluffy and soft on the inside. In other words, this easy recipe makes the most amazing bread!
- For those who live in colder climates, you’ll love that the dough can be left to rise during the day versus overnight – when it’s typically colder and therefore more difficult to get a great rise in the evening.
Sourdough is fantastic for making all kinds of tasty baked goods. From sweet treats like sourdough apple coffee cake to savory pizza crust, you can also make some sourdough breakfast recipes out of it. A good sourdough starter is about the most versatile ingredient in the kitchen!
Because sourdough bread goes through a long fermentation process, it tends to be easier on the stomach than bread made with commercial yeast. Many people who are sensitive to regular bread find sourdough much gentler to digest.
Ingredient Notes and Substitutions
There are only 4 ingredients (including water) needed to make a delicious loaf of sourdough bread from scratch:
- Active Sourdough starter – fed 12-24 hours before starting the recipe.
When we say active, we mean a mature starter that is at least a week old and always doubles in size within 4-6 hours of feeding. It doesn’t mean you need to use it at the peak activity after a feeding. - All-purpose flour – you can substitute bread flour for some of the all-purpose. See the recipe cards for exact amounts.
If you’d like to make a whole wheat loaf, we recommend making our no-knead whole wheat sourdough bread recipe instead! - Fine salt – any type of salt works though I prefer using fine sea salt. If you use Kosher salt, increase it by 25%.
- Warm filtered water or bottled water – ideally, the temperature of the water should be about 105°F or baby bottle warm. If the water is too hot, it will damage the starter and you’ll have a flat loaf.
Recipe Variations
- If you prefer extra tangy sourdough bread, replace 1/4 teaspoon (up to 1/2 teaspoon) of the salt with citric acid or sour salt for a tangy kick to your bread.
- Are you looking for a soft sourdough bread that is not baked in a Dutch oven? Super soft sourdough sandwich bread is great to keep on hand for lunches (kids love it!), and a is always welcome on the dinner table.
- Use an egg wash and sprinkle with dried herbs before for a different flavor.
Equipment and Supplies
One of the questions I get asked most often is what sourdough tools I actually use and recommend. So I put together a list of everything you need for this specific recipe, plus a few extras that have made my sourdough life so much easier!
- Dutch Oven for sourdough: for a more detailed explanation on what size dutch oven for sourdough bread see below!
- A dough whisk is handy for stirring the thick batter, especially in its “shaggy dough” stage. But if you don’t have one a regular spatula and using your hands works as well.
- Using a clear large mixing bowl for rising makes it easier to see the fermentation activity going on below, but any large bowl will do.
- Parchment paper is essential for this recipe, as that’s how we add the dough to the cast iron pot and get it back out when its hot!
- Plastic wrap to cover the bowl during fermentation keeps the dough from drying out if you live in a dry climate. We have tried damp tea towels in the past but found that in our dry climate they dry out fast and then leave a “crust” on the dough. Reusable bowl covers work great for this too.
Optional equipment:
- Digital food scale (optional)– this helps with making sure measurements are precise- as one cup of packed flour is different than one cup of flour that has been sifted.
- Bench scraper (optional)– helps scrape up every bit of dough d helps form the dough ball.
- Banneton (optional) – is a basket that is used for proofing your dough during the final phase. It helps hold the dough in a uniform shape and comes in both round and oval sizing. You can also line a bowl with a tea towel instead.
Dutch Oven for Sourdough Bread
What is a Dutch Oven?
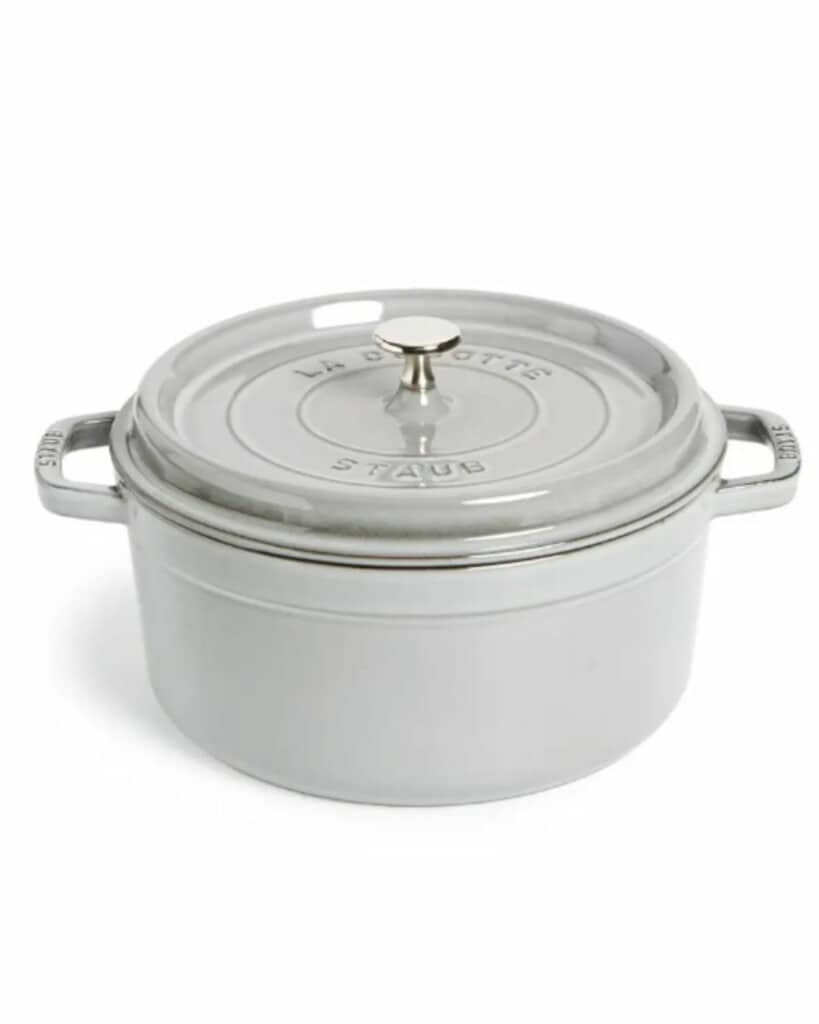
A Dutch Oven is a heavy and thick walled pot made of cast iron or enamel coated cast iron. It is used for sourdough bread because the combination of the heavy pot and lid traps in heat and moisture to perfectly bake a crispy exterior and a soft, fluffy interior bread. Dutch ovens are also great to use for making soups, stews, and my favorite pot roast recipe.
Don’t know whether to get cast iron or enamel? Cast iron is typically cheaper and hardier, but requires maintenance to keep it seasoned properly. Enamel is usually more expensive (and the enamel can chip) but cleanup is easier on enamel and they don’t need to be seasoned. Either works well, but it ultimately comes down to personal preference and skill level of baking.
What Size Dutch Oven for Sourdough
The best size dutch oven for sourdough bread depends on what type of loaves you plan on making. We have made this recipe with both 6 quart as well as a 4 or 5 quart dutch oven. The 4 or 5 quart dutch oven works well with this recipe and baking times. The smaller dutch oven allows for the dough to maintain its tall and round shape. If you plan to make an oval shaped loaf use a 6 quart and know that you may need to add a few extra minutes of baking time.
We typically use Lodge brand, Staub, or Le Crest brand dutch ovens. If you use an enameled dutch oven check with manufacturer recommendations for temperatures to ensure the dutch oven will support the high heat required for this recipe. For baking sourdough without a Dutch oven, use a similar sized heavy pot with a tight fitting lid for this sourdough bread recipe.
Do you Need to Preheat a Dutch Oven for Sourdough Bread?
The short answer is no. We pride ourselves on the ease of our sourdough recipes and have recipe tested to avoid unnecessary steps in the sourdough process. While pre-heating can have some benefits (slightly increases oven spring and helps with a crunchier crust) we have found it is much easier to work with a cold dutch oven and still get an amazing tasting bread.
How to Bake Sourdough Bread
Below are the foolproof step-by-step directions for making this amazing bread. Be sure to see our video tutorial which shows the whole process. You’ll love how easy (and delicious!) this bread is!
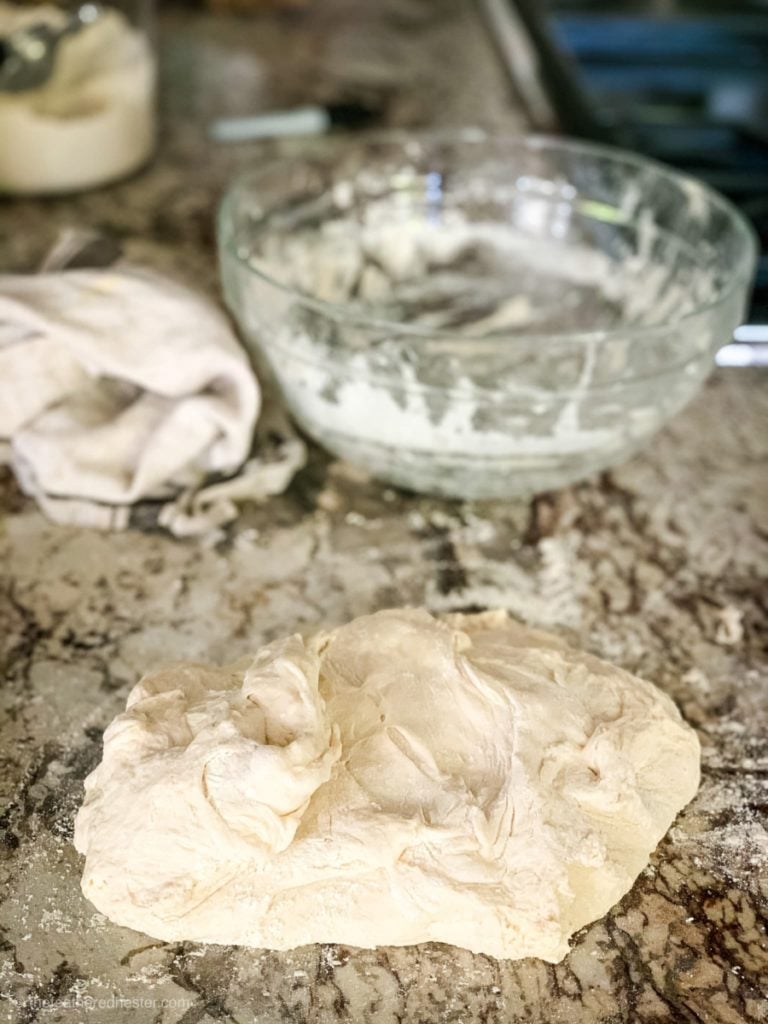
Mix the Dough
- Add the sourdough starter to a large glass bowl. Stir in the water until the starter is completely dissolved. Now add the flour and salt. Use a dough whisk or wooden spoon to stir until a thick and shaggy dough forms. If it’s too thick you can finish mixing the dough by hand. Leave the dough in the bowl, and cover it with a clean and slightly damp kitchen towel. Let the dough rest for 30 minutes.
- Next, activate the gluten by using the stretch and fold method in the bowl (takes about 15 seconds), until the dough tightens and is more difficult to stretch. Doing this creates surface tension in the dough.
Grab the edge of the dough, stretch it up, and press it down into the center of the dough, then turn the dough 1/4 a turn. Continue stretching the dough as you move in a clockwise rotation.
To see the technique in action, check out the video tutorial on the recipe at the bottom of this post. - Cover the bowl with a clean damp towel or plastic wrap (if you live in a dry climate). Let it rise in a warm area (75º to 80º F) for the fermentation process to happen. See our recipe notes at bottom for a proofing time guidelines.
Looking for a shorter fermentation rise recipe to use up your sourdough starter? You’ll love our sourdough discard naan! Use it for wraps, naan, or even pizza. Best of all, it only has a one hour rise so you are ready to serve them fast.
🎯 TFN Pro Tip
If the ambient temperature is less than 70°F, you may need to let the sourdough rise for up to 12 hours. See the recipe for a fermentation rise time guide.
Ideas for keeping dough warm during colder months:
- Use a heated mat (like those used for germinating seeds) for rising.
- Use the “proof” setting of your oven (Renae sets hers to 85ºF) and set a timer. This will speed up the rising process, so check it at 4 and 6 hours.
- If there is a sunny room in the house that stays warm, keep the dough covered in that area.
- Place the bowl in the oven with the door closed and light on to create a slightly warmer climate without actually turning the oven on. Check your oven temperature if you have not used this method before as some oven lights produce more heat than others.
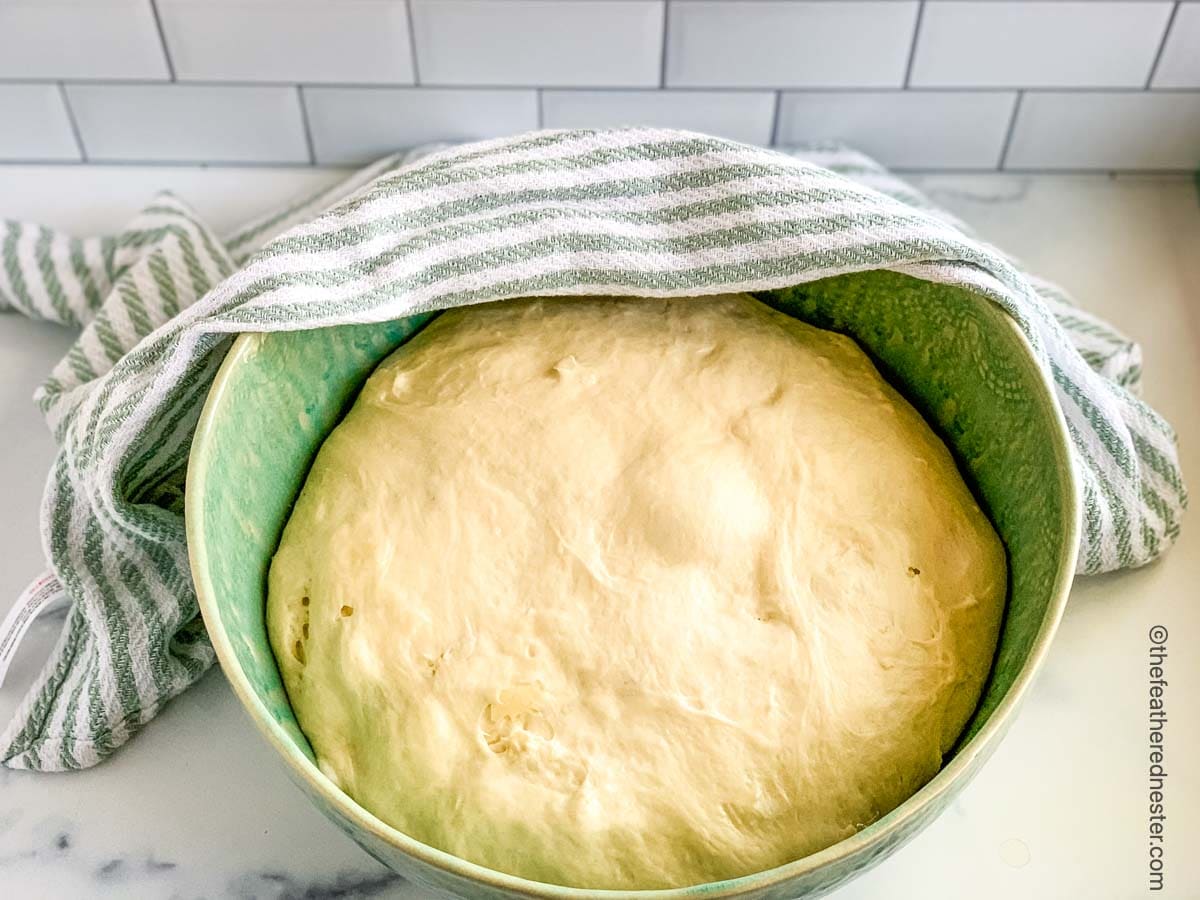
After the long, fermentation rise the dough will have risen about double and look bubbly with large air bubbles underneath.
Shape the Loaf
- Now let’s shape the loaf. Tip the bowl and pull the dough onto your lightly floured surface. Stretch and fold the dough again as you did before, until the dough tightens. Cover and let the dough rest for 10 minutes.
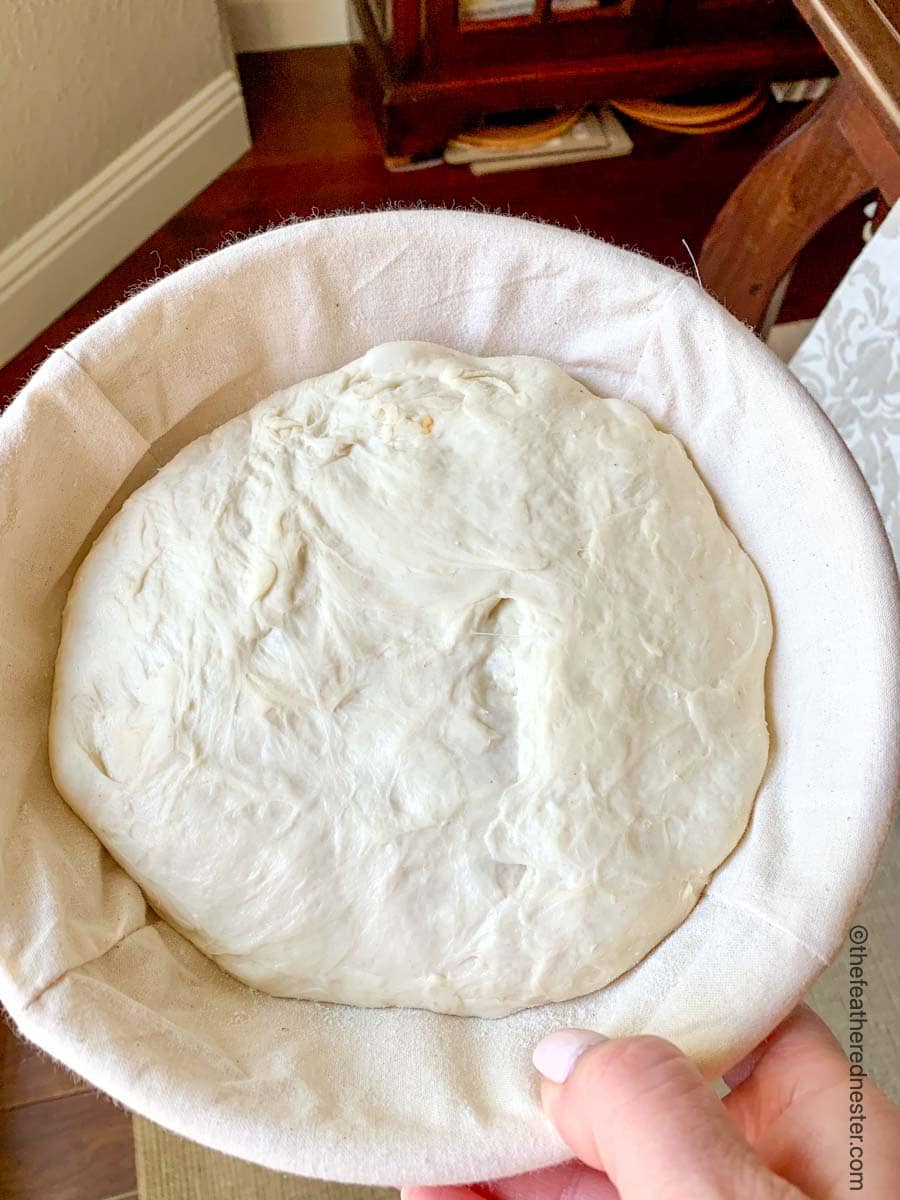
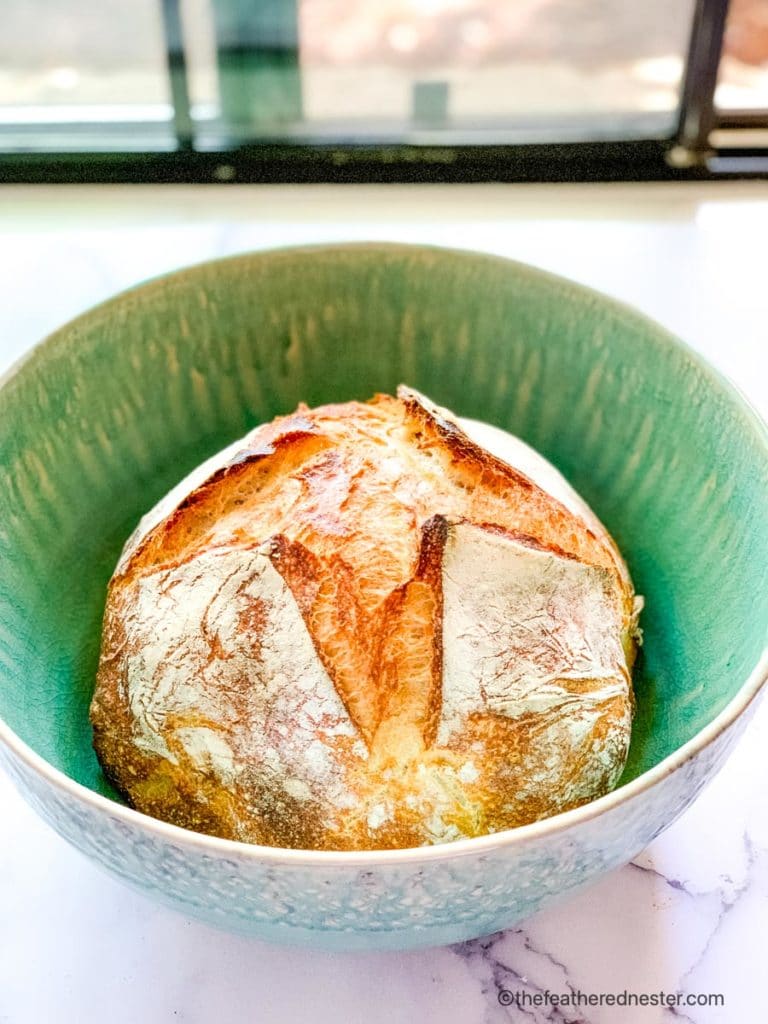
- In the meantime, line a medium bowl with a towel or use a banneton proofing basket with a linen cover (see photo), and dust heavily with flour. Transfer the dough to the bowl and let it rise for 30 – 60 minutes. This process is called proofing, where the dough undergoes its final rise before baking.
How to Bake Sourdough in a Dutch Oven
- Preheat your oven to 450º (without the cast iron Dutch oven). Place a long sheet of parchment paper on top of your bread bowl and turn it over onto the countertop so that the dough is on top of the parchment paper. It should hold its shape well. NOTE: If using a Dutch Oven with a dark interior, I recommend insulating the bottom with a round silicone sheet underneath the parchment paper. You can also place the pot on top of a baking sheet in oven. This helps the bottom crust of the bread from getting too dark in color.
- Next, slash the top of the loaf with a lame (covered razor blade) or sharp knife. This will allow the steam to escape and the crust to expand without cracking. Gently lower the parchment paper with the dough into the Dutch oven.

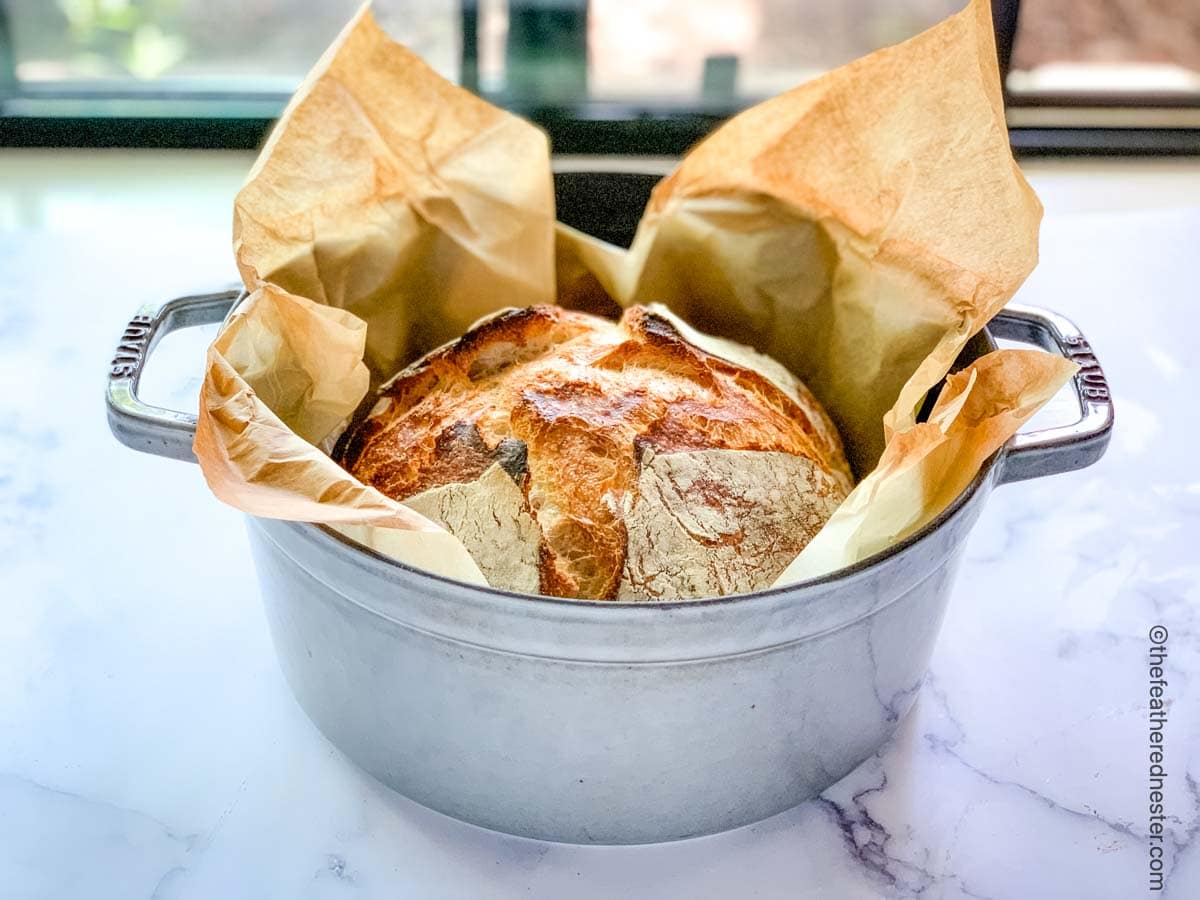
- Add the lid to the heavy pot and bake the covered bread for 30 minutes. Then remove the lid and bake for another 20 minutes.
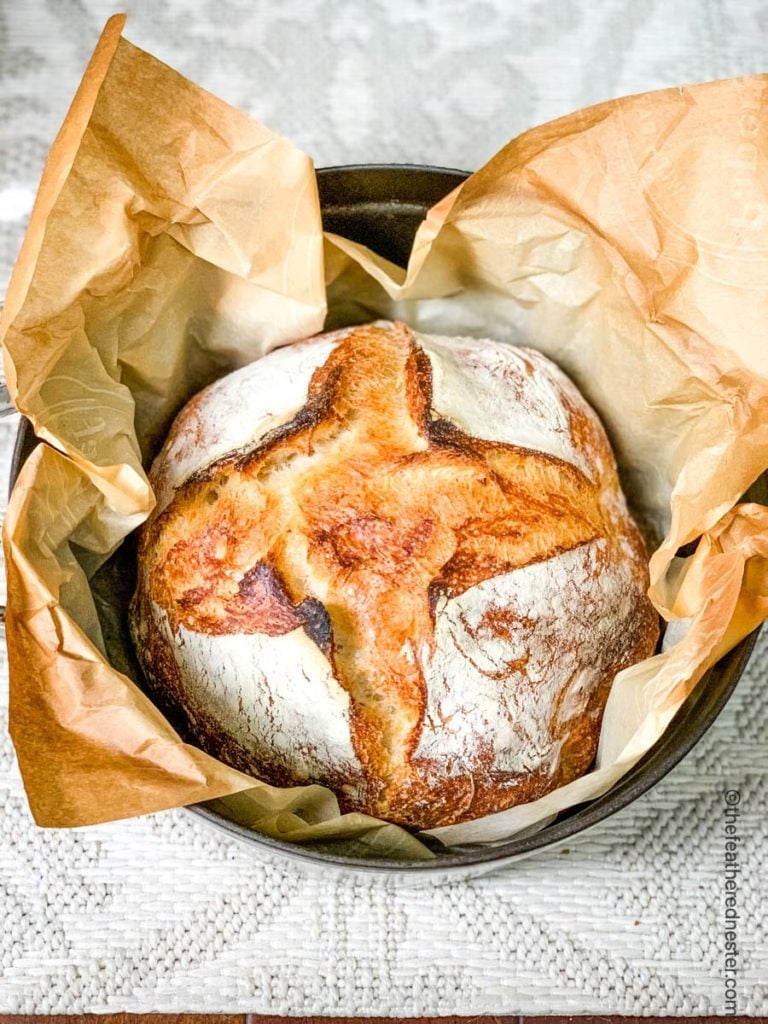
Use oven mitts to carefully remove the bread from inside the pot (on the counter covered with a trivet or stovetop is best) and bake the loaf directly on the oven rack for 10 minutes, until it’s golden brown on the exterior. You can also verify the bread is done by using a thermometer. Place the thermometer into the middle of the loaf and the temperature should read between 195-205°F - Remove from the oven and let the sourdough bread cool for at least 1 hour before slicing and serving.
Troubleshooting and Tips
- Use the same brand of flour for consistent results. I prefer using King Arthur Organic All-Purpose flour, Arrowhead Mills Organic All-Purpose Flour, or Wheat Montana Premium All-Purpose Flour.
- Use a glass bowl to proof the dough. This will let you see the bubbles throughout the dough that let you know the dough is ready.
- Keeping the dough warm (70º to 85º is ideal) during the bulk rise is key for proper fermentation. See the recipe notes for actual rise times and tips below for how to keep your sourdough dough warm.
- If your Dutch oven has a dark bottom, like Lodge or Staub, use an oven-safe trivet or round silpat liner to keep the bottom from darkening. As an alternative you can also put a baking sheet under your dutch oven.
- Keep an eye on your bread the last ten minutes while baking on the rack, different ovens vary and you’ll want to make sure it doesn’t get too crispy on the outside.
- A 6 quart pot can take slightly longer to cook than a 4 quart. Don’t worry if the time is up and your bread still isn’t “done”, seeing how the bread looks and using a thermometer to verify is more important than time.
Sample Sourdough Baking Schedule
8:00 AM Mix dough, rest 30-45 min
8:45 AM Stretch and fold, cover
9:00 AM Bulk fermentation begins
3:00–5:00 PM Shape loaf, second rise 45-60 min
5:00 PM Preheat oven, bake covered 30 min
5:30 PM Remove lid, bake 20 min
5:50 PM Bake on rack 5-10 min
6:00 PM Cool at least 1 hour before slicing
Serving Suggestions
This bread is incredibly versatile! Enjoy its crispy crust and chewy interior with classic butter and jam, elevate your breakfast with avocado toast spread featuring your favorite toppings, or indulge in a hearty soup and bread combo for a comforting meal.
Recipe FAQs
When it’s ready, the dough should be about double in size, with a slightly bubbly tip and active air bubbles underneath. This is where a glass bowl comes in handy. You’ll be able to see more bubbles on the underside of the bowl.
See our Fermentation rising or proofing guide in the recipe below for estimated bulk rising times.
Yes, you can substitute all-purpose flour 1:1 with bread flour.
A 4-5 quart Dutch oven is ideal for this recipe. The smaller size supports the dough during its rise in the oven, creating a taller loaf with better structure. While you can use a 6-quart Dutch oven, your loaf may be wider and shorter. Use a 6 quart if you would like to make an oval loaf.
Yes, you can substitute up to 1/2 of the all purpose flour with whole wheat flour. I don’t recommend using all whole wheat flour as this yields a denser loaf. Also, add 1 Tablespoon of vital wheat gluten to get a higher rise.
If your starter is at least a week old and doubles in size within 4-6 hours of feeding, then it should be ready to bake bread. I don’t recommend using the float test as it’s never worked for me.
You can prevent the bottom crust from burning in sourdough bread by using a silicone baking mat for a dutch oven. If you do not have one you can put a baking sheet below your dutch oven to help buffer the heat.
Bake covered for 30 minutes at 450°F, then uncovered for 20 minutes. Add 5-10 minutes on the oven rack if needed for extra crispness. Internal temperature should reach 195-205°F.
Sourdough Discard Recipes to Try…
- Sourdough Discard Pizza Dough No Yeast
- Sourdough Cinnamon Rolls
- Sourdough Discard Banana Bread
- Grilled Cheese on Sourdough
If you tried this Dutch oven sourdough bread recipe or any other recipe on my website, please leave a 🌟 star rating and let me know how it went in the 📝 comments below. Thanks for visiting!
Dutch Oven Sourdough Bread
Equipment
- dough whisk - optional
- Dutch oven - 4 to 5 quart, with lid
- 9 inch round silicone baking sheet - optional, for Dutch ovens with a dark interior (see notes below)
- lamé - optional, for scoring the top of the boule
Ingredients
- ¼ cup sourdough starter (65 grams) fed 12-24 hours prior *see notes below
- 1 ⅔ cups filtered water (350 grams) about 100º F or baby bottle warm
- 4 ¼ cups all-purpose flour (500 grams) can substitute with bread flour
- 2 teaspoons fine salt (9 grams)
Instructions
- In a large bowl, add the sourdough starter. Add in water and use a dough whisk or a wooden spoon to stir until dissolved. Stir in the flour and salt until a shaggy looking dough forms. Finish mixing dough by hand in the bowl until all the flour has been absorbed. Cover the bowl with a clean, damp kitchen towel and let the dough rest for 30-45 minutes.
- Lightly flour your countertop. Pull the dough from the bowl with a dough scraper or by hand onto the countertop. Stretch and fold the dough for 15 seconds (see video below): grab the edge of the dough and bring it straight up it about 4 inches and tuck it into the center of the dough. Then, turn the dough 1/4 a turn. Continue this process until the dough has come full circle and it has tightened.Return the dough to the bowl, cover with a damp towel (or plastic wrap if you live in a dry area) and and let rise at room temperature or a warm area 4-12 hours (see chart in notes) to ferment. Do not refrigerate the dough. The dough should be about double in size and look puffy on the surface and bubbly under the dough when fermented.
- Lightly flour your countertop. Pull the dough from the bowl and shape the dough by stretching and folding it again. Let the dough rest 10 – 15 minutes. Line a medium sized bowl with a towel, or use a banneton bowl with linen cover (see photos), and dust heavily with flour. Let dough rise in it for 45-60 minutes.
- Preheat your oven to 450ºF. Do not add your Dutch oven or baking pot to the oven, it does not get preheated.Cover the dough bowl with a long piece of parchment paper, about 20 inches long, and turn it over onto the countertop (see video). Slash the top of the loaf with a lame or sharp serrated knife. Gently lower the parchment paper dough into a heavy pot with a tight-fitting lid. NOTE: If using a Dutch Oven with a dark interior, see recipe notes below.
- Place the covered pot in the the oven and bake the bread at 450ºF covered for 30 minutes. Remove the lid and bake 20 minutes. Using oven mitts, carefully remove the bread from the pot. Bake it directly on the oven rack for 5-10 minutes to crisp the exterior (if needed). To ensure your bread is cooked through you can check the internal temperature. It should be 195ºF to 205ºF.
- Let cool for at least 1 hour before serving.
Video

Notes
- 80ºF about 4-5 hours
- 75ºF about 6-7 hours
- 70ºF about 8-9 hours
- For temperatures under 70ºF it can take up to 12 hours or more
- Place the bowl in the oven with the door closed and light on to create a slightly warmer climate without actually turning the oven on.
- Use a heated mat (like those used for germinating seeds) for rising.
- Use the “proof” setting of your oven (I set mine to 85ºF) and set a timer. This will speed up the rising process, so check it at 4 and 6 hours.
- If there is a sunny room in the house that stays warm, keep the dough covered in that area.
- I use a 9″ round Silpat silicone sheet in my dark-bottomed cast iron pots. Place it in the bottom of your pot before adding the dough.
- Or add a layer of foil and an extra layer of parchment paper in the bottom of your cast iron pot.
- Check to see if the top of the loaf is golden and if it sounds hollow when tapped on.
- Check the internal temperature in the center of the bread. It should 195º – 200ºF when done.
- Let the bread cool completely. Store it in a plastic bag at room temperature. I use a plastic bread bag with a twist tie to seal it and it stays fresh for about 5 days.
- This bread is great to freeze. Place in an airtight bag and store in the freezer for up to 3 months.
- Check out our in-depth guide on how to store fresh sourdough bread for more storage tips.
Nutrition

Redonna B. says
Thank you for sharing this recipe. I’m new to sour dough. A friend gave me some starter. I’ve made 2 loafs so far. Had to learn how not to overcook the bottom. I added pan of water to oven, lined bottom of dutch oven with foil and put my baking stone in the rack below the dutch oven. Might have been overkill, but it worked. Makes great sandwiches.
Justin says
Just made my starter and 1st loaf this week. Brand new to making bread and wow what a delicious loaf of bread. I will be making this every week.
Ashley says
Found this recipe on a whim, to send to my mother in law. Then I tried and it has been my favorite sourdough recipe. I’m here in Northern California and it been cold. I actually use a heat mat on my counter for my bulk rise. Really helps to have that consistent temp and keep me on schedule for busy day to day. I’ve been on my making sourdough for 3 months. Failed greatly before using heat mat. Almost gave up, glad I didn’t. I’ve got a solid starter going which has been fun making other foot items for my family. Thank you for the great recipe.
Renae says
This is such a great tip! Thanks for sharing it. I’ve been using a heating wrap around my starter jar and it really helps during the cold months.
Jolene says
Followed the recipe exactly, the bread wasn’t cooked through. Still doughy. I’m curious to why the recipe states not to preheat the oven with the Dutch oven inside?
Erin says
This was such an approachable sourdough bread recipe! I have a 3-year-old starter that I’ve used to make foccacia and flatbreads, but tackling a “real” loaf of bread seemed intimidating. I came across this recipe and gave it a shot. I did about half whole wheat flour and added a bit more starter to prevent the whole wheat flour from drying out the dough. I also added a tablespoon of honey. The bread came out incredible! I had always preheated my dutch oven for breads, but I followed the instructions here and did not preheat it. Bread came out perfect and crusty. I took some of the bread to work to share, and a couple of coworkers begged me to make a loaf for them. I have a loaf rising right now, now I just need to make more for myself!