
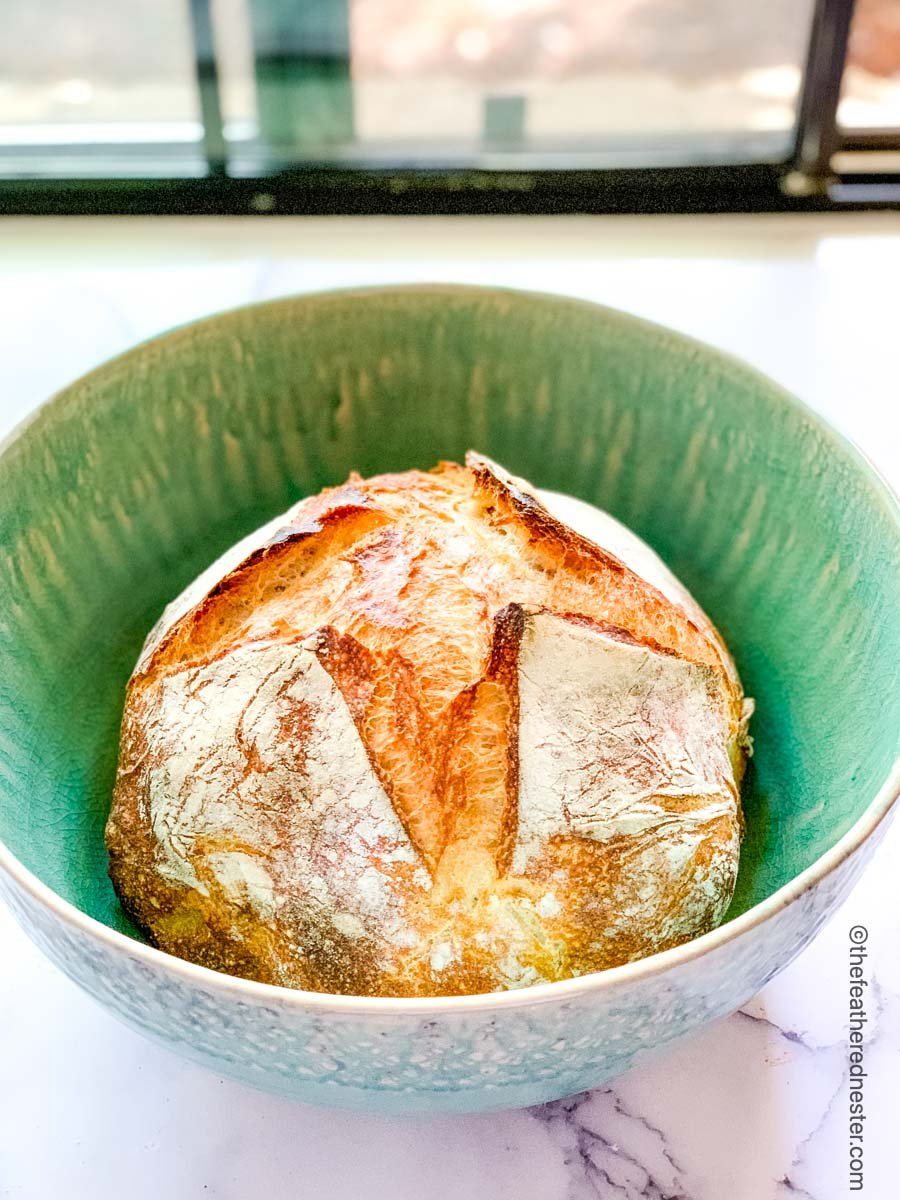
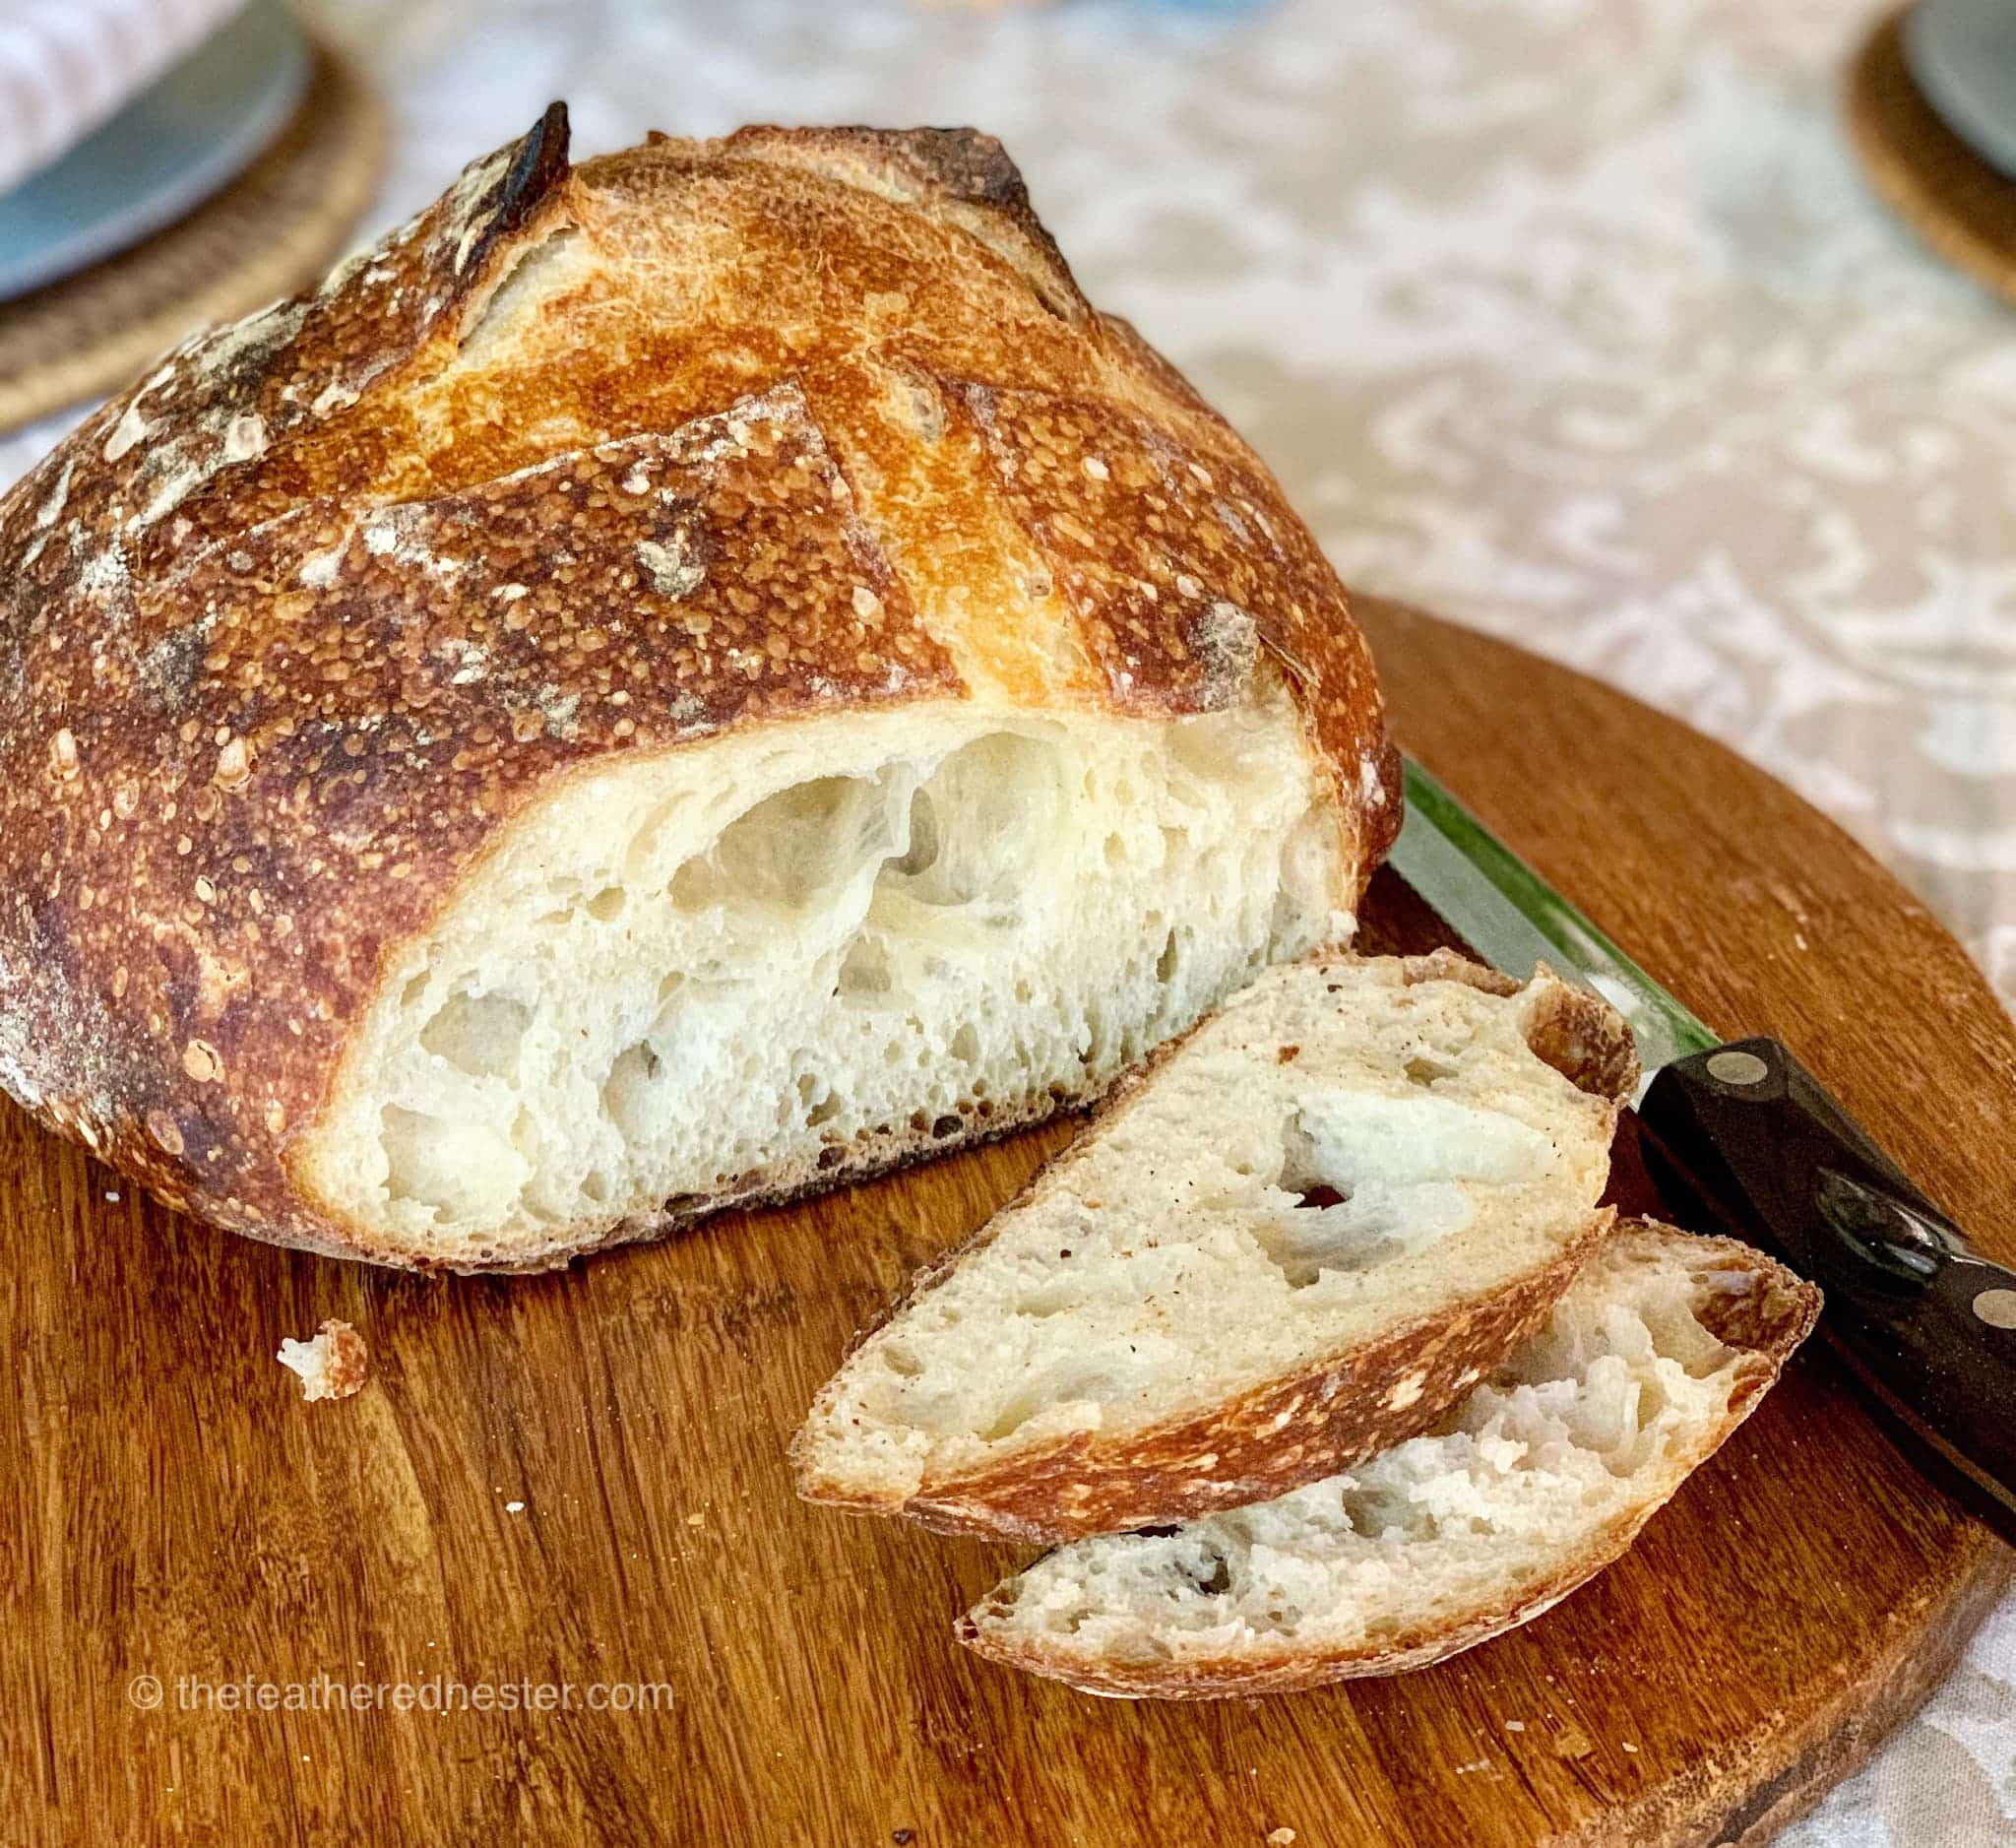
Imagine the smell of freshly baked sourdough bread…soft inside with a flavorful golden crust. Even if you’re a sourdough beginner or a seasoned baker, this no-knead overnight sourdough bread recipe will quickly become a staple in your kitchen.
Unlike traditional recipes, this one skips the kneading in favor of simple stretches, making it stress-free for bakers of all levels. Plus, our detailed step-by-step instructions ensure success every time, even if it’s your first sourdough bake.
Content Covered Here
Bread Recipe Video Tutorial
Why This Overnight Sourdough Bread Recipe Works
- No kneading necessary!
Unlike many other recipes, this no-knead sourdough bread recipe does not involve kneading. Instead, it uses an easy folding technique that stretches the gluten. The whole stretching process only takes several seconds. - The dough rises overnight and is ready to bake the following day.
Sourdough is made with naturally fermented wild yeast and requires a longer rise time than dough made with commercial yeast. Prep everything in the evening or early afternoon and let it do all the work while you sleep.
An 8-10 hour rise is typical for this overnight fermented or “bulk” rise. - It’s an ideal way to use up your starter discard.
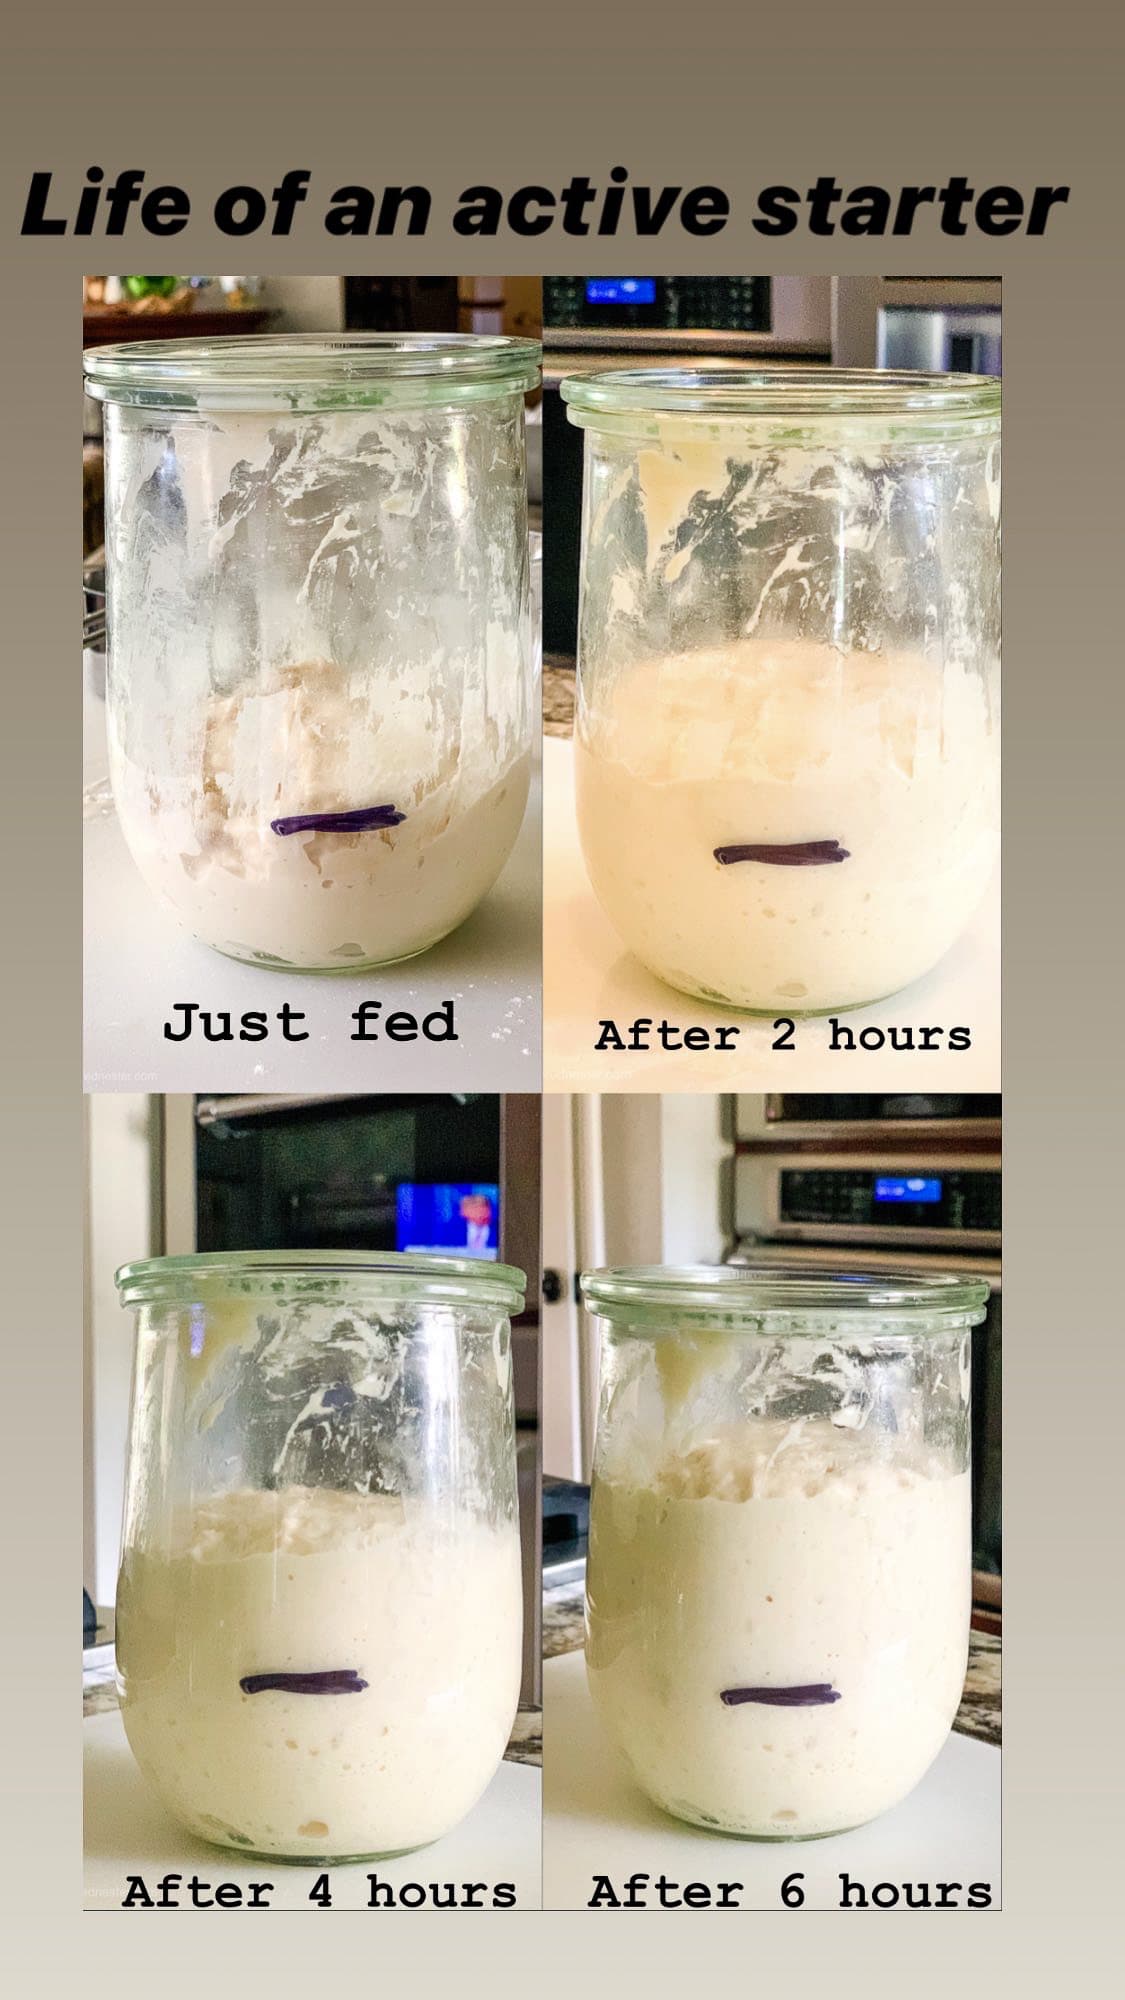
Our recipe uses a discard so it’s perfect to make when it’s time to feed your starter. Unlike other recipes that use active starters at their peak, our sourdough bread recipe uses one that was fed 12-24 hours prior. Your starter needs to be active (meaning it is an established starter that will reliably double in size 4-6 hours after feeding) but we don’t want it at it’s peak.
Ingredient Notes and Substitutions
🎯 TFN Pro Tip
Not sure if your starter is ready to be used for bread? Try the float test. You’ll place a spoonful of active starter into a glass of water. If it floats, there is enough carbon dioxide trapped within the dough to make it the bubbly dough we all know and love! If it sinks, you’ll likely need to give your starter at least another feeding before trying again.
- Active sourdough starter or discard, fed 12-24 hours before starting the recipe. This is the part that can get confusing for beginners. When we say discard, the starter itself that you are “discarding” from still needs to be an active starter, just not recently fed. An active starter is a mature starter that always doubles in size within 4-6 hours of feeding.
- Filtered water: or bottled water. Most tap water contains chlorine which can inhibit fermentation. If you must use tap water, leave the measuring cup out for at least 24 hours to let the chlorine dissipate.
- Bread flour: or substitute with all-purpose flour. I recommend using organic, unbleached flour.
- Fine salt: use fine table salt or fine sea salt. If you use Kosher salt, use about 25% more as Kosher salt is less “salty.”
Need a starter? Our sourdough starter recipe is literally fail-proof thanks to our pro tips. And it has step-by-step instructions, making it the perfect beginner sourdough recipe.
What is No Knead Sourdough Bread?
Our recipe uses stretching and folding to substitute for kneading the dough. Stretching and folding strengthens the gluten network and gives the bread more structure and elasticity. This effectively gives you the same result as a kneaded dough without all the hard work, which makes this sourdough recipe perfect for beginners. Unlike traditional sourdough recipes that requires kneading, this overnight method allows gluten to develop naturally. The long, slow rise creates the same texture and flavor with minimal hands-on work.
If you don’t have a sourdough starter, you can make this homemade sandwich bread or wheat sandwich bread that uses commercial yeast instead.
How to Make This Overnight Sourdough Bread
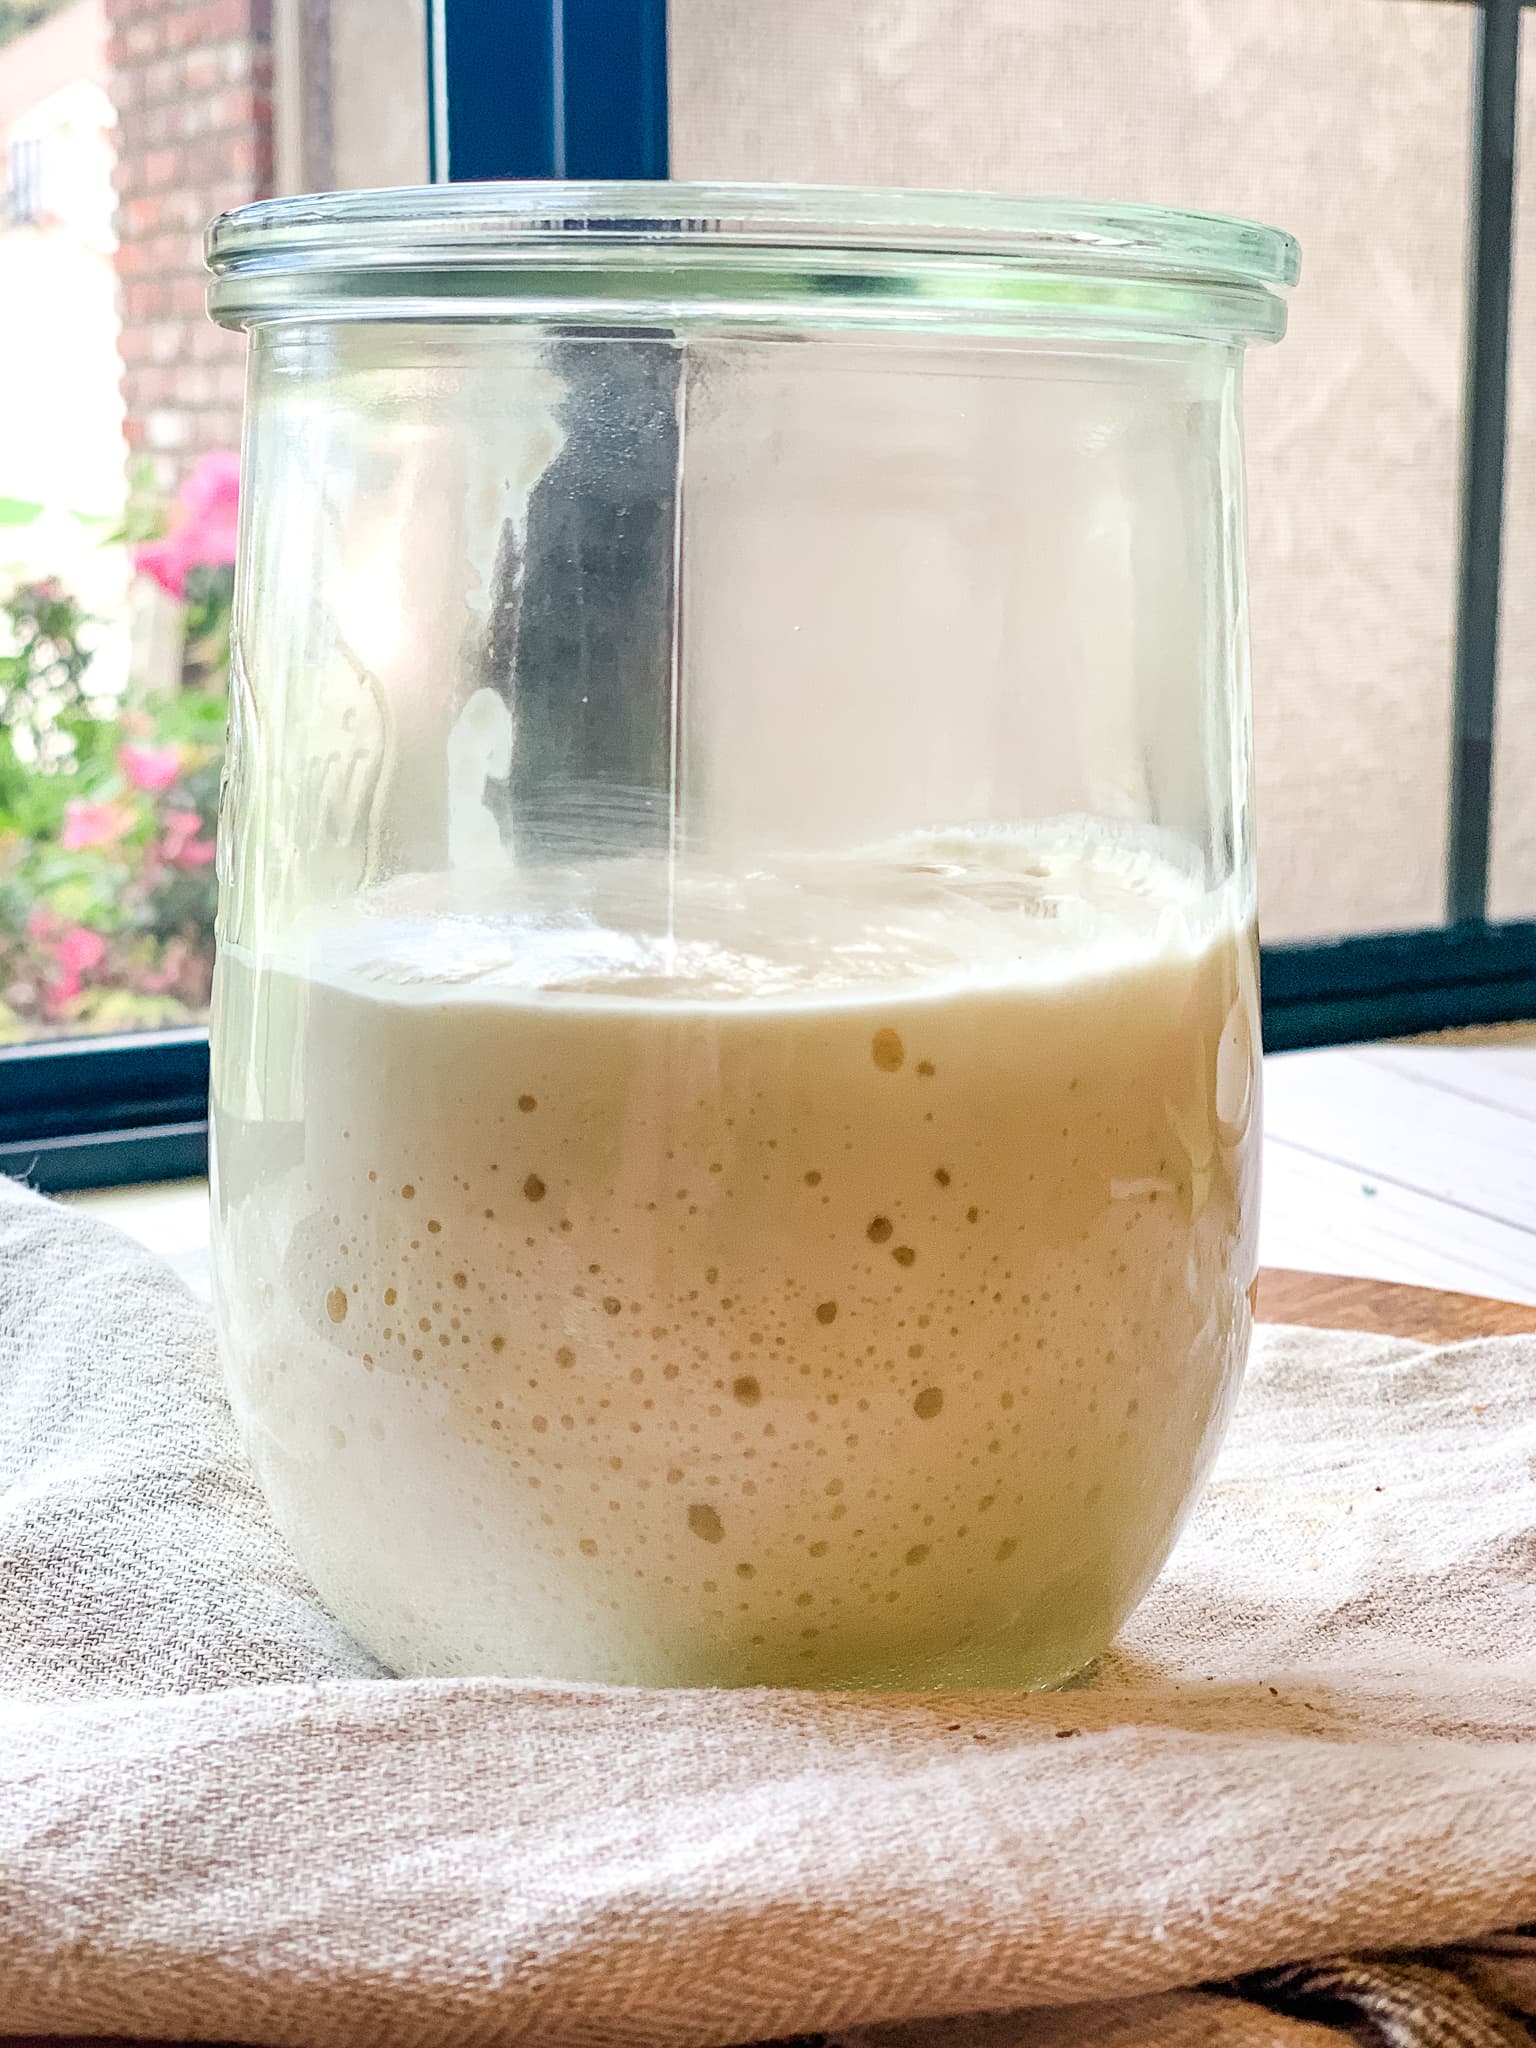
- Feed your starter at least 12-24 hours before starting the recipe.
You want a hungry starter that takes in the flour and water for energy and uses that to raise the dough.
Below is an example of the rise and activity after a feeding:
🎯 TFN Pro Tip
Store your artisan sourdough loaf at room temperature. For more tips, see our post on how to store sourdough bread.
- Mix the dough.
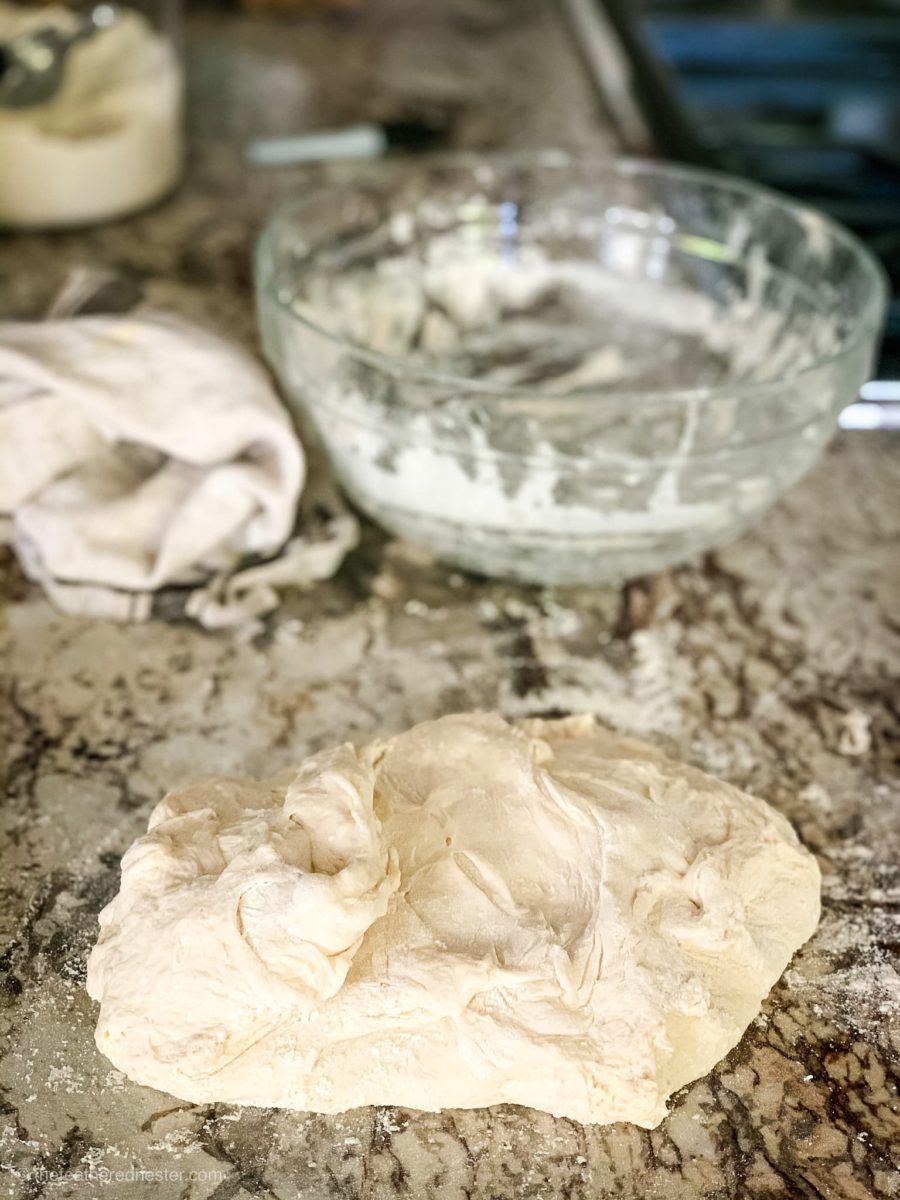
Use a mixing bowl to mix together starter, flour, water, and salt with a wooden spoon or a dough whisk until a thick, shaggy dough forms.
Then, cover the dough bowl with a clean, damp kitchen towel and let it rest for 30 minutes or so.

- Stretch the dough.
As mentioned earlier, we have a no-knead method for making overnight sourdough bread.
Simply pull up a section of the dough, stretch it out, push it into the back center of the dough, then turn the dough 1/4 a turn and repeat (see our video below in the recipe card).
Continue to pull, stretch, push, and rotate clockwise until you’ve gone in a circle.
Do you love to serve sourdough for breakfast? Here are some sourdough bread breakfast ideas for you: try our sourdough grilled cheese sandwich or lemon blueberry sourdough scones.
- Let the dough rise overnight for a bulk ferment.
For the overnight rise, keep the dough in a warm area free of drafts. Do not place the dough in the fridge. Our recipe uses a room-temperature rise.
Depending on the ambient temperature, this takes 8-10 hours, and sometimes even longer. Ideally, the dough should be in a room about 75° Fahrenheit. Estimated rising times- 75°F: 8-10 hours, 70°F: 10-12 hours , 65°F: 12-14+ hours (personally, a 65°F room has taken me as long as 16 hours of rising before it was done rising).
Tips for keeping dough warm during colder months:
- Use a heated mat (like those used for germinating seeds) for rising.
- Use the “proof” setting of your oven (I set mine at 85ºF) and set a timer. This will speed up the rising process, so check it at 4 and 6 hours.
- If a sunny room in the house stays warm, keep the dough covered in that area.
- Place the bowl in the oven with the door propped open and the light on to create a slightly warmer climate without actually turning the oven on. Different oven lights produce more heat than others, verify with a thermometer that it is 85 degrees or cooler.
The Next Morning
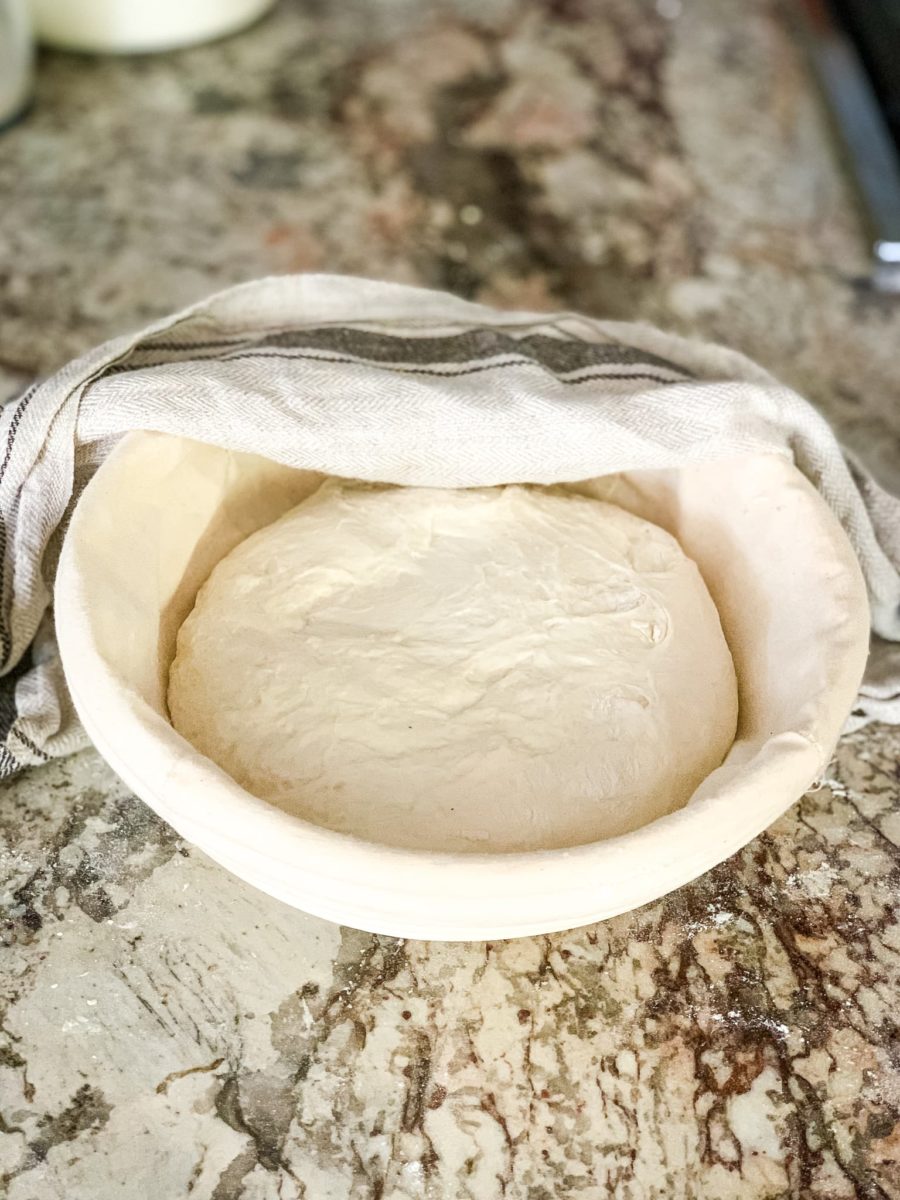
- In the morning, lightly flour your countertop. Remove the dough from the bowl and shape it by stretching and folding it again. Let the dough rest for 10 – 15 minutes.
Line a medium-sized bowl with a towel, use a banneton basket bowl with a linen cover, as shown above, and dust heavily with flour. Or line a large bowl with a clean kitchen towel and dust it heavily with flour.
Let dough rise in it for 45-60 minutes.
How to Bake Sourdough Bread
Preheat your oven to 450ºF.
- Cover the dough bowl with a long piece of parchment paper, and turn it over onto the countertop so that the dough ball sits on top of the parchment paper (see the video below in the recipe card to see how this is done).
Next, score the top of the dough with a sharp knife or lame.
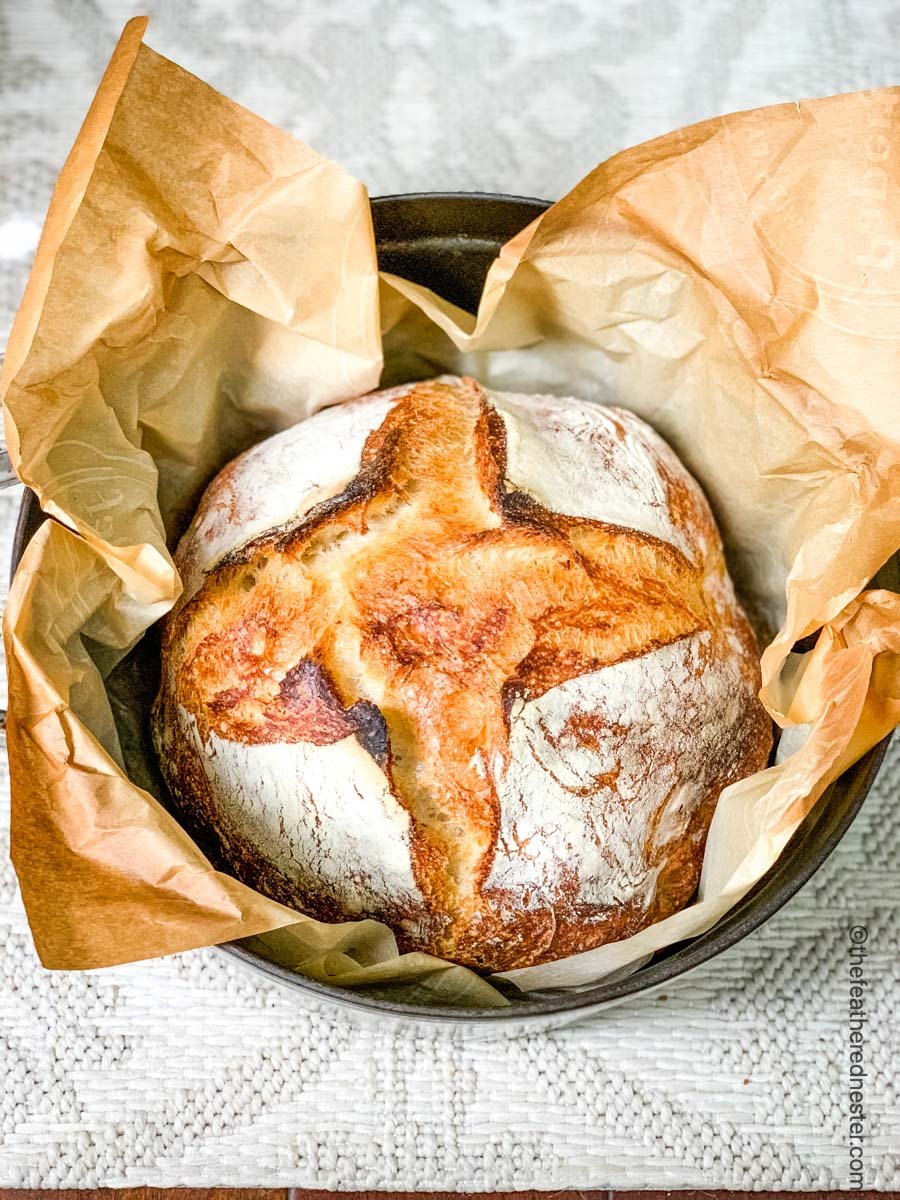
Use the parchment paper to lower your dough into the Dutch oven, as shown below.

🎯 TFN Pro Tip
If you have a black-bottomed Dutch oven, I recommend using a round silicone sheet to keep the bottom of the loaf from browning too much. See below under “Troubleshooting Common Issues” for more information.
- Add the lid to the Dutch oven and bake covered for 30 minutes.
Then, remove the lid and bake uncovered for 20 minutes.
After that, carefully remove it from the pot and bake it directly on the oven rack for 10 minutes, to crisp the exterior.
After baking, let your loaf cool for at least one hour on a wire rack before cutting it. Otherwise, the loaf could deflate.
Troubleshooting Common Issues
My sourdough bread did not double in size overnight.
If your starter is active (it doubles in size 4-6 hours after feeding) and was fed within 12-24 hours of starting the recipe, then your dough might not have been warm enough during the overnight rise. Or it still needs more time.
Find a warm place (ideally 75º- 80º F) like a cool oven with the light on (test this with a thermometer first!), a warm window, or above the refrigerator or dryer, and let it continue to rise while keeping an eye on it. You might not see air bubbles on the top of the bowl, but they should be visible underneath. That’s why I recommend that beginners use a clear glass bowl as shown above.
Keep an eye on your dough towards the end of your rise time, once it has doubled in size, it is ready. Do not let it continue to rise past that time or it can overproof.
What is over proofed dough?
Over proofed dough looks flat and deflated. It’s sticky and has no shape left to it. This is what happens when dough is left past the point where it has already fully risen. Don’t throw away over proofed dough, it is still edible and makes great flat breads, pancakes, and pizzas!
What should I do if my dough is too sticky?
- Before the overnight rise: Sprinkle 1-2 tablespoons of flour on top of the dough and flour or wet your hands before stretching.
- After the overnight rise: The dough has likely not fermented enough. It should have doubled in size and show bubbles on the top and bottom. If not, see the notes above to let it rise for 1-2 more hours.
How can I keep the bottom of my bread from turning so brown?
An easy fix is to add a layer of cornmeal to the bottom of the Dutch oven and place the parchment paper on top of that. Or, use a 9″ round Silpat silicone sheet, as I do. I place it in the bottom of my Staub cast-iron Dutch oven. I have also had success with putting a baking sheet under my dutch oven.
Dutch ovens that are darker in color tend to brown the bottom of the loaf more.
Get more tips in our troubleshooting sourdough starter article.
Serving Suggestions
Sourdough bread is incredibly versatile. Enjoy its tangy flavor with hearty soups and stews, like toscana zuppa soup recipe where it soaks up rich broths perfectly. For a lighter option, create open-faced sandwiches with avocado spread for toast, or turkey bacon. Slice it up and serve it with soft pretzel cheese dip or crab dip. Don’t forget classic pairings like butter and jam for a simple yet satisfying treat. Get creative and explore the endless possibilities of this delicious bread.
Recipe FAQs
Yes, a heavy oven-safe pot with a lid will work. Use one that is about 9″ to 10″ in diameter and 6″ high. Just be sure your pot and lid are rated for oven use of at least 450ºF.
This recipe will work daytime or night. However. most people enjoy the ease of having the dough rise overnight.
If you’re unsure if the bread is fully baked, the internal temperature should be around 195º – 200ºF.
Yes! Using a series of stretch and folds produces the same gluten development and elasticity as kneading the dough without the extra work!
If your starter is at least a week old and doubles in size within 4-6 hours after a feeding, then it should be ready to bake a loaf of sourdough.
Yes, you can replace up to 1/2 of the all purpose flour with whole wheat flour for this recipe.
Depending on the ambient temperature, this takes 8-10 hours, and sometimes even longer. Ideally, the dough should be in a room about 75° Fahrenheit. Estimated rising times- 75°F: 8-10 hours, 70°F: 10-12 hours , 65°F: 12-14+ hours (personally, this temperature has taken me as long as 16 hours of rising before it was done rising)>
Other Sourdough Recipes to Consider…
If you tried this overnight sourdough bread recipe or any other recipe on my website, please leave a 🌟 star rating and let me know how it went in the 📝 comments below. Thanks for visiting!
Easy Overnight Sourdough Bread
Equipment
- dough whisk - optional
- Dutch oven - 4 to 5 quart, with lid, or a heavy pot with tight fitting lid, rated to 450ºF
- warming mat - (I recommend this if your room is cooler than 75ºF)
- banneton proofing bowl - optional
- lamé - optional, for scoring bread
- 9 inch round silicone baking sheet - optional, if your Dutch oven has a dark interior (see notes below)
Ingredients
- ¼ cup sourdough starter (65 grams) fed 12-24 hours prior *see notes below
- 1 ⅔ cups filtered or spring water (350 grams) about 100ºF or baby bottle warm
- 4 ¼ cups bread flour (500 grams) can substitute with all purpose flour
- 2 teaspoons fine salt (9 grams)
Instructions
- In a large bowl, add the sourdough starter. Add in water and use a dough whisk or a wooden spoon to stir until dissolved. Stir in the flour and salt until a shaggy looking dough forms. Finish mixing dough by hand in the bowl until all the flour has been absorbed. Cover the bowl with a clean, damp kitchen towel and let the dough rest for 30-45 minutes.
- Lightly flour your countertop. Pull the dough from the bowl with a dough scraper or by hand onto the countertop. Stretch and fold the dough for 15 seconds (see video below): grab the edge of the dough and bring it straight up it about 4 inches and tuck it into the center of the dough. Then, turn the dough 1/4 a turn. Continue this process until the dough has come full circle and it has tightened. Return the dough to the bowl, cover with a damp towel (or plastic wrap if you live in a dry area) and and let rise at room temperature or a warm area 4-12 hours (see chart in notes) to ferment.. Do not refrigerate the dough. The dough should double in size and look bubbly on the surface and under the dough when fermented.
- In the morning, lightly flour your counter-top. Pull the dough from the bowl and shape the dough by stretching and folding it again. Let the dough rest 10 – 15 minutes. Line a medium sized bowl with a towel, or use a banneton bowl with linen cover (see photos), and dust heavily with flour. Let dough rise in it for 45-60 minutes.
- Preheat your oven to 450ºF. Do not add your Dutch oven or baking pot to the oven, it does not get preheated. Cover the dough bowl with a long piece of parchment paper, about 20 inches long, and turn it over onto the countertop (see video). Slash the top of the loaf with a lame or sharp serrated knife. Gently lower the parchment paper dough into a heavy pot with a tight-fitting lid. NOTE: If using a pot with a dark interior cast iron pot, I recommend insulating the bottom with a round silicone sheet underneath the parchment paper. You can also place the Dutch Oven pot on a baking sheet. This helps the bottom crust of the bread from getting too dark in color.
- Place the covered pot in the the oven and bake the bread covered for 30 minutes. Remove the lid and bake 20 minutes. Using oven mitts, carefully remove the bread from the pot. Bake it directly on the oven rack for 5-10 minutes to crisp the exterior (if needed). To ensure your bread is cooked through you can check the internal temperature. It should be 195ºF to 205ºF.
Video

Notes
- 80ºF about 4-5 hours
- 75ºF about 6-7 hours
- 70ºF about 8-9 hours
- For temperatures under 70ºF, it can take up to 12 hours or more
- Place the bowl in the oven with the door propped open and the light on to create a slightly warmer climate without actually turning the oven on.
- Use a heated mat (like those used for germinating seeds) for rising.
- Use the “proof” setting of your oven (I set mine at 85ºF) and set a timer. This will speed up the rising process, so check it at 4 and 6 hours.
- If there is a sunny room in the house that stays warm, keep the dough covered in that area.
- I use a 9″ round Silpat silicone sheet in my dark-bottomed cast iron pots. Place it in the bottom of your pot before adding the dough.
- Or add a layer of foil and an extra layer of parchment paper in the bottom of your cast iron pot.
- If your starter is active (it doubles in size 4-6 hours after feeding) and was fed within 12-24 hours of starting the recipe, your sourdough might not be warm enough during the overnight rise.
- Find a warm place (ideally 75º- 80º F) like a cool oven with the light on, a warm window, or above the refrigerator or dryer to set the bread for 2 hours. Then continue with the recipe.
- Check to see if the top of the loaf is golden and if it sounds hollow when tapped on.
- Check the internal temperature in the center of the bread. It should 195º – 200ºF when done.
- Let the bread cool completely. Store it in a plastic bag at room temperature. I use a plastic bread bag with a twist tie to seal it and it stays fresh for about 5 days.
- This sandwich bread is also great to freeze. Place in an airtight bag and store in the freezer for up to 3 months. Thaw the loaf at room temperature, then slice and enjoy.
- Check out our in-depth guide on how to store fresh sourdough bread for more storage tips.

Jacoby Johnson says
I was delighted to come across your sourdough recipe. Sourdough baking has become a popular culinary adventure, and your recipe offers a fantastic guide for those looking to embark on their own sourdough journey.
Your detailed instructions, accompanied by helpful tips and insights, make it easy for both novice and experienced bakers to follow along. The step-by-step process you outlined, from creating and maintaining the sourdough starter to the final baking stages, ensures a thorough understanding of each stage of the bread-making process.
I appreciate the emphasis on using simple and wholesome ingredients, such as flour, water, and salt. The inclusion of precise measurements and recommended types of flour provides a solid foundation for achieving consistent and delicious results.
Furthermore, your advice on techniques such as autolyse, folding, and shaping the dough adds a professional touch to the recipe. These techniques contribute to the development of a well-structured and flavorful loaf of sourdough bread.
I also found your troubleshooting tips and explanations of common challenges encountered in sourdough baking to be extremely valuable. Addressing issues such as overproofing, dense crumb, or lack of oven spring gives bakers the confidence to troubleshoot and improve their techniques.
The inclusion of variations and suggestions for customizing the sourdough recipe with add-ins like herbs, cheese, or seeds is a wonderful way to experiment and add personal flair to the bread.
Thank you for sharing your sourdough recipe and expertise. Your detailed instructions, helpful tips, and troubleshooting advice make it a valuable resource for anyone venturing into the world of sourdough baking. I look forward to trying out your recipe and enjoying the aroma and flavor of freshly baked sourdough bread in my own kitchen.
Kathleen says
Cannot say enough good things about this recipe. Very easy to understand. Simple, easy to follow. Excellent taste and texture.
Tyler says
I used 3 cups of flour and the dough was feeling too dry. I put it in my stand mixer with the bread hook and a bit more water til it looked better. It raised well overnight filling most of the glass bowl. The recipe I used before had the bake starting at 500, but I followed the instructions and 30 min at 450 then 20 min uncovered worked fine. I didn’t put it on the rack for 10 because it had good enough browning for what I like. Will definitely use this recipe again.
Ellen says
Best and easiest sourdough recipe I’ve tried yet. How is it with using some whole wheat flour?
Gianne @ The Feathered Nester says
We have a recipe for whole wheat – https://thefeatherednester.com/whole-wheat-sourdough-sandwich-bread/
Sarah says
Very dense. But still tasty
Dave Weilder says
Dear The Feathered Nester,
I wanted to reach out and express my appreciation for your wonderful sourdough recipe. As a home baker and a fan of sourdough bread, I found your recipe to be informative, detailed, and inspiring.
Your article provides a comprehensive guide to making sourdough bread from scratch, and I particularly enjoyed the following aspects:
Step-by-Step Instructions: Your step-by-step instructions are clear, concise, and easy to follow. I appreciate that you’ve included both the measurements and the visual cues to help readers understand the consistency of the dough at each stage. This attention to detail makes it much more approachable for those who may be new to sourdough baking.
Starter Creation and Maintenance: The detailed instructions on creating and maintaining a sourdough starter are fantastic. You explain the process thoroughly and offer helpful tips and troubleshooting advice along the way. This is particularly valuable for beginners who may be unsure about the fermentation process and the care required for a healthy starter.
Flavor Variations and Add-Ins: I love that you’ve included suggestions for flavor variations and add-ins, such as herbs, spices, or even dried fruits and nuts. This allows bakers to experiment and customize their sourdough bread to their taste preferences, adding a creative twist to the traditional recipe.
Baking Tips and Techniques: Your article provides valuable tips and techniques for achieving the perfect crust and crumb in sourdough bread. From scoring techniques to oven temperature recommendations, you’ve shared insights that can make a significant difference in the final outcome of the loaf.
To enhance the article further, you might consider including some troubleshooting tips for common issues that bakers may encounter during the sourdough bread-making process. This could help readers overcome challenges and achieve better results with their loaves.
Thank you for sharing your sourdough recipe and your knowledge of the baking process. Your article has inspired me to embark on my sourdough journey and explore the wonderful world of homemade bread. I look forward to trying your recipe and following your blog for more baking adventures and tips.